Microsoft Office Word offers a Review Feature that allows one to Track Changes in a document. This guide shares how to use the Review Feature or Track Changes feature in Microsoft Word.
Review Feature or Track Changes feature in Word
I have broken down the Review Feature feature into multiple sections and explained how each of them is useful:
- Enable Track Changes
- Reviewing and Commenting
- View Changes
- Accepting and Rejecting Changes
- Finalizing the document
- Merging Comments and Changes into One Document
- Compare two documents without Tracking
Merging and comparing documents are optional features, and you need to use it in different scenarios.
1] Enable Track Changes
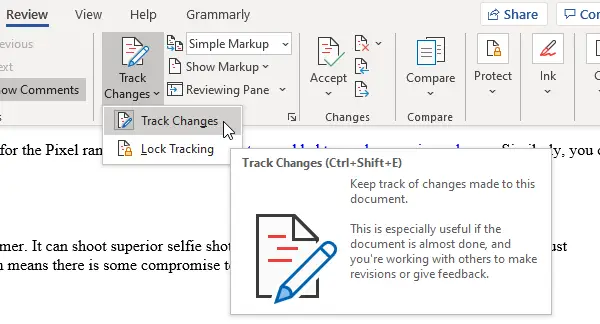
Before sending a document that will go through a review, enable the Track Changes feature. Once turned on, any reviewers’ changes will be recorded with their names. Those changes can be approved or rejected by another person.
The feature also offers a way to lock Track Changes so nobody can disable it. Let’s learn both of them.
- Make sure the document is ready for review.
- Open the document and go to the Review section.
- Click on Track Changes, then click the Track Changes menu again.
- Once enabled, you should notice that the button has a grey background.
- Next, click on Lock Tracking, enter a password, confirm, and click ok.
- After this, Track Changes will be enabled for you or anyone else unless you disable it again using the same password.
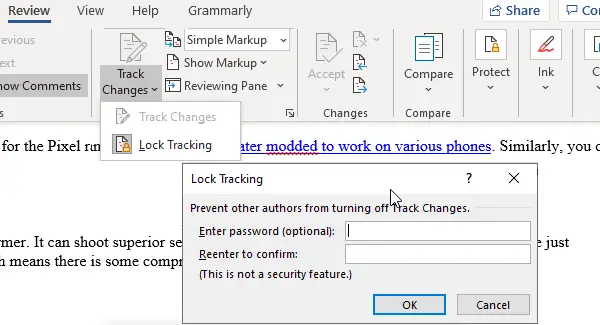
Note: If you lose or forget your password, Microsoft won’t be able to recover it for you. Make sure to note it somewhere regarding the document.
2] Reviewing and Commenting
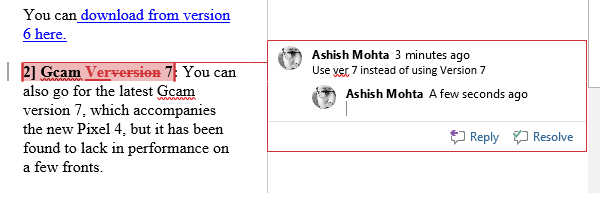
After this, whatever changes are made to the document will be recorded no matter where the document is shared and edited. Here is how the changes will be recorded:
- Deletions are marked with a strikethrough
- Additions are shown with an underline
- Every author gets its color for the changes
- Select a paragraph or set of words, and click on the comment button to add your comments
A red horizontal line will appear next to the line or paragraph, making it easier to identify. Click on it, and all changes and comments will be visible. In addition, you can customize colors by clicking on the arrow in the right-bottom corner of the Tracking section.
Note: Even if you turn off tracking, the colored underlines and strikethrough will be visible in the document.
3] View Changes
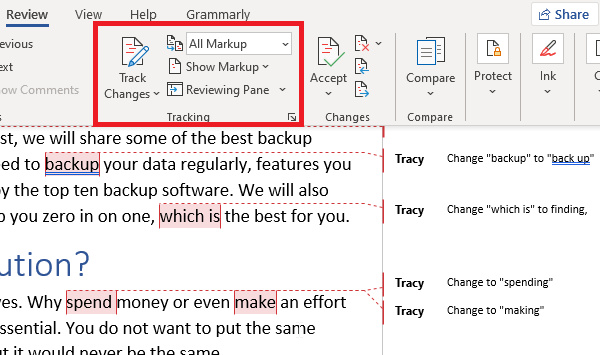
Assuming a document has come back to you after review, you need to find all the changes and comments. Go to Review > Tracking > Display for Review.
- Go to Review > tracking > change from Simple Markup to All Markup
- If you choose No Markup, then the document will display as the final version only
- If you select Original, you can view the original document without any changes
4] Accepting and Rejecting Changes
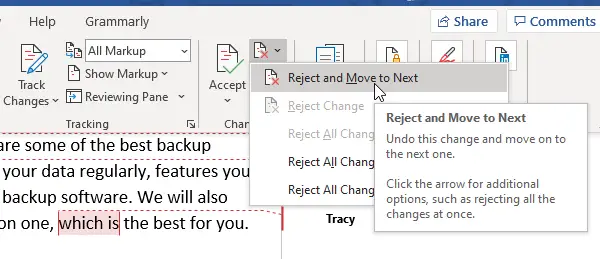
If you are ok with a difference, click on Accept and move next, but if you do not like it, click on Reject and jump to next. It will undo the change to the previous revision. You should see that the difference is marked with an underline. You also have options to
- Accept All Changes in the Document.
- Reject All Changes in Document.
You also have the comments section, which can help you navigate all the comments. You can reply to comments, mark them as resolved when you have made a change, or delete them.
5] Finalizing the document
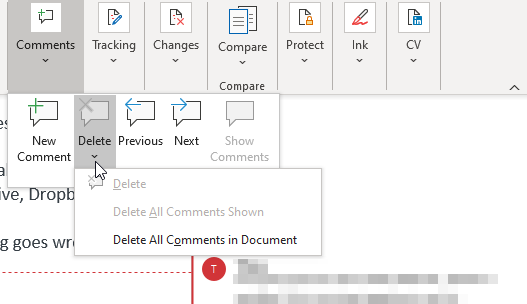
When you know everything is complete, follow these steps to remove any visible markups and comments.
- Delete all the comments by clicking Comments > Delete > Delete all comments.
- Click on Accept All changes and stop tracking
- You might be asked to enter the password if the tracking is locked.
Once you have done this, the Review feature in an Office Word document is complete. However, we have added two more features to the guide. They can be handy in different scenarios.
6] Merge comments & changes from different documents into one Document
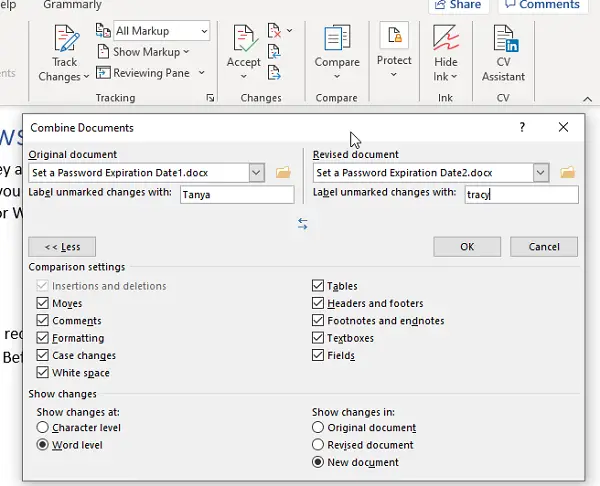
If you have given a document to be reviewed by multiple users, you can combine them into one final document for review.
- Open a blank Microsoft document, and go to Review > Compare > Combine
- Select two documents, original on the left side and edited on the right.
- Click OK and repeat this for all documents until it is over.
Author changes will be visible in different colors. To filter by author, click Show Markup > Specific people and remove unnecessary authors.
When doing so, use the Protect feature to lock authors and set editing restrictions. It is useful when a document is available in a shared location.
7] Compare two documents without Tracking
Lastly, if no tracking was enabled and changes were made, you can use the Compare tool to find the differences.
- Open a blank document, go to Review, click on the Compare button, and then click on Compare again.
- It will show a similar dialogue box where you can select the original document, revised document, author name, and more.
- You can also compare comments, headers, footers, tables, etc.
That concludes our guide on using the review features to track, comment on, and compare documents in Microsoft Word. It’s a powerful tool for companies where documents are reviewed at different levels.
I hope the guide was easy to understand and follow.
What is display for review in MS Word?
When you enable Display for Review, it shows a simple and detailed markup for all the edits. In short, you see all the changes. You can choose Simple or All markup.
Read: Microsoft Word tutorial for beginners – Guide on how to use it.
How do you use Copilot to review a document?
Once enabled for your account, Copilot can summarize the word document. This can be super helpful if you want to get a quick look without putting your head on. Once done, you can enable the review check.
Leave a Reply