In this post, we will talk about how to validate XML against XSD in Notepad++. An XML (eXtensible Markup Language) file is a markup file that consists of a set of rules for encoding documents in both human-readable and machine-readable formats. It is used to store and transport the data. While XSD stands for XML Schema Definition given by World Wide Web Consortium (W3C). It is primarily used for defining the structure and content of an XML file.
XSD contains a set of validation rules to validate the correctness of an XML file. It defines the syntax and how elements and attributes must be used in an XML file. An XML document is well-formed if it is validated against XSD. Programmers use XML Schema to verify and assure that items and elements in a document are correctly used and are error-free. When you perform XSD validation on an XML file, it highlights and displays the errors in the document that you need to fix. You can easily eliminate all the errors in the document using the highlighted errors and comments.
You can easily validate your XML document against XSD using the Notepad++ application. Notepad++ is a popular text and source code editor for various programming languages and can also be used as a LaTeX editor. You can use its Plugins functionality to validate an XML document using an XSD file. Here, we are going to show you the exact step-by-step procedure to perform XML validation against XML Schema. Let’s get straight to the tutorial now!
See: How to set Notepad++ as default editor for .xml files.
How to validate XML against XSD in Notepad++
Here are the main steps to validate XML documents using XSD files in Notepad++:
- Download and install the Notepad++ application.
- Launch Notepad++ application.
- Open Plugins Admin.
- Select and Install XML Tools in Notepad++.
- Import the XML document that you want to validate.
- Click on the Plugins > XML Tools > Validate Now option.
- Browse and select an XSD file to validate the XML file against it.
Now, let us discuss the above steps in elaboration!
Firstly, if you don’t already have it, you need to download Notepad++ and then install it on your Windows 11/10 PC. If you don’t want to install it, you can use its portable edition as it comes in both installer and portable packages. So, use the version you prefer.
After installation, simply launch the Notepad++ application. Now, go to its Plugins menu and click on the Plugins Admin option.
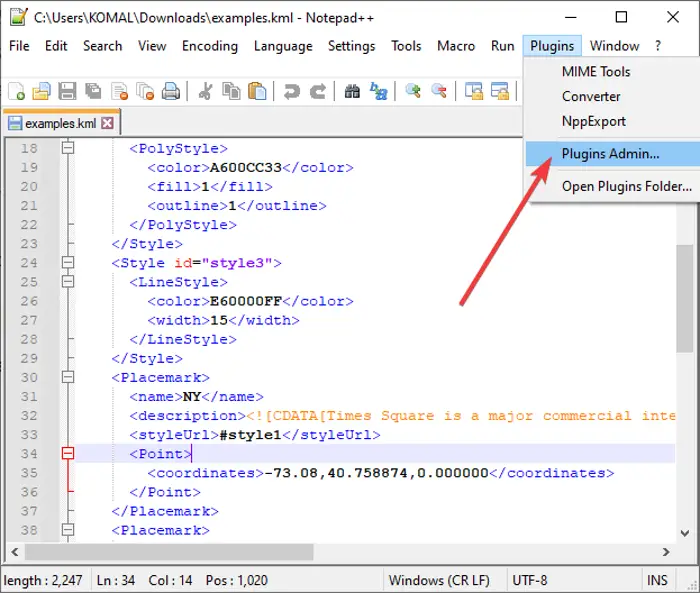
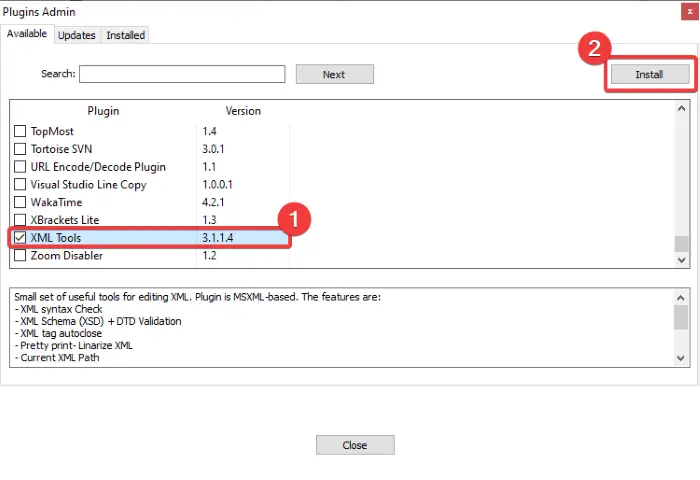
In the Plugins Admin window, you will see a list of available plugins that you can enable or disable whenever you want. Also, it shows the plugins that you have installed and for which updates are available. From this list of plugins in the Available tab, scroll down to the XML Tools; it will be present at the end of the list.
Select the XML Tools plugin and you will be able to view the plugin description and uses. Enable the XML Tools checkbox and then press the Install button.
Notepad++ will have to exit and restart to install the plugin. Confirm the same on the next prompt by clicking the OK button. The installation takes few seconds only. After the XML Tools plugin’s installation, Notepad++ will be restarted quickly.
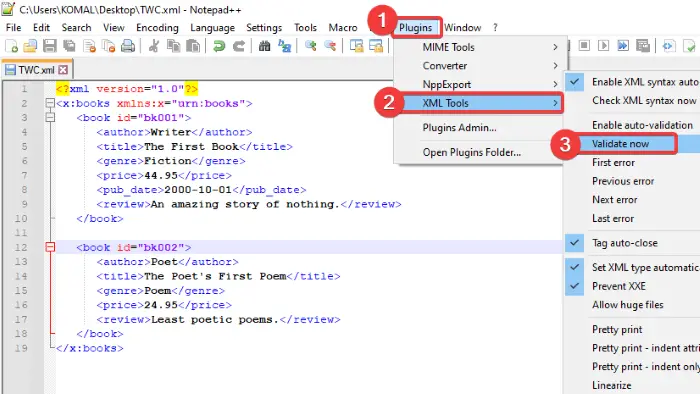
You now need to open the XML document that you want to validate against XSD. After opening the XML file, go to the Plugins menu and you will now see the XML Tools option added to it. Simply go to the XML Tools > Validate Now option and click on it. You can also press Ctrl + Alt + Shift + M key combination to open Validate Now option.
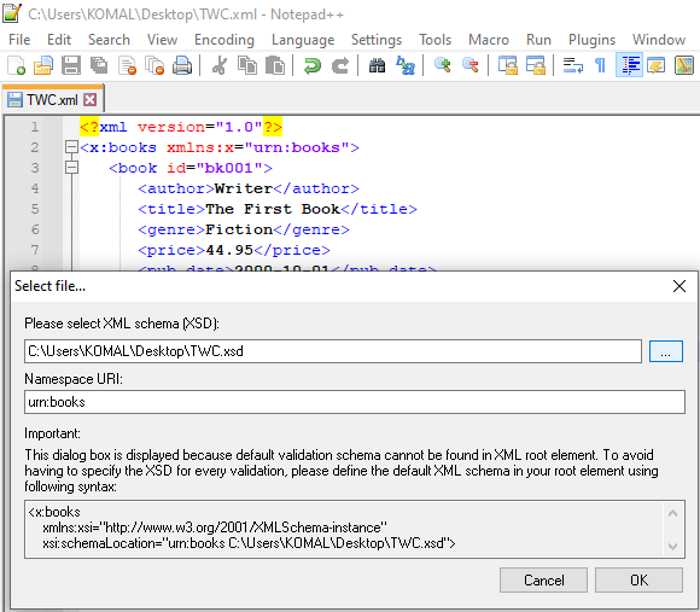
Now, select the XSD file against which you want to validate the opened XML document. Simply browse and then import the XSD file in the respective field. It shows the Namespace URI too.
Press the OK button to start validating XML against the imported XML schema file.
XML document file will now be validated against XSD and if there are any issues, it will highlight the errors with comments to correct them.
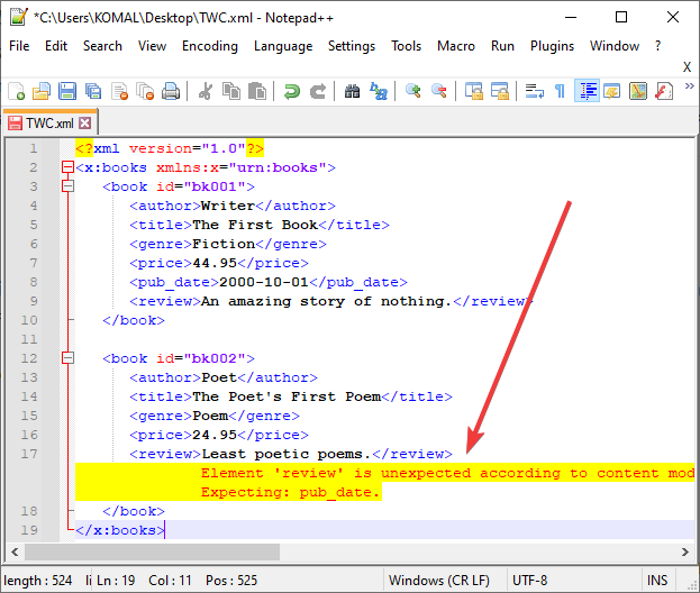
You can now correct the errors present in your XML document using the comments given by XSD validation. When you have rectified all the errors, re-run Validate Now button to validate XML content. If all is good in the XML file, it will show a message prompt saying No error detected.
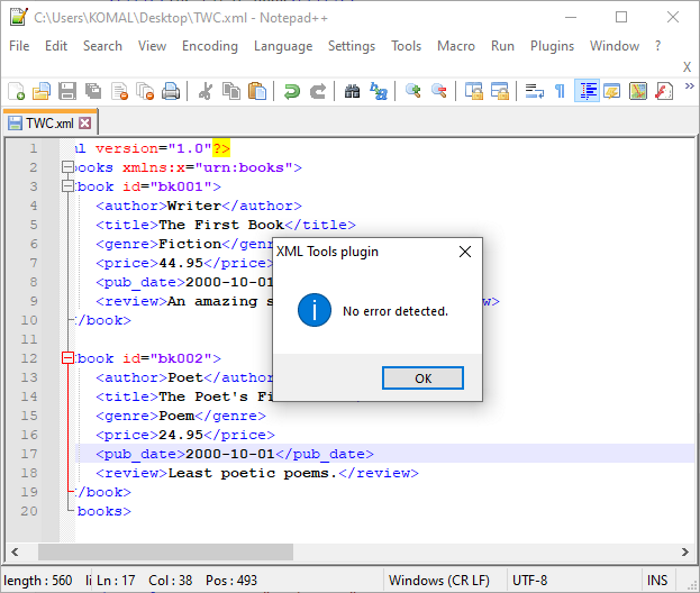
If you have turned on the Enable Auto-validation from Plugins > XML Tools options, every time you make and save changes to your XML document, it will let you validate XML against XSD.
So, this is how you can use Notepad++ to validate XML documents against XSD by installing a simple plugin from its Plugins Admin.
Now read:
Leave a Reply