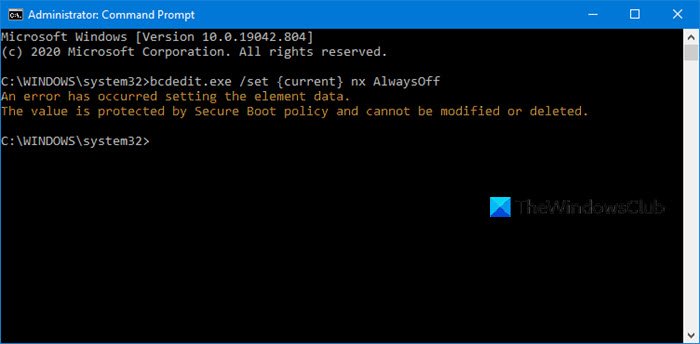
If you see an error message – An error has occurred setting the element data, The value is protected by Secure Boot policy and cannot be modified or deleted in Windows 11/10, then this post may be able to help you.
You may see the message under any of the following scenarios:
- While trying to Turn Off Data Execution Prevention (DEP) using bcdedit
- When you try to Disable Driver Signature Enforcement
- When running VMware.
- When you use MSCONFIG to make a change to the boot menu, and you see error message – System Configuration cannot save the original boot configuration
The value is protected by Secure Boot policy and cannot be modified or deleted.
The value is protected by Secure Boot policy and cannot be modified or deleted

If you see An error has occurred setting the element data message, it means Secure Boot is enabled for your computer’s UEFI firmware.
You need to disable Secure Boot first and then run the commands.
Warning if you are disabling Secure Boot
After disabling Secure Boot and installing other software and hardware, it may be difficult to re-activate Secure Boot without restoring your PC to the factory state. Also, be careful when changing BIOS settings. The BIOS menu is designed for advanced users, and it’s possible to change a setting that could prevent your PC from starting correctly. Be sure to follow the manufacturer’s instructions exactly.
- Go to Settings > Windows Update, and check if you have anything to download, and install. OEMs send and update the list of trusted hardware, drivers, and operating systems for your PC.
- Once done, you need to go to the BIOS of your PC.
- Go to Settings > Update & Security > Advanced Startup options.
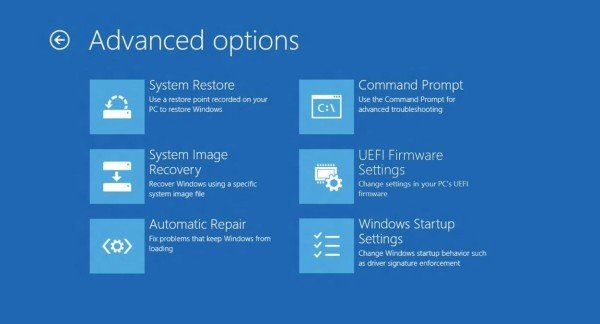
- Then you click on Restart Now, it will reboot your PC, and offer you all these advanced options.
- Select Troubleshoot > Advanced Options.
- This screen offers further options which include System Restore, Startup repair, Go back to the previous version, Command Prompt, System Image Recovery, and UEFI Firmware Settings.
- Select UEFI Firmware Settings, and it will take to the BIOS.
- Every OEM has its own way of implementing the options. Secure Boot is usually available under Security / Boot / Authentication Tab.
- Set it to Disabled.
- Save changes and exit. The PC will reboot.

After this, you can run those commands or change your graphics card or any other hardware which you believe is giving you trouble. Make sure to follow the same steps again, and this time enable the Secure Boot.
I hope this clarifies things.
Fix: Secure Boot State Unsupported error in Windows 11.
