The new version of the Edge browser comes with some interesting tweaks and useful features that make it easy to personalize the browsing experience. One of such exciting features is the vertical tabs button that has been added to the new Chromium-based Edge.

This feature was earlier used in Firefox but it is not available with its current versions. In this article, we have explained how to add or remove the vertical tabs button on the toolbar in the Edge browser.
Use Vertical Tabs on Toolbar in Edge browser
Follow the below suggestion if you want to add or remove the vertical tabs button in the toolbar.
- Open Microsoft Edge
- Go to Settings > Appearance.
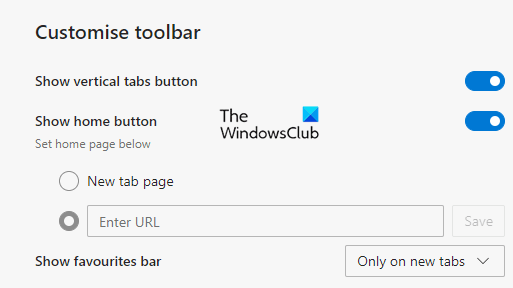
- Go to the right and scroll down to the Customise toolbar.
- Now turn ON or OFF the Show vertical tabs button as per your requirement.
Now, let’s see them in details:
Go to the start menu and open the Microsoft Edge browser.
Once it opens, tap on the three vertical dots in the upper right corner of the page. You can also use the Alt+F keyboard shortcut for the same purpose.
In the menu list, click Settings and then select Appearance from the left side.
Go to the right and locate the Customise toolbar.
Next to Show vertical tabs button, click on the toggle switch to activate this feature.

Once you activate it, you will see something like a button shape with an icon in the top left corner of the screen.
Clicking on this icon, it will turn on the Vertical tabs feature on your browser.
Similar to the tab row layout, you can use the Ctrl+T keyboard shortcut to add a new tab in your browser.

However, if you would like to use the classic horizontal tab row, then simply right-click on this vertical tab icon and select Hide from toolbar option.
Alternatively, you can also remove the vertical tabs button by going through the Settings > Appearance > Customise tool.
Let us know how you like this feature.
Read: How to get Firefox Vertical Tabs on Windows PC.
Leave a Reply