Video editing is becoming increasingly important these days due to the likes of YouTube and other social video platforms. Folks want to make their own videos to attract a large audience, and that’s great. If you’re not yet a YouTuber but considering the prospects of becoming one, then chances are you’re out seeking a video editor that is both powerful and free. We have to say that there are several editing tools out there, but today, we’re going to focus on VideoPad Video Editor. With this tool, users can easily create professional-looking videos in just a few minutes because it’s quite easy to use and to understand.
VideoPad Video Editor for YouTube

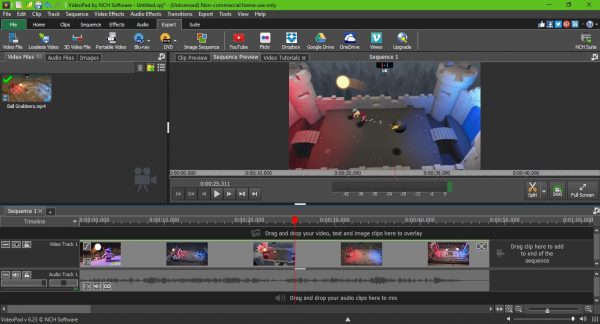
Once you have installed this free video editing software, launch the editing tool and right away you’ll see the user interface. At first, it might look intimidating, but don’t fear, it’s not difficult to learn once you have a strong reason to get it all in your head.
Now, to edit your video, simply click on the icon that says Open and select your video, or drag and drop the video to the open area on the left. Once added, we suggest dragging your video the timeline at the bottom for more control.
Here you can edit the audio separately from the video and vice versa, or you can edit them all at once. Seriously, if you have experience using other advanced video editing tools, then you’ll have no problem getting down and dirty with VideoPad.
Video Trimming
Let’s make no mistake about this, folks. When it comes down to basic video editing, the trimming tool is the most used. Luckily, VideoPad comes packed with such a tool, and it’s a breeze to use.
Click on the Trim tool to determine where you want the trim to begin, and where it should end. It’s so easy; even an unborn child should be able to do it, trust us.
Video effects and transition

Here’s the thing, if you’re adding multiple clips to create a single video, then you’ll need to add transitions between each clip. Doing this is super easy because the Transition icon is situated at the top. Just click and select the one you need, and simply drag it to where you prefer it to be.
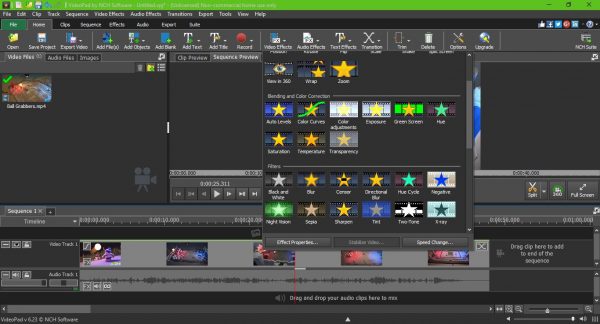
In terms of video effects, the option is also found at the top. The icon is big and revealing – therefore, it’s difficult to miss. Chances are you won’t be using this feature quite often, but when the time comes, you should find it useful.
Render your new video

After completing the edit to your liking, please click on Export then select an option from the drop-down menu. Most folks should choose Video Files, then select the right option before creating their video.
If you want to make things super easy, choose the YouTube option to render and upload the video to YouTube directly from VideoPad.
Overall, we have to say that VideoPad is more than a decent tool for editing videos for YouTube. It’s powerful, but it won’t compare to Adobe Premiere Pro, but it should give Adobe Premiere Essentials a run for its money.
Bear in mind that rendering a video could take a long time if your computer doesn’t have a fast enough processor. Furthermore, rendering time also depends on the length of the video, so keep that in mind before digging in.
You can download the program from the official website.
Leave a Reply