If you own an iPhone and a Windows PC, you know how difficult it is to view or transfer photos and videos. I am one of such users and trust me one needs a hell lot of patience to transfer the files from an iPhone to the PC and vice-versa. Today in this post, I will tell you how you can view or transfer the Live Photos from your iPhone to the Windows PC.
What is a Live Photo?
Apple introduced the feature of Live Photos a few years ago and it’s a nice and interesting one. It is actually a moving photo wherein, your phone records 1.5 seconds before and after your photo. To click the Live Photo, open the camera on your iPhone and put it on Photo mode. On the top right corner, there is a small icon of Live Photos, click on that icon and you will see Live written on your camera.
There is no special way of capturing Live Photos, click the photo normally and it will record 1.5 seconds before and after your photo. The Live Photo gets saved in your normal gallery with other photos only. It is a short video of 3 seconds or you can also call it a GIF and is saved as both a still photo (JPEG) and the video (MOV File) in your gallery.
All good, right? But the problem is that you can view this Live Photo only on your iPhone. When you transfer it to your PC or an Android phone, it shows you only the still photo.
How to view or transfer Live Photos from iPhone to Windows PC
Let’s learn how to transfer the Live Photos as Live Photos on your PC and not as still photos.
- Transfer using a USB Cable
- Via iCloud.com
- Convert Live Photos into videos
1] Using a USB Cable
If you have been using an iPhone, I am sure you must have tried all apps already to transfer these Live Photos to your PC, but trust me none of them works. To transfer your Live Photos to your PC, you need to use the USB data cable.
This is actually the most simple and best option to transfer data from iPhone to Windows PC, however, you still can’t transfer data from your PC to an iPhone with a USB cable.
To transfer your Live Photos from iPhone to Windows PC, first, connect your USB cable to your iPhone and PC.
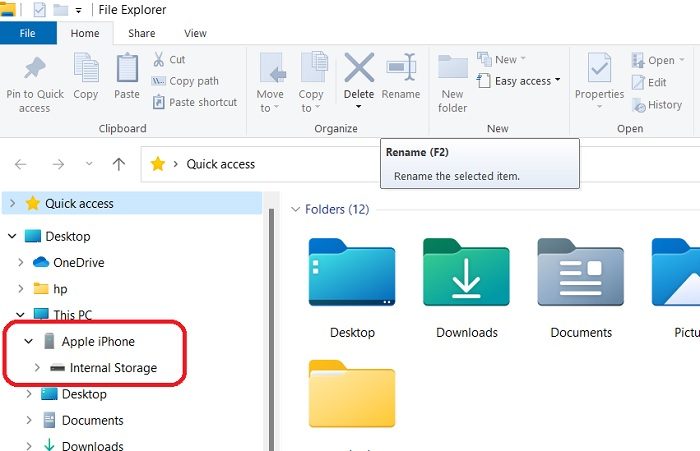
Open the File Explorer and you will then see a folder named Apple iPhone.
Click on it and you will see the folder names Internal Storage. Your phone might ask for permission here. The internal storage folder will show empty until you grant permission from your phone.
Click on the Internal Storage and you will see a single folder DCIM. This is again something I don’t like about iPhones. All your photos and videos are saved in one single folder.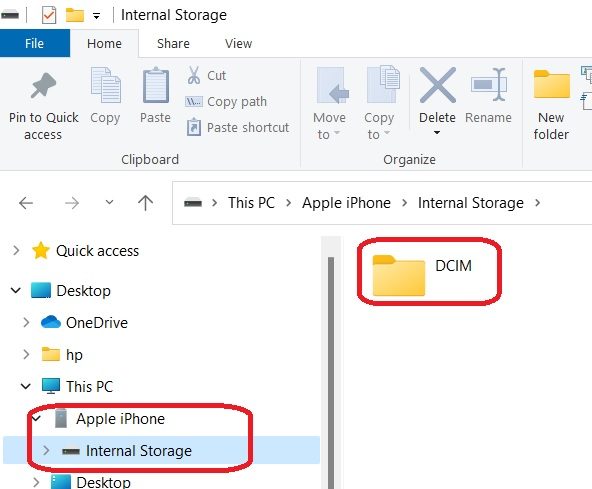
Well, open the DCIM folder and you will see multiple folders named in numbers. Your latest photos will be saved in the last folder by default.
So, if you want to locate any of your older photos or videos, check the file name and type it in the search bar in the DCIM folder.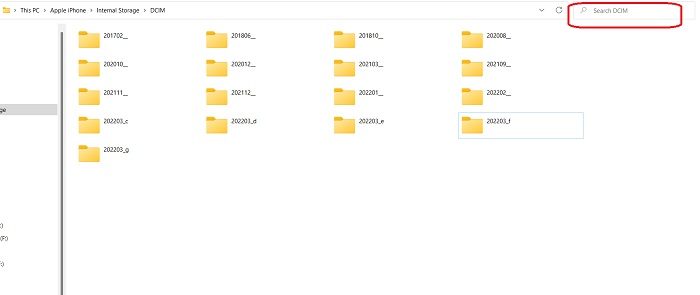
Your Live Photo will be saved here as both photo and a video. To transfer the Live Photos on your Windows PC, you need to copy and paste both these files.
Again, remember that if you delete the original file from your iPhone and transfer these files back to your phone, it won’t show as Live Photo.
2] Use iCloud to view or transfer your Live Photos on Windows PC
If you are backing up all your photos on iCloud, you can use iCloud for Windows to view your Live Photos on your PC.
Now, you can either use iCloud online to view these photos or can use iCloud for Windows. Which you have to set up first. Also, if you are using iCloud online, all your photos and videos will be displayed in chronological order which makes it easy to locate the video you want to view. Whereas with the iCloud for Windows app, all your photos and videos are displayed in random order.
- Open iCloud.com on your PC and sign in using your iCloud account. Go to Photos to open your phone gallery.
- And as mentioned above, the photos and videos here are displayed in chronological order, it is easy to pick the Live Photo you want.
- Also, you can directly go to the Live Photos simply by clicking on Live.
- There will be a Download button on the top right corner of your screen, click it to download the Live Photo on your PC. It will download and save both JPEG and MOV files on your PC.
3] Convert your live photos into videos
This is the third method to transfer your Live Photos from your iPhone to the Windows PC. The Live Photos are actually a 3 seconds video but saved as Live Photos on your phone, so you can simply save them as a video first and then transfer them to your PC using the two methods mentioned above.
To save the Live Photos as a video-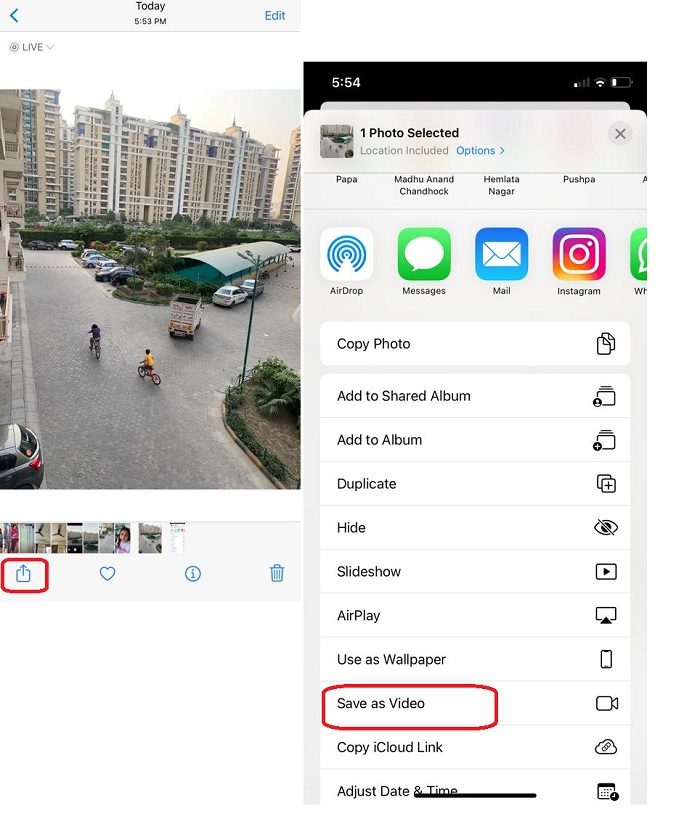
- Select the Live Photo and click on the Share icon below.
- Scroll down the menu option and select Save as video.
- The Live Photo will then be saved as a video in your phone gallery.
These are some quick methods to transfer Live Photos from an iPhone to a Windows PC. Do let us know via comments, which method do you prefer.
How do I view iPhone live photos on my PC?
You best way is to first transfer those Live Photos to your PC. You can use any of the above-mentioned methods to transfer your photos from iPhone to PC.
How do I convert live photos to JPG?
When you click a Live Photo on your iPhone it is saved as both a JPG image and a MOV file in your gallery. Both the files are saved by the same name but with different file extensions.
Leave a Reply