In VMWare VSphere, the Virtual Machine disks Consolidation Needed status is displayed in the Summary section if leftover virtual disk files or snapshots are not merged with the base virtual disk file or vmdk file. Leaving excessive snapshots unattended can seriously impact the system’s performance. In this post, we will discuss why Virtual machine disks consolidation is needed in VMware and how you can resolve it.
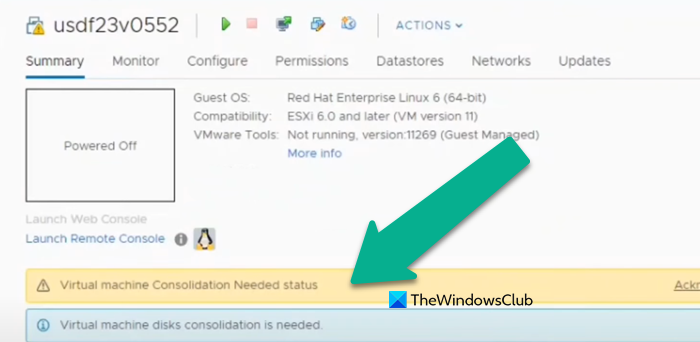
What is Virtual Machine disks consolidation in VMware and why is it needed?
Multiple delta disks are created when you take a snapshot of a virtual machine in VMWare to save changes made since the last snapshot. The changes are stored in the latest disk if the user manually selects no snapshot. So, the VM becomes overcrowded by the presence of these redundant delta disks that can eventually cause lack of storage. Hence, we have the Virtual Machine disks consolidation process, which aims to combine numerous virtual disk files into one. The disk consolidation process leaves no redundant data on the datastore where this VM’s files are located.
Storage space is cleaned after you consolidate virtual machine disk files. Keep in mind that VMware recommends using no more than 32 snapshots per VM.
So, we can clearly say that the Virtual Machine disk consolidation is needed to clean our redundant snapshots and make some space in your virtual machine.
Fix Virtual Machine disks consolidation is needed status in VMware
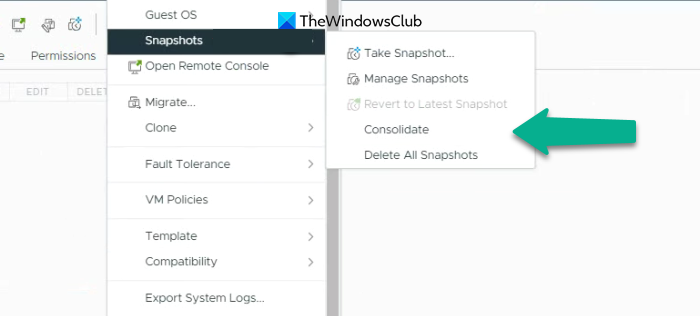
If you get a message stating “Virtual Machine disks consolidation is needed” in VMware, all you have to do is consolidate. Follow the steps mentioned below to do the same.
- Open the VMware console and select the problematic VM.
- Go to Action > Snapshots.
- Now, you need to click on the Consolidate button and then click on “Yes” when the prompt appears.
However, on most occasions, users who got the warning earlier, encountered an error when trying to consolidate manually or failed to do so.
Unable to access file since it is locked in VMware
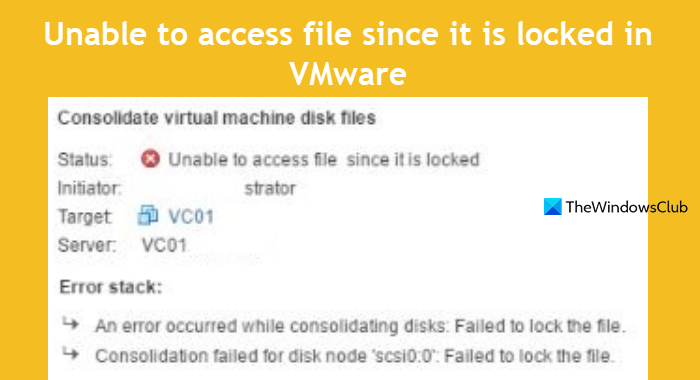
The consolidation might fail if a lock is created. If the hot-add disk option is used when creating the snapshot, there is a possibility that locks can be created to stop simultaneous writes to the file. To resolve this issue, we need to reboot the services.sh script that will restart all the services.
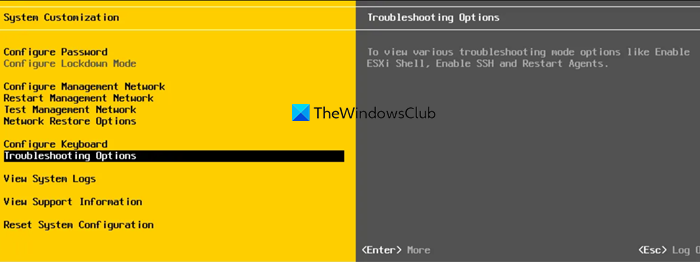
To do so, we need to restart management agents on the ESXi server. So, either open the ESXi shell or connect to the host via SSH and then run the following command as a root user.
services.sh restart
or
/etc/init.d/hostd restart
/etc/init.d/vpxa restart
Alternatively, navigate to Troubleshooting Options, and choose Restart Management Agents. Then press Enter to activate the option, then press F11 to confirm.
After restarting the service, we can check the locked file using the command given below.
vmfsfilelockinfo -p /vmfs/volumes/vm_datastore/vm_name/vm_name.vmx
Now, we need to find the hostd log file. Run the command given below to identify the VM file path.
cat /var/log/hostd.log |grep -i vm_name
Then, navigate to the VM directory using the cd or change directory command and finally, execute the below command to list all ESXi hosts that are responsible for locking the VM files.
for i in `ls`; do vmfsfilelockinfo -p $i ;done|grep 'is locked in\|Host owning the lock\|Total time taken' | sed 's|Host owning the lock on file is||g'|sed 's|Total time|---|g' | awk '{print $1}' |uniq
Finally, either include hostd and vpxa and run the command, or go to each ESXi host and execute the commands.
/etc/init.d/hostd restart
/etc/init.d/vpxa restart
Hopefully, this will do the job for you.
Unable to consolidate as too many snapshots exist
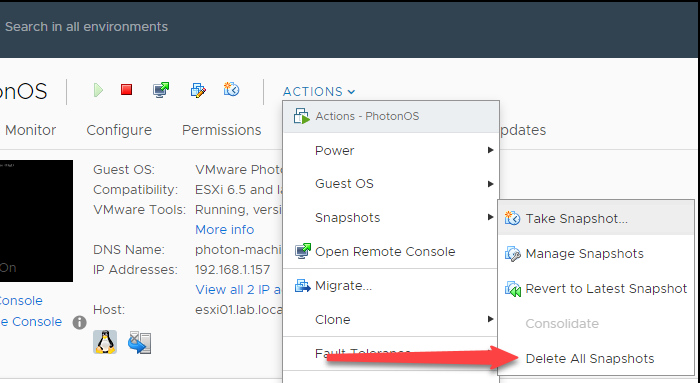
Sometimes, VMware fails to consolidate or even lock the file because too many snapshot is present on the VM at the same time. In order to resolve it, we need to delete redundant snapshots. To do the same, follow the steps given below.
- First of all, shut down the VM and create a new VM disk snapshot.
- On the VM tab, you have to right-click and select Snapshots.
- Then, click on Delete All Snapshots.
Sometimes, the virtual machine consolidation needed status can be triggered by inconsistent -ctk.vmdk files. Therefore, you can attempt to resolve the issue by deleting the CTK files.
VMware consolidate snapshot option is greyed out (inactive)
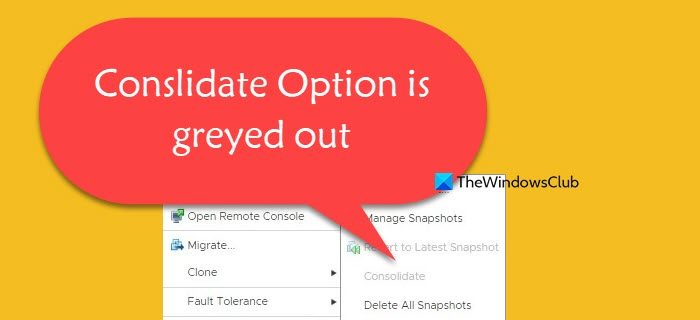
Sometimes, users are unable to manually consolidate as the option is greyed out and is inactive. So basically what has happened is that some snapshots or a link in the chain of snapshots is broken. To resolve the issue, we can use PowerCLI with command line interface.
So, first of all, use Connect-VIServer vcenter01.test.com to connect to vCenter Server with the problematic VM.
Enter the command given below to list all virtual machines with the status – Virtual machine consolidation needed.
Get-VM | Where-Object {$ _. Extensiondata.Runtime.ConsolidationNeeded}
Finally, consolidate using the following command.
Get-VM | Where-Object {$ . Extensiondata.Runtime.ConsolidationNeeded} | foreach {$ . ExtensionData.ConsolidateVMDisks_Task ()}
That’s it!
What does virtual machine disk consolidation is needed mean?
The virtual machine disk consolidation process combines multiple virtual disk files into one, removing redundant data and freeing up space in your virtual machine. You might see Virtual disk consolidation is needed when there are redundant snapshots available and the automated consolidation process failed.
Read: Iperius Backup & Virtual Machines: Backup Software for Hyper-V, VMware ESXi, vCenter
How do I fix virtual machine disk consolidation is needed?
Since VMware is notifying us that disk consolidation is needed, we will manually run it. In case, it fails with an error, check our the solutions mentioned earlier to resolve the issue.
Also Read: Unable to Connect to the MKS while Connecting to Remote Console.