Hence, in this article, we look into the possible causes for The virtual machine failed to start because nested virtualization is not supported error, along with the steps necessary to resolve the issue on your Windows computer.
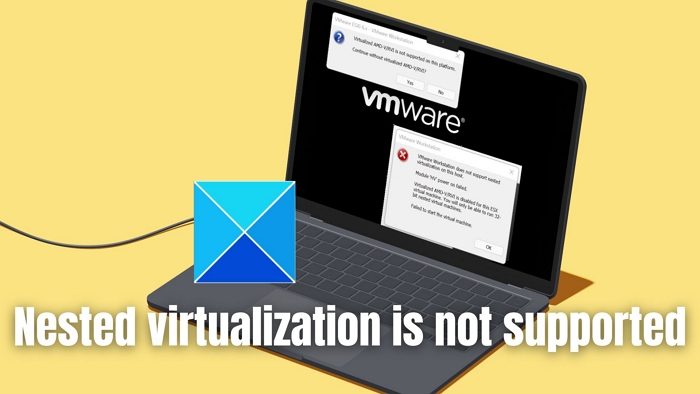
Module ‘HV’ Power on failed
Virtualization, as the name suggests, involves the creation of a make-believe version of a computer or its constituent resource, like a storage device, server, etc., within a physical computer. The allocation of these hardware resources to the virtual machines and their management is administered by a Hypervisor (Hyper-V), helping in the maximum utilization of its physical resources. Running one or multiple virtual machines within another virtual machine is referred to as nested virtualization, with the Hypervisor’s involvement in managing the same. In such scenarios, the error, The virtual machine failed to start because nested virtualization is not supported can be pretty standard.
What causes The virtual machine failed to start because nested virtualization is not supported error?
Nested virtualization finds its application mainly in software development and testing environments. However, it has limitations concerning compatibility with physical hardware and virtualization platforms, contributing to the error.
- Incompatible Hardware or Virtualization Extensions: Virtualization Extensions allow the virtual machines to access the hardware resources of the CPU directly without involving the host Operating System. Some CPUs lack the necessary extensions to run a nested virtualization environment, leading to errors.
- Software or OS Limitations There can be scenarios where the virtualization software may not support nested virtualization. Improper configuration of the Hypervisor on the physical host can also contribute to the cause. Guest OS, too, may not support nested virtualization, which can also be a potential cause of the error.
- Security Configuration on the host system: Although nested virtualization is a powerful tool, it can also expose the system to security risks. Malicious codes or malware can get into the host system from the virtual machines, affecting its stability. Hence, to mitigate such security risks, virtualization platforms sometimes disable the nested feature, leading to the error mentioned above.
- UEFI/ BIOS settings: The smooth running of nested virtualization might require necessary options to be enabled from the BIOS/UEFI. If the BIOS settings are not enabled or configured for running nested virtualization, it can lead to the abovementioned error.
Fix The virtual machine failed to start because nested virtualization is not supported error
Here is the list of suggested methods that can help you fix the Nested virtualization is not supported issue on your Windows 11/10 computer:
- Check software and hardware compatibility.
- Review BIOS/UEFI settings.
- Opting for either Hyper-V or VMWare
- Disabling Virtualization-based Security (VBS)
Use an admin account and create a system restore point before proceeding.
1] Check software and hardware compatibility
Hardware support or compatibility is one of the most essential factors while running a virtualized environment, especially when nested. The presence of virtualization extensions like Intel VT-x (for Intel processors) or AMD-V (for AMD processors) is a prerequisite for the concerned physical system. These extensions help run virtualization features like Virtual Machine Control Structure (VMCS) and Extended Page Tables (EPT).
While VMCS allows the creation of multiple instances of the Virtual Machine, helping the creation and execution of the multiple VM instances, EPT helps in efficient memory management in a nested virtual environment.
The below steps can be performed to check if the physical system supports virtualization:
- Open the Windows Terminal as Administrator
- Type systeminfo on the Command Prompt and check the results to confirm if virtualization is enabled or not, as shown below:
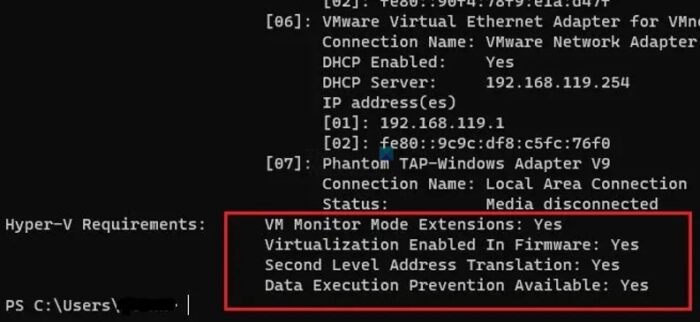
Note: Hyper-V support and virtualization extensions are available in Windows Server 2016 or later versions and Windows 10 or later.
2] Review BIOS/UEFI settings
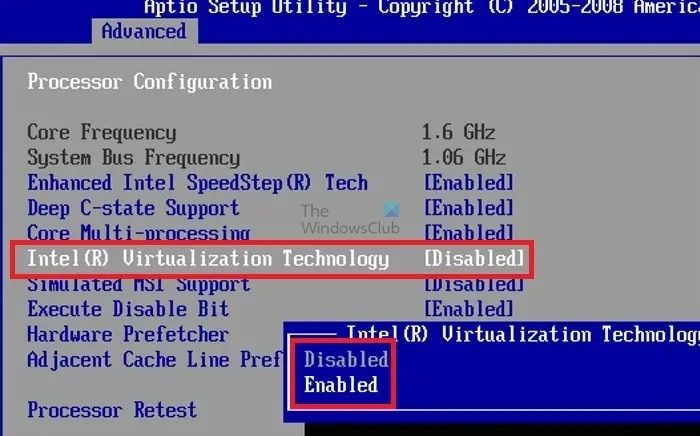
Checking if the support for virtualization is present and enabled from the BIOS/UEFI is also essential to resolve the error. Hence, reviewing the BIOS settings to check whether the option is enabled can be considered a primary step towards resolving the error.
- Power on the computer and press the relevant key (F2, F10, DEL, etc.) to enter the BIOS/UEFI settings.
- Check for the Virtualization settings. Generally, virtualization settings can be found in the Advanced Section for most BIOS/UEFI.
- Once located, enable the virtualization feature if it shows otherwise and save the changes made before restarting the system.
3] Opting for either Hyper-V or VMWare
In cases where virtualization support is enabled per the information displayed through the systeminfo command, but the nested virtualization error persists, we can use either Hyper-V or VMWare to explore nested virtualization. Since Hyper -V, and VMWare don’t work together, the Hypervisor can be turned OFF to use VMWare or set to AUTO if Hypervisor needs to be used instead of VMWare as using command-line utility as mentioned below:
- Press the Windows + X key to open the Quick Access menu and click on Windows PowerShell (Admin).
- Execute the below-mentioned command on PowerShell and restart the system to use only Hyper-V once the system boots
bcdedit /set hypervisorlaunchtype auto
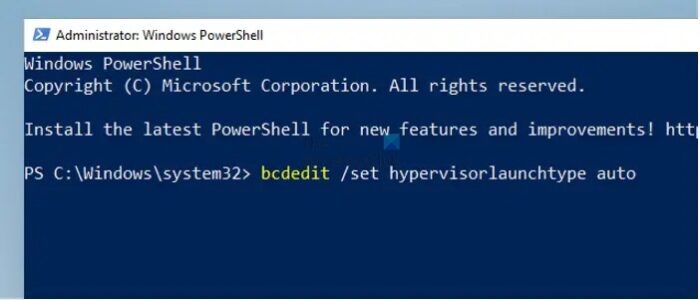
The above command edits the Boot Configuration Data (BCD) to launch the Hypervisor automatically while the system boots.
- To use VMWare, enter the below-mentioned command on the PowerShell and restart the system
bcdedit /set hypervisorlaunchtype off
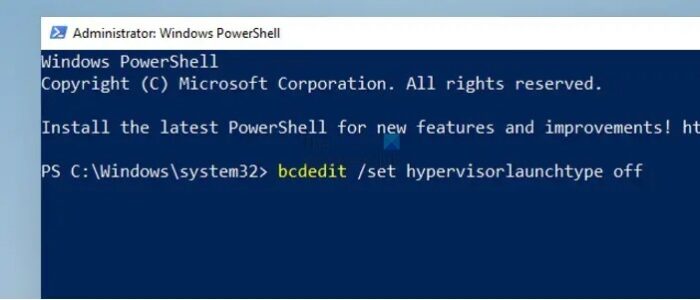
The command edits the BCD and turns off the launching of the Hypervisor when the system boots, making way for VMWare to operate.
4] Disabling Virtualization-based Security (VBS)
VBS is a security feature in Windows that happens to use hardware virtualization to enhance system security. However, these features may disrupt the functioning of the essential virtualization extensions for nested virtualization by prioritizing security mechanisms above all else. Hence, turning off the VBS allows uninterrupted access to the virtualization features for the host system at both the software and the hardware levels. To disable VBS,
- Open Windows Security by typing the same on the Desktop search bar
- Navigate to Device Security> Core Isolation and turn OFF Memory Integrity
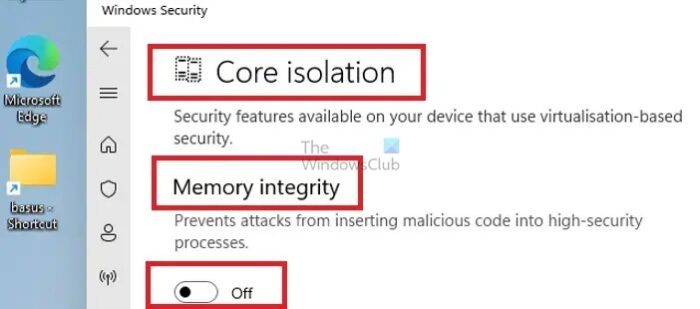
- Reboot the system for the changes to take effect
Read: How to enable or disable Nested Virtualization for VMs in Hyper-V
I hope this helps.
What are the security issues with nested virtualization?
Nested virtualization is not without its security concerns. One of the main issues is that it enlarges the code base of host hypervisors, which, in turn, expands the attack surface due to known security bugs. Additionally, nested VMs have been found to have poor I/O performance, which is a topic that has been discussed extensively in the community.
Read: Memory Integrity greyed out or won’t Turn On/Off
Why do we need nested virtualization?
Nested virtualization allows users to run virtual machine instances inside of other VMs, thereby enabling the creation of customized virtualization environments. To facilitate nested virtualization, Compute Engine adds Intel VT-x instructions to VMs. This allows the hypervisor that is already present on a VM to run additional VMs when they are created.
Leave a Reply