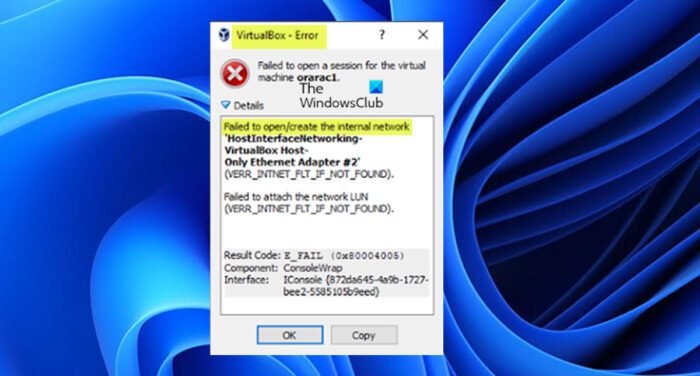
There are reported cases where VirtualBox can cause your network config in the VM to become invalid and throw the error message Failed to open/create the internal network when you start a virtual machine after a reboot of your host/physical Windows 11 or Windows 10 machine. This post provides the most suitable fixes you can apply to resolve the issue.

When this issue occurs on your system, one of the following similar error(s) may appear along the following lines:
- Failed to open a session for the virtual machine.
Failed to open/create the internal network ‘HostInterfaceNetworking-Ethernet-Name’ (VERR_SUPDRV_COMPONENT_NOT_FOUND). - Failed to open/create the internal network ‘HostInterfaceNetworking-VirtualBox Host-Only Ethernet Adapter (VERR_INTNET_FLT_IF_NOT_FOUND).
Failed to attach the network LUN (VERR_INTNET_FLT_IF_NOT_FOUND). - Could not start the machine <machine’s name> because the following physical network interfaces were not found: <Network Adapter name> (adapter 1)
You can either change the machine’s network settings or stop the machine.
VirtualBox failed to open/create the internal network
If you get the error message Failed to open/create the internal network when you start a virtual machine in VirtualBox on your Windows 11/10 host system, you can try our recommended solutions below to get the issue resolved on your machine.
- Initial checklist
- Set the correct Network Adapter in VirtualBox VM
- Disable/Enable or Update VirtualBox Host-Only Ethernet Adapter
- Disable and Enable the VirtualBox NDIS6 Bridged Networking Driver
- Change to Google Public DNS
- Reinstall VirtualBox
Let’s take a look at the description of the process involved concerning each of the listed solutions.
1] Initial checklist
Affected users reported the error started to occur after installing a recent Windows update on their device. So, as a quick resolution, you can either uninstall the ‘problematic’ update or perform System Restore. However, if this isn’t the case for you or you would prefer to try either task as a last resort, then you can proceed with the other solutions below.
2] Set the correct Network Adapter in VirtualBox VM
In some cases, you may encounter the Failed to open/create the internal network error because, after a Windows Update, Windows changes the name of the physical Network Adapter. In this case, to resolve the issue, you need to set the correct Network Adapter in VirtualBox VM. To perform this task, do the following:
- Press the Windows key + R to invoke the Run dialog.
- In the Run dialog box, type devmgmt.msc and hit Enter to open Device Manager. Alternatively, press the Windows key + X to open the Power User Menu, then tap M on the keyboard.
- In Device Manager, scroll down through the list of installed devices and expand the Network adapters section.
- Make a note of the active Network adapter.
- Now open the network settings of the VM running in VirtualBox and make sure that the same network adapter is selected. If not, use the drop-down menu and select the correct adapter.
Read: Hyper-V Network adapter not connected in Windows 11/10
3] Disable/Enable or Update VirtualBox Host-Only Ethernet Adapter

This solution requires you to simply disable and re-enable the VirtualBox Host-Only Ethernet Adapter in Device Manager. To perform this task, do the following:
- Open Device Manager.
- Under the Network adapters section, right-click on VirtualBox Host-Only Adapter.
- Select Disable device from the context menu.
If there is more than one VirtualBox Host-Only Ethernet Adapters present, you will have to uninstall all of them and reinstall Oracle VM VirtualBox.
- Right-click again on VirtualBox Host-Only Ethernet Adapter and choose Enable device.
- Exit Device Manager.
You can now start VirtualBox and see if the issue in view is resolved. If not, you can try updating the VirtualBox Host-Only Ethernet Adapter driver by following these steps:
- In Device Manager, under the Network adapters section, right-click on VirtualBox Host-Only Adapter.
- Select Update driver from the context menu.
- In the next window, Select the Browse my computer for drivers option.
- On the next screen, choose Let me pick from a list of available drivers on my computer.
- Now, select the VirtualBox Host-Only Ethernet Adapter.
- Click the Next button to begin the update process.
After the driver update is completed successfully, you can start the VM machine and check if the error persists. If so, try the next solution.
Read: How to manually install a Driver using a .INF File
4] Disable and Enable the VirtualBox NDIS6 Bridged Networking Driver

To disable and re-enable the VirtualBox NDIS6 Bridged Networking Driver on your Windows 11/10 PC, do the following:
- Press the Windows key + R to invoke the Run dialog.
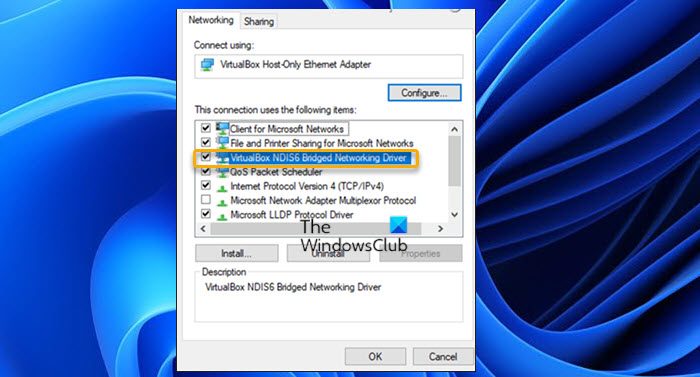
- In the Run dialog box, type ncpa.cpl and hit Enter to open the Network Connections applet.
- In the window that opens, right-click on the VirtualBox Host-Only Network adapter.
- Select Properties from the context menu.
- In the virtual network adapter Properties sheet, uncheck (to disable) the VirtualBox NDIS6 Bridged Networking Driver.
- Click OK to exit.
- Now, re-open the Properties for the adapter.
- Check (to enable) the VirtualBox NDIS6 Bridged Networking Driver.
- Click OK to exit.
- Exit the Network Connections window.
Now open the VirtualBox machine and check if the problem is resolved. If not, try the next solution.
Read: VMware Bridged network not working or detecting
5] Change to Google Public DNS

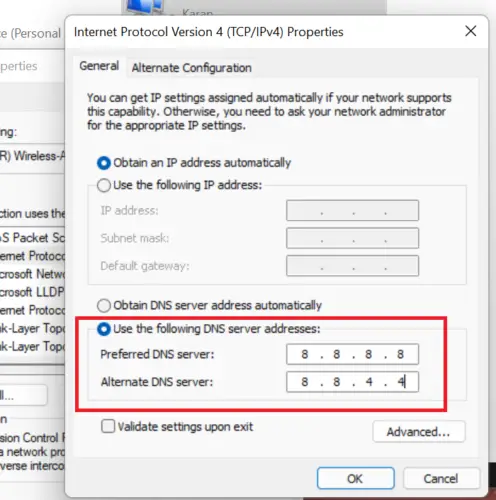
If you have configured the VM that’s failing to start as your home DNS server, it could be that the VirtualBox or the host machine tries to validate the network settings before setting up a bridge on the network, but since the VM isn’t started, the nameserver IP is offline, hence the error in highlight. In this scenario, the solution is to change to Google Public DNS on the Windows 11/10 host machine. Once you have configured a static IP for your DNS server on the host, the VM can start without throwing the error message. If this doesn’t apply to you or the solution didn’t work, you can try the next solution.
Read: Cannot change Static IP address & DNS server
6] Reinstall VirtualBox
If you have exhausted all other solutions suggested in this post, but the issue you’re currently facing is still unresolved, the only option available for you, is the reinstallation of VirtualBox. To uninstall VirtualBox on your Windows 11/10 computer, we suggest you use any free third-party Uninstaller Software to completely remove all the leftovers before installing the Virtualization software again on your device.
Read: VT-x is not available (VERR_VMX_NO_VMX)
Any of these solutions should work for you!
Also read:
- Failed to create a proxy device for the USB device VirtualBox error
- How to fix VMware Internal Error while powering on
What is VirtualBox internal network?
VirtualBox Internal Networking is similar to bridged networking in that the VM can directly communicate with the outside world. However, the outside world is limited to other VMs on the same host which connects to the same internal network.
Read: 0x80004005, VirtualBox failed to open the session for the virtual machine
What is a Host-only network?
Host-only networking can be thought of as a hybrid between the bridged and internal networking modes. As with bridged networking, the virtual machines can talk to each other and the host as if they were connected through a physical Ethernet switch.
Read: Fix Error applying Virtual Switch Properties changes in Hyper-V.