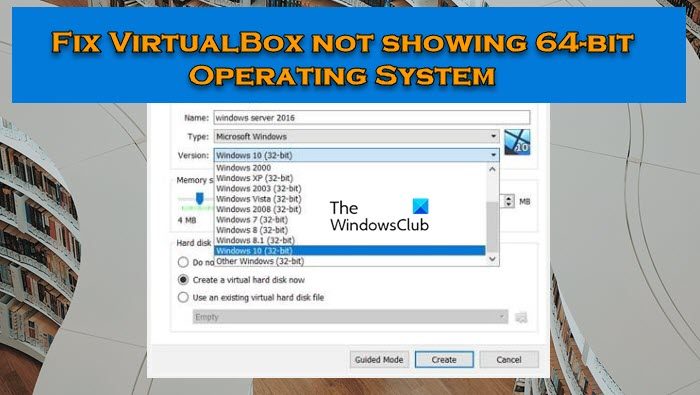
Some users are unable to see 64-bit guest operating systems displayed on the Oracle VM VirtualBox application and because of this, they are not able to install such operating systems on VirtualBox. In this article, we are going to know what to do when VirtualBox is not showing 64-bit Operating Systems.

Why is VirtualBox not showing 64-bit Windows?
If VirtualBox is not showing 64-bit operating systems, check if Hardware Virtualization is enabled or not. In case, the feature is not enabled, you won’t be able to create a 64-bit operating system. Not just that, we also need to make sure that Microsoft Virtualization technology Hyper-V is not enabled. In case, the feature is enabled, VirtualBox will face various issues. There are some other solutions that you need to try, so, follow the solutions mentioned in this post to resolve the issue.
VirtualBox not showing 64-bit Operating System
If VirtualBox is not showing 64-bit Operating Systems, follow the solutions mentioned below to resolve the issue.
- Enable Hardware Virtualization
- Disable Microsoft’s Hyper-V
- Create your VM in Clean Boot State
- Uninstall VirtualBox
Let’s discuss these methods one by one.
1] Enable Hardware Virtualization

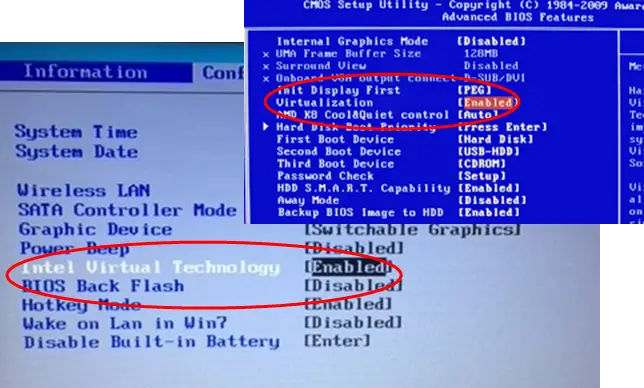
On our computer, Virtual Technology architecture allows us to run multiple operating systems on a single hardware using virtualization. If the feature is disabled, one won’t be able to connect to create a VM and sometimes, one won’t be able to see 64-bit Windows Operating Systems in a lot of tools. That is why, you should enable Hardware Virtualization from BIOS and then check if the issue is resolved.
Read: How to find if your computer supports Intel VT-X or AMD-V
2] Disable Microsoft’s Hyper-V

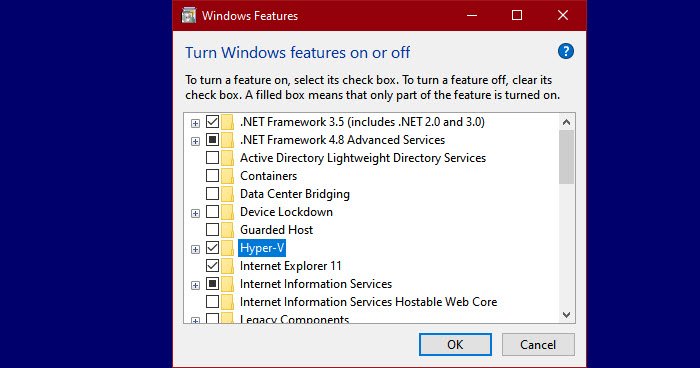
Hyper-V is a built-in tool of the Microsoft operating system that allows users to create one or more virtual machines. This virtual machine can be Windows 11, Linux, or another operating system and this application works like VirtualBox. If the feature is enabled on your computer, it is very likely that because of this conflict. To disable Hyper-V, follow the steps mentioned below.
- Open Control Panel.
- Change View by to Large icons.
- Click on Program and features.
- Select Turn Windows features on or off.
- Look for Hyper-V and untick the box next to it.
After disabling the feature, make sure to reboot your computer, and check if the issue is resolved.
3] Create your VM in Clean Boot State
In case, after following the solutions mentioned above, you are unable to see 64-bit Operating Systems, it is very likely that there is a third-party application that’s conflicting with VirtualBox installed on your computer. Most likely, another virtualization tool causes this issue, but we need to do a thorough inspection before coming to a conclusion. So, go ahead and start your computer in Clean Boot State, make sure to enable VirtualBox services along with Microsoft services. If you can see and create a 64-bit VM, enable services manually to find out which applications is causing the issue.
4] Uninstall VirtualBox
In case VirtualBox doesn’t have a 64-bit operating system in the list, you need to make sure VirtualBox installed on your computer has something wrong with it. In that case, we recommend you uninstall VirtualBox from your computer and then install a fresh copy of the same from the official website. So, go ahead and uninstall VirtualBox using the following steps.
- Open Settings.
- Go to Apps > Installed apps or Apps & features.
- Search for “Oracle VirtualBox”.
- Click on the three vertical dots and click on Uninstall.
- Select the app and click on Uninstall.
- Click on Uninstall again to confirm your action.
After uninstalling the app, go to virtualbox.org and finally check if the issue is resolved. Hopefully, this will do the trick for you.
Read: VirtualBox displays a Black screen and not Booting guest OS
How to add Windows OS to VirtualBox?
To add Windows Operating System to VirtualBox, first, download Windows 11 or Windows 10 ISO from Microsoft’s official website. Once done, open the VirtualBox app, and click on New. Once the dialog box appears, give it a name, click on ISO Image (drop-down) > Others, go to the location where you have stored Windows ISO, and then follow the on-screen instructions to mount and install the operating system. This will do the trick for you.
Also Read: VirtualBox Aborted: The VM session was aborted on Windows PC.
Leave a Reply