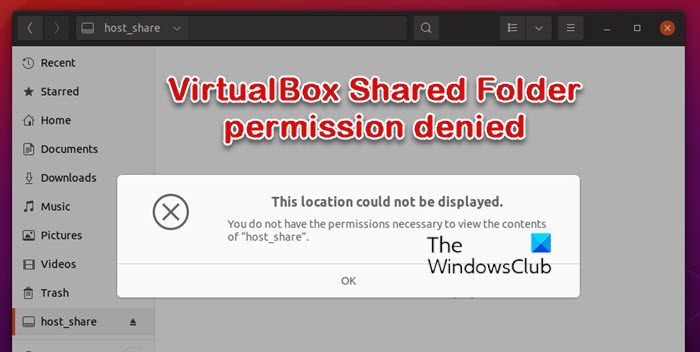
This post features solutions to fix the issue where VirtualBox Shared Folder permission is denied in Windows 11. VirtualBox by Oracle is a cross-platform virtualization software that allows users to run multiple operating systems on their devices at the same time. It offers a very stable and seamless experience without consuming system resources.
Some other features of VirtualBox include shared folders and 3D virtualization, remote machine display, etc. But recently, many users have complained about VirtualBox shared folder permission denied errors in VirtualBox. Fortunately, you can follow these steps to fix it.
Fix VirtualBox Shared Folder permission denied in Windows 11
To fix the issue where VirtualBox Shared Folder permission is denied in Windows 11, restart the Virtual Machine and try running VirtualBox as an Admin and see. However, if that doesn’t work, here are some tested fixes:
- Check Shared Folder Settings
- Install Guest Additions
- Check Allowed Permissions of the Shared Folder
- Allow Access via Terminal
- Add VirtualBox to Permissions list
Let’s now see these in detail.
1] Check Shared Folder Settings
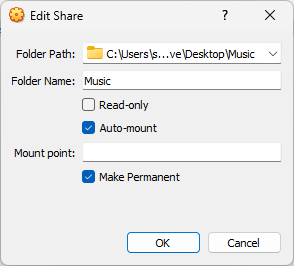
Before using different methods, check if the shared folder settings are misconfigured. The shared folder permission error can occur due to misconfigured settings. Here are the settings you need to enable:
- In VirtualBox, navigate to Settings > Shared Folders.
- Right-click on the Shared Folder and select Edit Shared Folder.
- Check the Auto-mount option and click on OK to save the changes.
2] Install Guest Additions
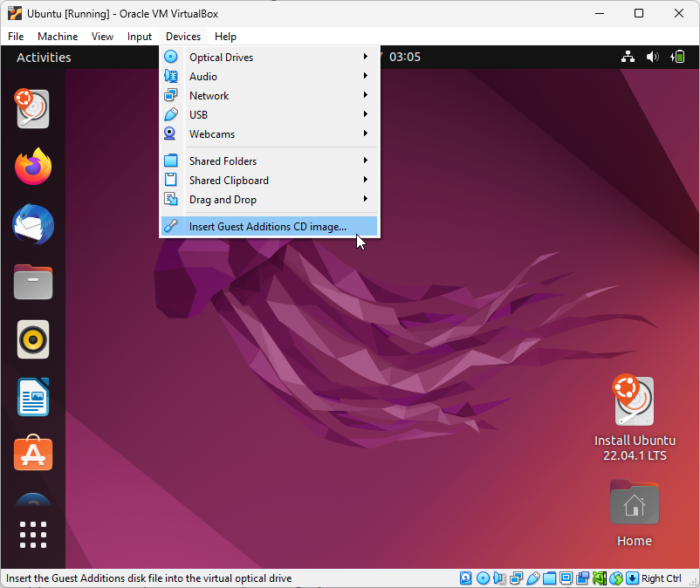
Guest Additions are designed to be installed inside a virtual machine after the installation of the guest operating system. Usually, these consist of device drivers and applications to optimize the operating system. If these are not installed, your Virtual Machine may face permission errors. Here’s how you can install Guest Additions on your Virtual Machine:
- Click on Devices > Insert Guest Additions CD image on your Virtual Machine.
- Your Virtual Machine will now react as if a physical CD was inserted.
- Now follow the instructions on screen to complete the installation procedure.
3] Check Allowed Permissions of the Shared Folder
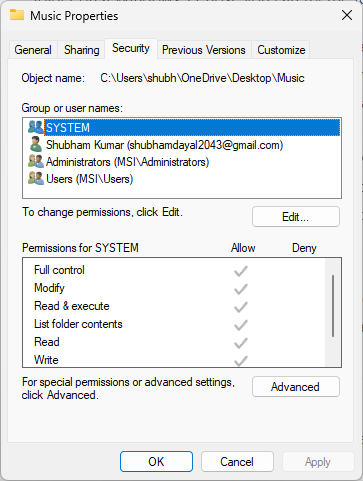
The Virtual Machine may be unable to access the shared folder if it doesn’t have appropriate permissions. Check and modify the folder permissions and see if the error gets fixed. Here’s how:
- Right-click on the folder, select Properties and navigate to Security.
- Under Permissions for SYSTEM, check if all the permissions are allowed.
4] Add user to vboxsf Group via Terminal
If you’re still unable to fix the error, try allowing access to the folder using Terminal on your Virtual Machine. Here’s how:
- Open Terminal on your Virtual Machine.
- Type the following command and hit Enter. Type your username instead of the user.
sudo usermod -aG vboxsf $(user)
- Logout the user and log in again, and now you should be able to access your shared folder here:
/media/sf_(shared_folder_name).
5] Add VirtualBox to Permissions list
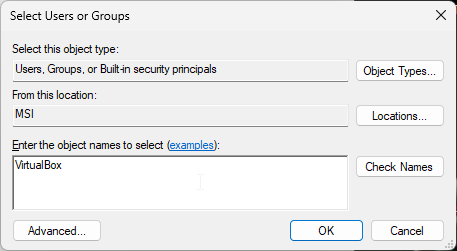
You can also try adding VirtualBox as a user to access the shared folder. Also, after adding it as a user don’t forget to allow all permissions. Here’s how:
- Right-click on the folder, select Properties and navigate to Security.
- Click on Edit and then on Add to add a new user.
- Enter the object name as VirtualBox and click on Check Names.
- Click on Ok to save the changes.
- Restart your Virtual Machine and check if the error is fixed.
Why is VirtualBox not compatible with Windows 11?
If you are using both, VirtualBox and Hyper-V on your device you may face compatibility issues. Microsoft and Oracle have identified some compatibility issues between these two Virtual Machine creation tools. Due to this, virtual machines sometimes may not start or crash unexpectedly.