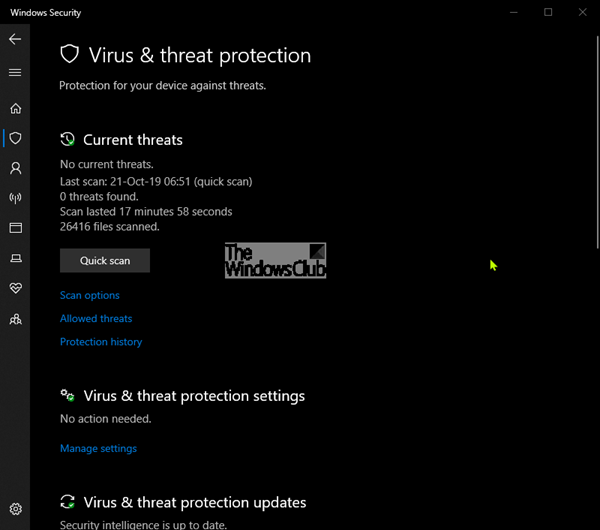
Windows Defender Antivirus is always actively helping to protect your device by scanning for malware, viruses, and security threats. It has now been integrated with Windows Security and it includes a Virus and Threat Protection section. In this post, we will explain what is Virus and Threat Protection in Windows 11/10 and how you can prevent users from accessing this section.
Virus and Threat Protection in Windows 11/10

The ‘Virus and Threat Protection‘ area in Windows 10, is one of the seven areas that protect your device and let you specify how you want your device protected in Windows Security Center.
The seven areas include:
- Virus & threat protection
- Account protection
- Firewall & network protection
- App & browser control
- Device security
- Device performance & health
- Family options.
Virus & threat protection in Windows Security helps you scan for threats on your device. You can also run different types of scans, see the results of your previous virus and threat scans, and get the latest protection offered by Windows Defender Antivirus. Some of these options are unavailable if you’re running Windows 11/10 in S mode.
Show or Hide Virus & threat protection in Windows Security
The Virus & threat protection area can be hidden from users. This can be useful if, as an admin, you don’t want them to see or have access to this area. If you choose to hide the Account protection area, it will no longer appear on the home page of the Windows Security Center, and its icon will not be shown on the navigation bar on the side of the app.
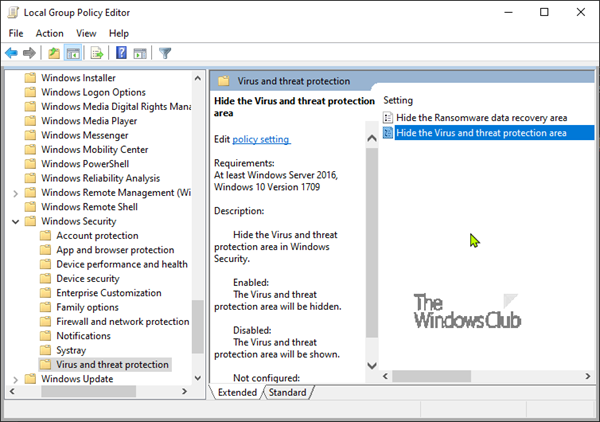
Show or Hide Virus and Threat Protection in Windows Security via GPEDIT

- Run gpedit to open the Group Policy Editor
- Navigate to Computer Configuration > Administrative templates > Windows components > Windows Security > Virus & threat protection.
- Open the Hide the Virus and threat protection area setting
- Set it to Enabled.
- Click OK.
Hide Virus & threat protection in Windows Security via Registry
- Double-click the downloaded Hide-Virus-&-threat-protection.reg file to merge it.
- Click Run on the prompt. Click Yes on UAC prompt and OK to allow the merge.
- Restart PC to apply.
- You can now delete the downloaded .reg file.
Show Virus & threat protection in Windows Security via Registry
- Double-click the downloaded Show-Virus-&-threat-protection.reg file to merge it.
- Click Run on the prompt. Click Yes on UAC prompt, and OK to allow the merge.
- Restart PC to apply.
- You can now delete the downloaded .reg file.
You can click here to download the zipped Registry files from our servers.
Virus and threat protection not available
If Virus and threat protection is not available in Microsoft Defender you can edit the Registry or change the Group Policy setting as mentioned above in this post. See this post if you see Your Virus & threat protection is managed by your organization message.
How do I turn off Virus and threat protection in Windows 11?
To turn off Virus and threat protection in Windows 11, open the Local Group Policy Editor and navigate to this path: Computer Configuration > Administrative templates > Windows components > Windows Security > Virus & threat protection. Then, double-click on the Hide the Virus and threat protection area setting. Next, choose the Enabled option and click the OK button.
Where is Virus and threat protection in Windows 11?
To use the Virus and threat protection in Windows 11, you need to head to Windows Security first. Search for window security in the Taskbar search box and click on the individual search result. Then, switch to the Virus & threat protection tab on the left side. Here you can find all the options you need.
Hope it helped!
Leave a Reply