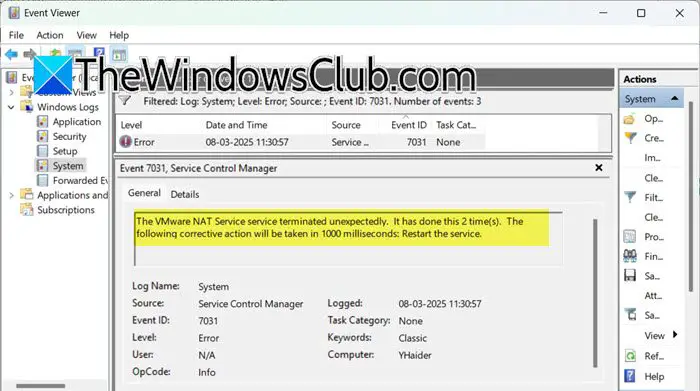
The VMware NAT Service allows your VMs to share the host computer’s IP address for internet access. It uses Network Address Translation (NAT) to enable communication between the virtual machines and external networks while keeping the virtual machines isolated from the host’s network. However, as of late, we have noticed some issues with the network and when investigating a bit, we saw a log that says that the VMware NAT Service service terminated unexpectedly with Event ID 7031.
The VMware NAT Service service terminated unexpectedly. It has done this 2 time(s). The following corrective action will be taken in 1000 milliseconds: Restart the service.
Fix Event ID 7031, The VMware NAT Service service terminated unexpectedly
To fix Event ID 7031, the VMware NAT Service service was terminated unexpectedly on Windows 11/10. You can follow the solutions mentioned here:
- Check the service status
- Change the Recover Option
- Reset NAT Network
- Disable Conflicting Program
- Reinstall VMware Workstation
Let us discuss them in detail.
1] Check the service status

As the error message clearly demonstrates, the VMware NAT Service causes this issue. Therefore, our first job should be to check whether the service is running. To do so, follow the steps mentioned below.
- Open the Services app by searching it out of the Start Menu.
- Now, look for “VMware NAT Service” and check if it is running.
- If the service is not running, you need to right-click on it, set the Startup type to Automatic, and click on Start.
- If the service is already running, you need to right-click on it and click on Restart.
Once you’ve done this, launch your virtual machine and monitor the Event Viewer. Hopefully, you won’t notice the event log this time.
2] Change the Recovery Option
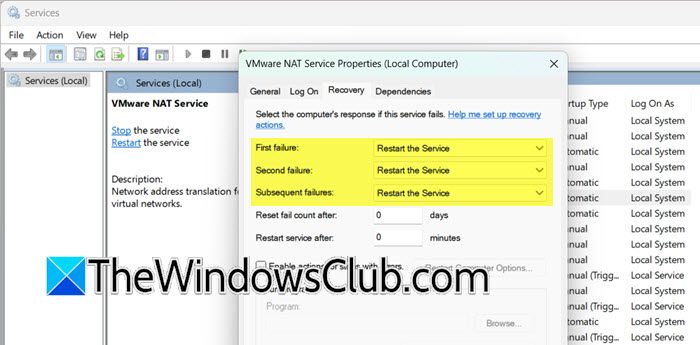
If you noticed that the VMware NAT Service was stopped in the Services app, we recommend you check and change its recovery option. Ideally, your service should restart or at least try to restart the moment it is terminated, according to the log, the service failed to do so. We can always manually start the service but in an organization, you can’t afford a blackout for such a long time. To change the recovery option, follow the steps mentioned below.
- Launch the Services app.
- Look for VMware NAT Service.
- Then, you need to right-click on the service and select Properties.
- Go to the Recovery tab, set at least First Failure and Second Failure to Restart the Service, and then configure Subsequent Failure based on your preference.
- Finally, click on Apply > Ok.
Once done, you can check if the issue is resolved.
3] Reset NAT Network
If you have made some alterations to the NAT Network setting, there is a high possibility that it is not compatible and is terminating the service. Even if you have not made changed directly to the NAT Network settings, any changes made to the network also alter it. Therefore, you need to reset the NAT Network settings using the following steps.
- Open the VMware Workstation.
- Click on Edit > Virtual Network Editor.
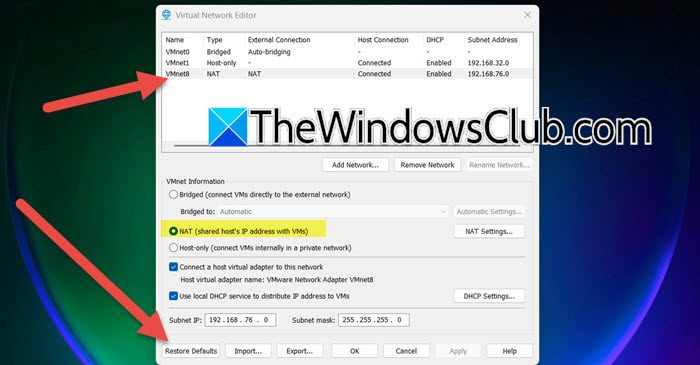
- Once the Virtual Network Editor wizard appears, look for the adapter with NAT enabled, you can click on them one-by-one, and check the selected option under VMnet Information.
- Now, click on Export, select the location where you want to store the exported file, and then save it. This step is optional, but we recommend it to prevent the loss of any configurations you have made.
- Then, click on Restore Defaults and click Yes when prompted.
Once you have reset the settings, open the VMware VM and check if the issue is resolved.
4] Disable Conflicting programs
If conflicting programs can affect VMware NAT, you should disable them temporarily and see if it helps. To find out, you can perform a Clean Boot. Disable all services except VMware ones, then start your system and open VMware Workstation. If there are no issues with the network and nothing is registered in the Event Log, enable services manually to find out what the actual cause is and remove it.
5] Reinstall VMware Workstation
If all else fails, your last resort is to uninstall VMware Workstation and then install the latest version of the same. This is going to kill two birds with one stone, address the corrupted program and replace it with a new fresh one, and get a new version that will not have this issue.
Hopefully, you can resolve the issue using the solutions mentioned in this post.
How do I fix my Event ID 7031?
To resolve the VMware NAT Service terminating unexpectedly with Event ID 7031, check if the service is running in the Services app and restart it if needed, ensuring the startup type is set to “Automatic.” Update the recovery options by configuring the service to restart upon failure. If network changes cause the issue, reset the NAT Network in the VMware Virtual Network Editor by restoring defaults.
How can I resolve the VMware NAT Service termination issue?
If the VMware NAT Service is terminated, restart the service and set its startup type to Automatic. Update recovery options to restart upon failure. Reset NAT network settings in VMware Virtual Network Editor. Disable conflicting programs via clean boot or reinstall VMware Workstation for a fresh setup.
Leave a Reply