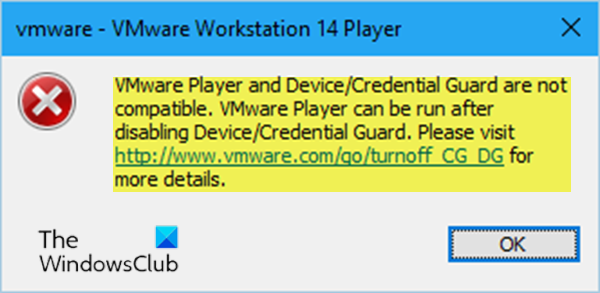
If when you try to power on the VM (Virtual Machine) inside VMware Workstation Player on Windows 11/10, you receive the error message VMware Workstation and Device/Credential Guard not compatible, then this post is intended to help you. In this post, we will present the solution you can try to help you resolve this issue.

When you encounter this error, the following full error message is displayed;
VMware Player and Device/Credential Guard are not compatible. VMware Player can be run after disabling Device/Credential Guard. Please visit http://www.vmware.com/go/turnoff CG DG for more details.
In Windows 11/10, Device Guard and Credential Guard are the new security features that are only available on Windows 11/10 Enterprise today. Device Guard is a combination of enterprise-related hardware and software security features that, when configured together, will lock a device down so that it can only run trusted applications. If it is not a trusted application, it cannot run. Credential Guard uses virtualization-based security to isolate secrets (credentials) so that only privileged system software can access them. Unauthorized access to these secrets can lead to credential theft attacks. Credential Guard prevents these attacks by protecting NTLM password hashes and Kerberos Ticket Granting Tickets.
The Pro version of Windows 11/10 ships with Hyper-V, the in-house virtual machine solution from Microsoft built-into Windows. However, if you enable Hyper-V, it also enables the Credential Guard. Disabling the Hyper-V also disable the Credential Guard.
VMware Workstation and Device/Credential Guard not compatible
Based on the error message, you can see it indicates VMware Player can be run after disabling Device/Credential Guard. So, if you’re faced with this VMware Workstation and Device/Credential Guard not compatible issue on Windows 11/10, you can try the 2-step solution below to resolve the issue.
- Disable Hyper-V (if enabled)
- Disable the Device Guard Policy via Registry Editor
Let’s take a look at the description of each step.
1] Disable Hyper-V (if enabled)
To disable Hyper-V, do the following:
- Press Windows key + R to invoke the Run dialog.
- In the Run dialog box, type appwiz.cpl and hit Enter to open Programs and Features applet.
- In Programs and Features, on the left-hand side, click Turn Windows features on or off.
- In the Turn Windows features on or off popup that appears, uncheck Hyper-V.
- Click OK.
Hyper-V will now be disabled from your computer.
- Restart the computer and on boot, proceed with Step 2.
2] Disable the Device Guard Policy via Registry Editor
Since this is a registry operation, it is recommended that you back up the registry or create a system restore point in case the procedure goes wrong. Once you have taken the necessary precautionary measures, you can proceed as follows to resolve the VMware Workstation and Device/Credential Guard not compatible issue.
- Press Windows key + R to invoke the Run dialog.
- In the Run dialog box, type regedit and hit Enter to open Registry Editor.
- Navigate or jump to the registry key path below:
Computer\HKEY_LOCAL_MACHINE\SYSTEM\CurrentControlSet\Control\DeviceGuard
- On the right pane, double-click the EnableVirtualizationBasedSecurity key to edit its properties.
If you don’t see the key, create it by right-clicking on a blank space on the right pane and then select New > DWORD (32-bit) Value. Rename the value name as EnableVirtualizationBasedSecurity and hit Enter.
- Input 0 in the Value data field and hit Enter.
- Next, navigate or jump to the registry key path below:
Computer\HKEY_LOCAL_MACHINE\SYSTEM\CurrentControlSet\Control\Lsa
- On the right pane, double-click the LsaCfgFlags key to edit its properties.
- Input 0 in the Value data field and hit Enter.
You can now exit Registry Editor and restart your system.
You can be able to disable Device Guard policy using the Local Group Policy Editor, as well.
Once you have completed the procedure and restarted your computer, the VM should be running fine.
Read next: VMware Workstation and Hyper-V are not compatible.
Leave a Reply