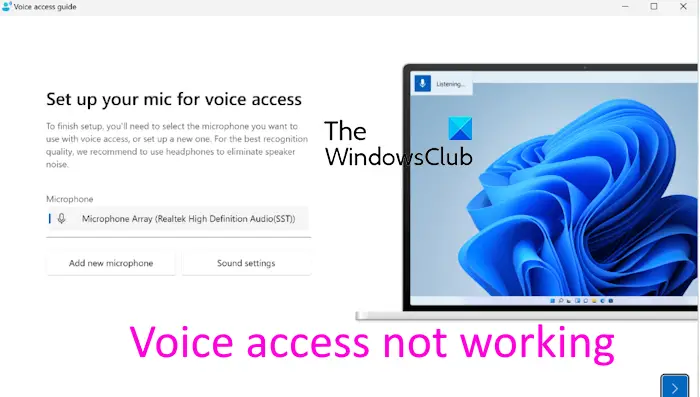
Is Voice access not working on your Windows PC? If so, this post will help you. Voice access is a Windows built-in feature that allows you to control your PC using voice commands and enter text using your voice. You can enable this feature using Windows Settings. Open Settings using Win+I and go to Accessibility > Speech to enable Voice access.

The Voice access feature seems to be not working for some Windows users. The problem might occur due to a lack of the necessary language pack, a damaged microphone, disabled microphone permissions, etc.
Voice access not working on Windows 11/10
If the Voice access feature is not working on your Windows PC, here are the solutions you can use to fix the problem:
- Make sure your PC has an active internet connection.
- Ensure your microphone is working correctly.
- Enable microphone access.
- Download the supported language pack for Voice access.
- Check related services.
- Try disabling Windows Speech Recognition.
1] Make sure your PC is connected to an active internet connection
If you are having difficulty while setting up the Voice access feature for the first time, you need an active internet connection to download the corresponding language files. Hence, if the scenario is applicable, you can check your network connection and make sure your internet is working fine.
However, once you configure the settings, you can use the Voice access feature offline without an internet connection.
2] Ensure your microphone is working correctly
Another potential cause of the issue could be your microphone. You must ensure that your microphone is in proper working condition physically. Connect it to a different device and see if it can take voice commands. You can also test the microphone on your Windows PC using Settings. And make sure it is correctly configured.
You can also try plugging your headset into a different USB port and see if it works fine.
Read: Voice Activation Troubleshooting in Windows.
3] Enable microphone access

You might have disabled microphone access for desktop and other apps, intentionally or unintentionally. Check if you see a “Microphone access denied” message. If so, you need to turn on microphone access for the Voice access feature. Here’s how you can do that:
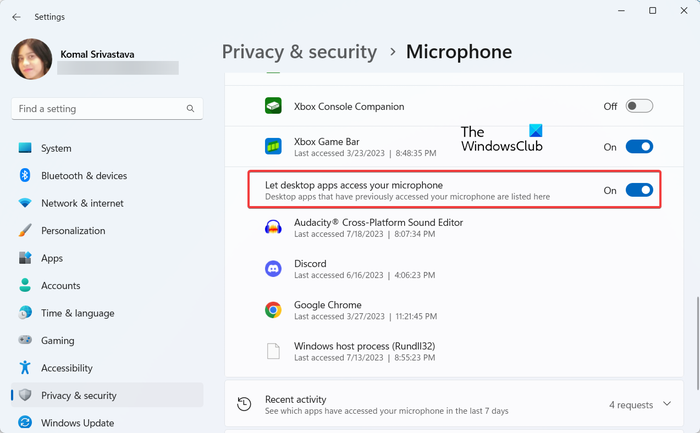
- First, open Settings using Win+I and go to the Privacy & security tab in the left-side pane.
- Now, under the App permissions section, select the Microphone option.
- Next, make sure the toggle associated with the Microphone access option is On.
- After that, scroll down and enable the Let desktop apps access your microphone toggle.
- Once done, the Voice access feature should work fine.
Read: Skype Audio or Microphone not working in Windows.
4] Download the supported language pack for Voice access
Voice access works only when you have downloaded and installed the correct language pack on your computer. It might be the case that the necessary language is missing which is why the tool is not working. If the scenario is applicable, download the required language pack to fix the issue.
Here’s how:
First, download the Speech.en-US.1.cab file from Microsoft and double-click on the file to open it.
Now, right-click on the zip file and select the Extract option. Then, extract the file at the desired location on your computer.
Once done, open the unzipped file and launch the installer by double-clicking on the MSIX file in the opened folder.
Next, in the installation wizard, press the Install button. If you have already installed the language pack, click on the Reinstall button to reinstall it.
When the installation is complete, close the installer window and check if Voice access is working properly.
Read: Fix Voice Typing not working in Windows.
5] Check related services

It might also be the case that the services necessary for features like Voice access and other microphone-based features are not running on your PC. Or, maybe they are stuck in a limbo state. Hence, if the scenario is applicable, start/restart the related services and then see if it helps resolve the issue. Here are the steps to do that:
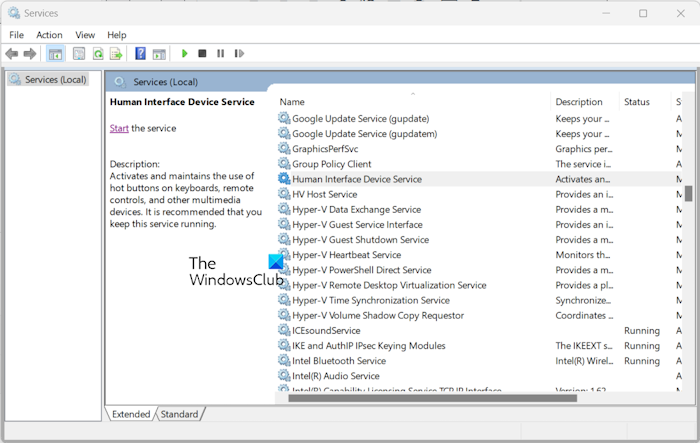
- First, open the Run command box using Win+R and enter services.msc in the Open box to open the Services app.
- Now, locate the Agent Activation Runtime service and click on the Restart button to start this service again. If it is not running, press the Start button.
- Next, repeat the above steps for Human Interface Device Service and Windows Audio Endpoint Builder services.
- Once done, check if you can use the Voice access feature correctly.
Read: Google Meet microphone not working on Windows PC.
6] Try disabling Windows Speech Recognition

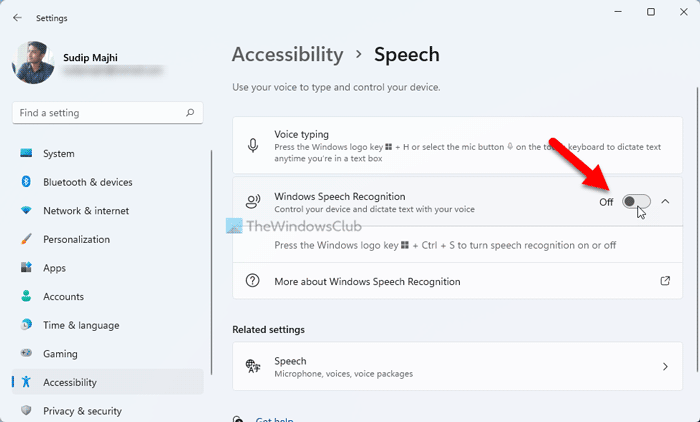
If you have enabled the Windows Speech Recognition feature along with Voice access, try disabling the former one and check if the issue is resolved. Windows Speech Recognition is the classic voice command feature, while the Voice access feature is the newer version of it. If you have enabled both, there might be some interferences and Voice access might not work correctly. So, turn off Windows Speech Recognition and see if the problem is resolved. Here’s how:
- First, open the Settings app and go to the Accessibility > Speech section.
- Now, switch off the toggle associated with the Windows Speech Recognition feature.
See: Fix Speech Diagnostic Calibrate Errors 0x80004003 or 0x800706BE?
I hope the issue will be fixed now.
Why is speech recognition not working?
There can be different reasons why Windows Speech Recognition is not working on your PC. The issue could be caused due to microphone issues, disabled microphone access permission, broken system files, corrupted or outdated drivers, or software conflicts. If you want to fix the issue, you can check your microphone and make sure it is working properly. Also, try re-enabling Windows Speech Recognition, checking the speech language, performing an SFC scan, or reinstalling the microphone driver.
How do I enable voice on Windows?
To enable or use voice recognition on Windows, open the Settings app using Win+I and go to the Time & language tab. Now, click on the Speech option, and under the Microphone section, click on the Get started button. In the opened Set up Speech Recognition wizard, follow the prompted instructions to correctly set up the voice recognition.
Now read: Fix Voice Recorder not working on Windows.
Leave a Reply