There are several VPN errors, but unlike many errors, VPN Error 812 is not very common that users may come across. However, just because this is an uncommon problem does not mean it cannot be resolved. This post will share some useful hacks to fix VPN Error 812. Keep reading:

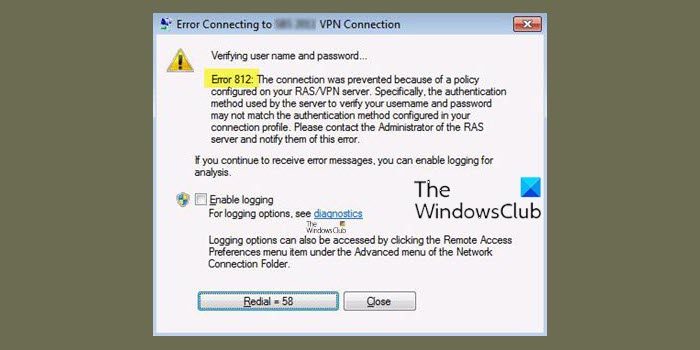
When you get this error, you will see the following message:
The connection was prevented because of a policy configured on your RAS/VPN server. Specifically, the authentication method used by the server to verify your username and password may not match the authentication method configured in your connection profile. Please contact the Administrator of the RAS server and notify them of this error.
The error mostly thwarts you from reestablishing a connection to the VPN after it has been disconnected. The error is related to the RSA/VPN server, as the message specifies.
Possible causes for VPN Error 812
Error 812 is a technical issue mainly caused by the server side. Let’s go through the possible reasons why this error occurs:
- This error code can pop up when the Client Connection Profile and the Server Network Policy do not match the Authentication Protocol.
- This can be a complicated situation when NPS does not update the value added to the “Tunnel Type” Condition in Network Policy.
Irrespective of the cause, do not worry; there are straightforward steps to help you resolve this error.
How to fix VPN Error 812 on Windows 11/10
If you want to fix Error 812, The connection was prevented because of a policy configured on your RAS/VPN server. Then you have to try the following methods:
- Set up the External DNS
- Check the Tunnel Type Settings
- Contact your Network Administrator
- Contact your VPN Provider.
Connection prevented because of a policy configured on RAS/VPN server
1] Set up the External DNS
To set up the External DNS, follow these steps:
- In the Windows Search Box, type ‘ncpa.cpl’ and press ‘Enter’
- This will take you to see the ‘network connections’
- Right-click on the VPN connection that you are currently using and click ‘Properties’ from the option
- Change the ‘Primary DNS’ to ‘Domain Controller’
- Now set up the External DNS by accessing the Secondary DNS
- Alter the range of the Primary DNS to ‘8.8.8.8’
- Check and apply the settings and restart your VPN
Now check if the VPN error is fixed.
2] Check the Tunnel Type Settings
In case option 1 doesn’t work in your case, you can try the following steps:
- Obtain the ‘L2TP OR PPTP’ value by selecting ‘Tunnel Type’ Condition as the additional value
- Now hit ‘Apply’ and close the ‘Network Policy’
- Try connecting the VPN client
- Revert the Network Policy to the ideal value for ‘Tunnel Type’ Condition, here it is “PPTP” only.
- Select ‘Apply’ and close the ‘Network Policy’
Now try connecting your VPN client. The above steps should have set your network policy, confirming that the VPN works properly.
3] Contact your Network Administrator
Sometimes, VPN Error 812 can occur due to inadequate access rights.
In such a situation, you are advised to contact your network administrator. Ask them to update your permissions and ensure all protocols and network authentication permissions are correct.
4] Contact your VPN Provider
When none of the above fixes work, the best possible thing is to contact your VPN Provider. Every VPN developer has a list of the most common issues affecting their products; hence in most cases, they will understand the issue and have a corresponding solution.
The above fixes of VPN Error 812 work for Windows 11 and Windows 10 too.
Do you have other workarounds for the VPN Error 812? Share it with us in the comments section below!
Related errors:
- VPN Error 789, The L2TP connection attempt failed
- VPN Error 720, Error connecting to a VPN Connection
- Error 13801, IKE authentication credentials are unacceptable.
Leave a Reply