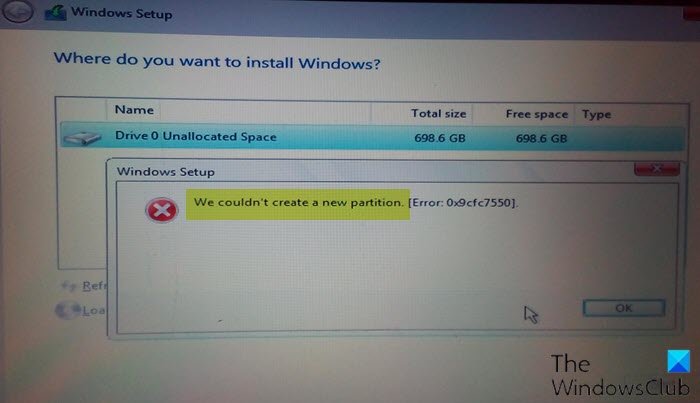
If you’re encountering We couldn’t create a new partition error message on your Windows computer while installing Windows 11/10, then the solution we will present in this post is intended to help you remediate this issue.

This error might happen for any number of reasons, even on perfectly functioning SSDs and HDDs.
We couldn’t create a new partition, Errror 0x9cfc7550
If you’re faced with this issue during Windows Setup, you can try our recommended solutions below and see if that helps to resolve the issue.
- Disconnect additional Hard Drives, USB drives, and Memory cards
- Create a new partition using DiskPart
- Set the intended Windows Install partition as primary/active
- Use USB 2.0 Drive.
Let’s take a look at the description of the process involved concerning each of the listed solutions.
1] Disconnect additional Hard Drives, USB drives and Memory cards
When using multiple hard drives, the first and foremost thing to do is disconnect all hard drives except the primary hard drive where you install Windows. Once you disconnect all your other hard drive(s), try to install Windows again and see if you can proceed with the installation without encountering the error.
Also, other than the actual Windows 10 bootable USB drive, if you have any other USB drives and memory cards connected to your system, then on rare occasions Windows might confuse these drives for regular hard drives. Disconnect those additional USB drives or memory cards and try installing Windows again.
2] Create a new partition using DiskPart
This solution will delete all files on your selected hard drive, so use it on a new computer that doesn’t have any files on it, or only if you have a backup available.
To run DiskPart, do the following:
- Start Windows 10 setup using bootable USB or DVD.
- If you get the error message close the setup and click the Repair button.
- Choose Advanced tools and then select Command Prompt.
- When Command Prompt opens, enter the following command:
start diskpart
- Now enter the following command:
list disk
You should see the list of all hard drives connected to your computer.
- Find the number that represents your hard drive and enter the command below and be sure to replace 0 with a number that matches your hard drive.
select disk 0
- Next, input the following lines and press Enter after each line:
disk 0 clean

disk 0 create partition primary

disk 0 active

disk 0 format fs=ntfs quick

disk 0 assign
After running the commands, type exit and hit Enter to close Command Prompt.
Start the installation process again and see if it completes successfully. If not, try the next solution.
3] Set the intended Windows Install partition as primary/active
You might encounter this error if the partition you are trying to install Windows 10 is not active. To make a partition active, you need to have access to the command prompt.
Do the following:
- Start DiskPart as shown above.
- Next, type the command below and hit Enter
list disk
You should see the list of available hard drives.
- Locate your hard drive and enter the command below and be sure to replace 0 with a number that represents your hard drive.
select disk 0
- Next, type the command below and hit Enter
list partition
The list of available partitions will appear.
- Now, locate the partition on which you want to install Windows 10 and type the command below and hit Enter. Replace 1 with a number that matches your partition.
select partition 1
- Lastly, type the command below and hit Enter to set the partition as primary/active.
Active
Type exit and press Enter to exit the Command Prompt.
Start the installation process again and check if the problem is resolved. Otherwise, continue with the next solution.
Read: Windows Setup couldn’t create a new partition or locate an existing one
4] Use USB 2.0 Drive
If you are using a USB 3.0 bootable drive to install Windows, then it might also be a reason why Windows is giving you this specific error. To solve it you can try using a USB 2.0 drive.
Hope this helps!
Leave a Reply