If webcam redirection is not working in Windows 365 Cloud PC or if you’re unable to use the integrated webcam over the remote desktop connection, then this post will be able to help you resolve the issue.

Essentially, device redirection is a technology that allows an end user to plug an external device into a USB port on their endpoint and access the device from within a remote desktop or application. Users that want to use external devices like a webcam, will have to use the Microsoft Remote Desktop app to access Cloud PC to share the video. However, if the video is not enabled and only 2-way audio is in use, then a web browser can be used instead.
Fix Webcam redirection not working in Windows 365 Cloud PC
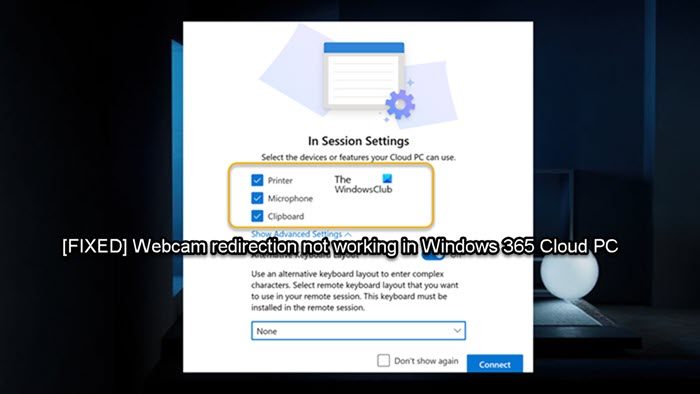
In a typical scenario, you may be unable to get a webcam to redirect via a remote connection on a Windows 365 Cloud PC. In a reported case, neither using the Microsoft Remote Desktop app nor the web browser doesn’t seem to detect the camera. Also, reportedly, in the Edge browser, affected Cloud PC users allowed the site microphone and camera access, and it did allow the microphone to start working but in Teams or Zoom, the camera is not detected at all — there is just no option for webcam as you can see in the lead-in image above. In other cases, users were unable to use the integrated webcam over a remote desktop connection even though in remote desktop connection client options, local resources have been enabled but are still not able to connect.
If the webcam (video) redirection is not working in Windows 365 Cloud PC, the suggestions provided below can help you resolve the issue.
- Sign out or restart the Cloud PC
- Enable Audio and Video Redirection for Windows Virtual Desktop
- Configure Group Policy to allow video capture redirection
- Get support in the Microsoft Endpoint Manager admin center
Let’s see these suggestions/fixes in detail.
1] Sign out or restart the Cloud PC
The first time a user signs into their Cloud PC, Microsoft Teams will be installed if the connection is established using the Remote Desktop client for Windows. After the installation, the optimizations to redirect audio and video to your local Windows endpoint won’t work. In this case, the user must close Teams and sign out from or restart the Cloud PC to activate the Optimized status.
Read: Windows 365 Cloud PC Setup and Known Issues with Fixes
2] Enable Audio and Video Redirection for Windows Virtual Desktop

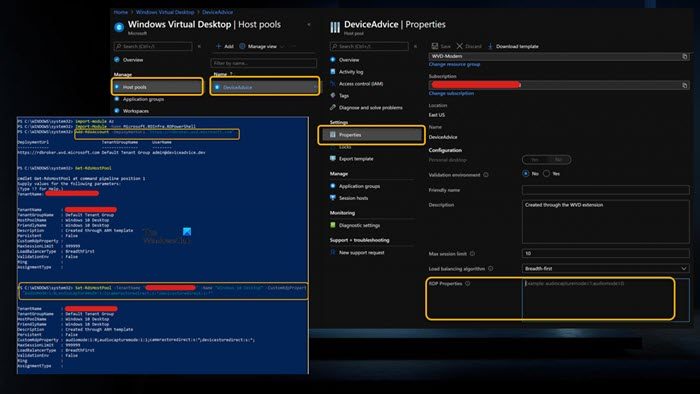
To enable Audio/Video redirection, we’ll need to set the following custom RDP properties using PowerShell or via the Azure Portal:
audiocapturemode:i:1enables audio capture from the local device and redirects audio applications in the remote session.audiomode:i:0plays audio on the local computer.camerastoredirect:s:*redirects all cameras.
To do this, you’ll need to run the following two PowerShell commands against your WVD tenant. You must have the WVD PowerShell and AZ modules installed, which are also required for standing up WVD.
Add-RdsAccount -DeploymentUrl "https://rdbroker.wvd.microsoft.com"
Set-RdsHostPool -TenantName <tenantname> -Name <hostpoolname> -CustomRdpProperty "audiomode:i:0;audiocapturemode:i:1;camerastoredirect:s:*;devicestoredirect:s:*"
You can use this command to configure any of the RDP settings, which can be found at docs.microsoft.com. Alternatively, if you created your tenant via the Azure Portal, you could configure the setting without using PowerShell because there’s a pane in Azure to change the properties. For this, do the following:
- Open the Windows Virtual Desktop pane in the Azure Portal.
- Navigate to Host Pools > YourHostPool > Properties > RDP Properties.
- In the RDP Properties field, enter the following line:
audiomode:i:0;audiocapturemode:i:1;camerastoredirect:s:*
- Click Save.
Note that this requires the WVD Desktop Client because it’s not supported over HTML5. Once that’s configured, if you launch the Remote Desktop client for Windows you will see Remote Audio and Camera working in Teams. If you prefer to use Media Optimizations instead of Audio & Video Redirection which seems to provide a better experience – because instead of redirecting the audio/video connection to the WVD instance, the local remote desktop client is handling the experience, then you can refer to this Microsoft documentation. Similarly, you can use multimedia redirection (MMR) as described in this Microsoft documentation to redirect the media content from Azure Virtual Desktop to your local machine for faster processing and rendering in Microsoft Edge or Google Chrome browsers.
Read: Fix Remote Desktop Error Code 0x3000046 on Windows
3] Configure Group Policy to allow video capture redirection

The AVD clients integrated with RX420(RDP) and RX-RDP+ devices (firmware version 2.4.5 and higher) support the native (functional) redirection of USB webcams. To ensure proper webcam redirection, you will need to configure Group Policy to allow video capture redirection on both client and server machines. In addition, each user under Settings > Privacy > Camera needs to allow the applications to access the camera.
For client configuration, the following GPOs need to be applied on a client PC:
Computer Configuration > Administrative Templates > Windows Components > Remote Desktop Services > Remote Desktop Connection Client > RemoteFX USB Device Redirection
- Set the Allow RDP redirection of other supported RemoteFX USB devices from this computer policy to Enabled. Ensure that the RemoteFX USB Redirection Access Rights are set to Administrators and Users for this GPO.
Computer Configuration > Administrative Templates > Windows Components > Remote Desktop Services > Remote Desktop Session Host > Device and Resource Redirection
- Set the Allow audio and video playback redirection policy to Enabled.
- Set the Do not allow supported Plug and Play device redirection policy to Disabled.
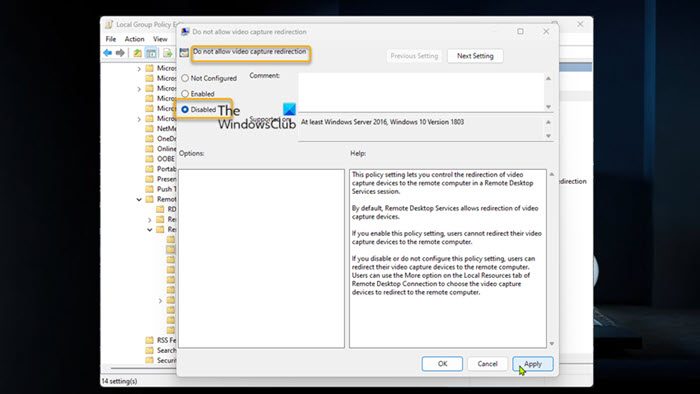
- Set the Do not allow video capture redirection policy to Disabled.
For server configuration, the following GPOs need to be applied on the RD Session Host:
Computer Configuration > Administrative Templates > Windows Components > Remote Desktop Services > Remote Desktop Session Host > Remote Session Environment > RemoteFX for Windows Server 2008 R2
- Set the Configure RemoteFX policy to Enabled.
Computer Configuration > Administrative Templates > Windows Components > Remote Desktop Services > Remote Desktop Session Host
- Set the Do not allow supported Plug and Play device redirection policy to Disabled.
The GPOs above are required for the web camera’s redirection – first make sure that web camera redirection works over the native mstsc.exe client. For example, on a client PC on LAN, open Remote Desktop Connection > Local Resources > More tab and see if the Webcam shows up under Other supported RemoteFX USB devices so that you can select it. If the device is shown, select the Webcam and continue. Otherwise, it indicates that RemoteFX isn’t enabled on the workstation, or the USB device isn’t being detected.
Read: Group Policy not replicating between Domain Controllers
4] Get support in the Microsoft Endpoint Manager admin center
If webcam redirection is still not working in Windows 365 Cloud PC, to get more help or additional/further assistance, you can head over to learn.microsoft.com/mem/get-support to review your different support options from within the Microsoft Endpoint Manager admin center.
I hope this helps!
Read next: Remote Desktop Printer redirection not working in Windows
How do I connect my webcam to the Cloud?
To enable your Webcam/Microphone inside the Cloud Desktop, follow these steps:
- Login to your Cloud desktop.
- Click on the Windows icon at the bottom left of the screen and type in Privacy Settings.
- Click on Privacy Settings.
- In the Privacy Settings window, in the App Permission section in the left sidebar, click on Camera.
To enable or get the camera to work on Azure Virtual Desktop, go to the settings of Remote desktop connection in the General tab, go to the connection setting, select your RDP file of azure VM, and enable both checkpoints inside the video catalog that include the webcam option.
Why is RDP not picking up my webcam?
If RDP is not detecting your camera, it’s likely the device has not been granted access, or possibly, the camera is faulty and needs to be replaced. You can check the camera privacy settings and make sure to allow access to the camera on your device. Toggle the button for the Allow apps to access your camera option. Also, make sure that the Allow desktop apps to access your camera option is enabled.