Hard Faults are an accepted component of how contemporary computers analyze storage-related information. In cases where a memory block is obtained from the Page File (Virtual Memory) rather than the physical memory (RAM), a hard fault occurs. As a result, Hard Faults should not be regarded as error situations. A high number of hard faults, on the other hand, is frequently an indication that the system in issue needs extra physical memory (RAM). In this post, we are going to discuss what is Hard Faults Per Second and how you reduce them.

What are Hard Faults Per Second and how do they occur?
A Hard Fault occurs when the address memory of a certain application is no longer in the main memory slot but has been moved out to the main paging file. This compels the system to hunt for the absent memory on the hard drive rather than retrieving it from physical memory (RAM). When this occurs, your system will experience slowdowns and excessive hard disk activity. However, the extent to which you’ll experience the symptoms of a hard fault is greatly dependent on the remaining components of your PC.
Hard Faults are an extremely common OS behavior. A mean of 20 or fewer hard faults is typical. However, when the Hard Faults count is continually high, it frequently results in a hard disc thrash. When software fails to respond, but the hard drives continue to operate at full speed for a lengthy period of time, your computer is experiencing disc thrash.
Fortunately, because most systems have a sufficient amount of RAM, hard drive thrashing is not as prevalent as it was a few years ago. However, it is not unusual for a Windows system with insufficient resources to display a large number of hard faults per second, particularly when multiple apps are operating at the same time.
In the event that the device is suffering many hard faults per second, it is typically due to either of 2 factors:
- It is performing a task that is using a lot of resources, or,
- It is in desperate need of a RAM expansion.
How do you reduce Hard Faults Per second?
To reduce Hard Faults Per Second, you can either follow one or all suggestions mentioned below.
- Expand your system’s RAM
- Resource Monitor for Checking Hard Faults
- Restart the Pagefile.sys
Let us talk about them in detail.
1] Expand your system’s RAM
In case you experience a high number of hard faults, examine your system setup to make sure it has sufficient RAM to accommodate the Windows version that’s currently running.
2] Resource Monitor for Checking Hard Faults

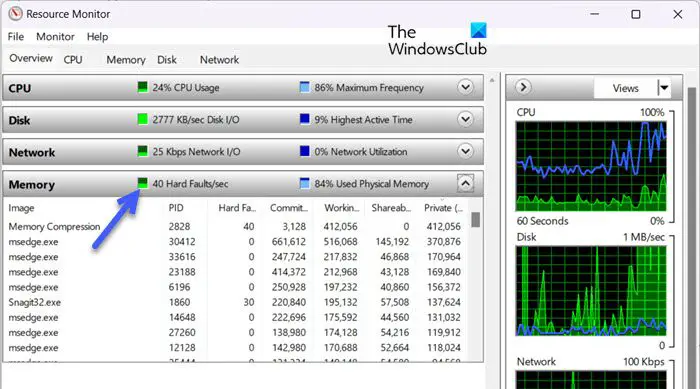
Next up, we need to examine if there is a particular app that’s causing Hard Faults and then either terminate or remove it completely. Following these steps must help you resolve the issue.
- Open the Run dialog by clicking the Win + R keys
- Type resmon & press Enter
- Go to the Memory tab & choose the Hard Faults section.
Now you can determine which process is causing your system to slow down. - Right-click the process that has too many hard faults per second (more than 100)
- Now choose End Process Tree (it will end the operation and any linked processes)
You may remove this software if it is no longer necessary for you. There will be some Hard Fault Per Second in Resource Monitor, but this doesn’t mean that they, do remember that they are an inevitable side effect of the way that contemporary computers handle information stored in memory at the moment. A memory block is said to have had a hard fault when it was forced to be fetched from the Page File (Virtual Memory) rather than the physical memory (RAM).
Read: How to use Resource Monitor in Windows 11
3] Reset the Pagefile.sys
In practice, you would experience lesser memory Hard Faults per second system the more RAM you install. By disabling and re-enabling the pagefile.sys file, you may lower the frequency of hard faults each second. You may follow the steps mentioned below.
- Open Windows File Explorer by hitting the Win+E keys.
- Right-click This PC (in the left pane) and choose Properties.
- Hit on the Advanced system settings option.
- Navigate to the Advanced tab in the pop-up window.
- In the Performance segment, select the Settings menu then navigate to the Advanced tab.
- In the Virtual Memory section, click on the Change button.
- Now un-select the checkbox that shows Automatically manage paging file size for all drives.
- Now choose the drive you want to disable the pagefile.sys file
- Click on No paging file
- To commit these changes, you must first click Set, then the OK button
- To make the changes take effect, you’ll need to restart your computer.
Once you have disabled the feature, go ahead and enable it using the same procedure.
Also Read: Why is my RAM usage so high when nothing is running?