Clean Boot in Windows 11/10 lets you start your PC or laptop with only the most essential files and services required by the OS. This action enables, the system to run in a stress-free environment with minimal hardware resources usage. If you experience a lag in performance, it is also possible that there’s a failing hardware device. In such a cse you may perform a Hardware Clean Boot.
How to do a Hardware Clean Boot in Windows 11/10
A Hardware Clean Boot is different from the usual Clean Boot State. In it, the hardware components that are not necessary for a system to run are disabled through the Device Manager. So, to start a Pc in Hardware Clean Boot:
- Open the Run dialog box.
- Type devmgmt.msc and press Enter.
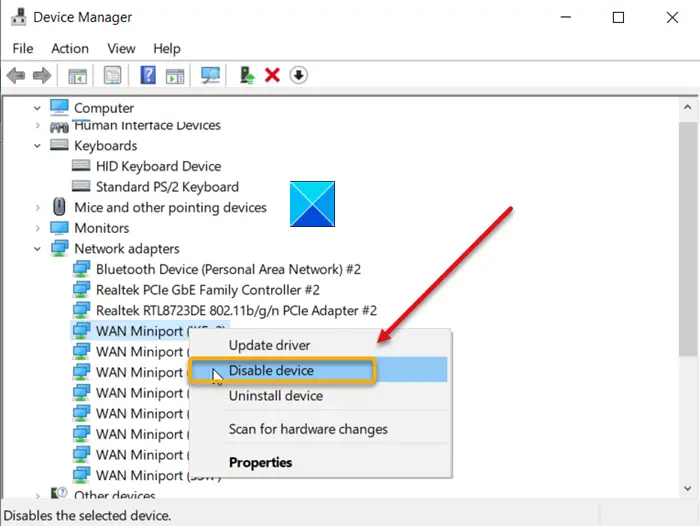
- Inside the Device Manager, disable the drivers for devices that are not in use.
- Right-click the devices and choose the Disable option.
We strongly recommend you back up your important files before performing this procedure because sometimes, even your best-laid plans can go awry. So, better safe than sorry!
Press Win+R in combination to open the Run dialog box.
In the box that appears, type devmgmt.msc and hit the Enter key.

Now, inside the Device Manager disable the drivers for the following devices by right-clicking them and choosing the Disable option.
- Display Adapters.
- DVD/CD-ROM drives.
- Modems.
- ports.
- Sound, video, and game controllers.
- Network Adapters.
- USB Devices and controller.

For USB Devices and controller, disable the entry only when USB/Wireless Mouse or Keyboard is not in use or you are NOT using it.
Also, try disabling the options one by one. Once done, you enable each option one after the other by rebooting.
This will help you pinpoint the issue and find the devices or hardware that is likely causing the issue. Take the necessary action to resolve it!
Leave a Reply