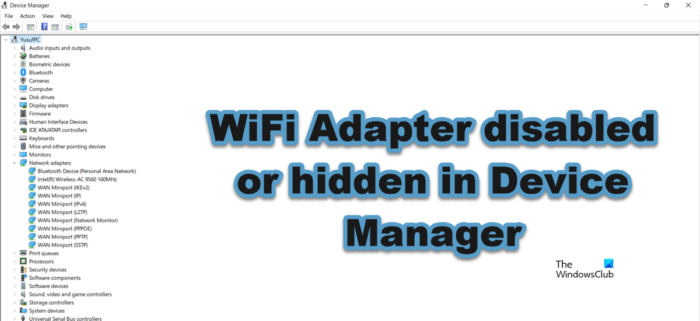
Some Windows users have complained that the WiFi Adapter is disabled or hidden in Device Manager on their Windows computer. When they launched Device Manager and checked the Network Adapter section, they couldn’t find the driver. In this article, we will discuss this issue and see how you can find or install the WiFi adapter if it is hidden, disabled, or missing from your computer.

Fix WiFi Adapter disabled or hidden in Device Manager
If your WiFi Adapter is disabled or hidden in Device Manager, the first thing you should do is check if there are any updates available, also, do check the Optional Updates and install the available updates. Even though these are not the main solutions, they can sometimes do the job for you; also, it is a good practice to keep your drivers up-to-date. If updating doesn’t work for you, try the following solutions to resolve the issue.
- Restart your computer
- Enable Show Hidden Devices
- Make sure that the device is not disabled
- Enable WiFi Adapter from Control Panel
- Run Network Troubleshooter
- Scan for hardware changes
- Install the device from the manufacturer’s website
- Repair System Files
Let us talk about them in detail.
1] Restart your computer
When you restart the computer, Windows automatically installs the required drivers and resolves the issue for you. So, the first thing you should do is restart the operating system and see if that helps. If this doesn’t work, move to the next solution.
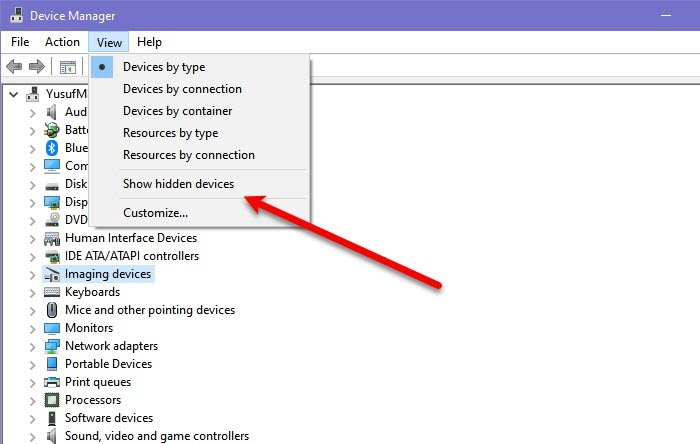
2] Enable Show Hidden Devices

Next, let us check if your WiFi Adapter is hidden because that could be the case in this scenario. To do so, follow the prescribed steps.
- Launch Device Manager.
- Go to View > Show hidden devices.
- Expand Network adapters and check if you can see the WiFi adapter.
If the adapter is hidden, this will do the trick. If something else is at play here, move to the next solution.
3] Make sure that the device is not disabled
Maybe you have manually disabled the device, or it gets disabled for some reason. You can manually enable the device from the Device Manager pretty easily. Just follow the prescribed steps to do so.
- Launch Device Manager.
- Go to Network adapter and expand it.
- Right-click on your WiFi driver and select Enable device (you will only see this option if your device is disabled).
This should do the job for you.
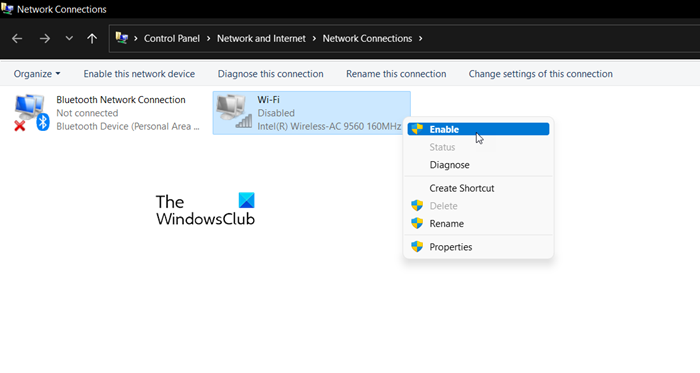
4] Enable WiFi Adapter from Control Panel

After making sure that the driver is not disabled in the Device Manager, we should check the Control Panel to confirm the same. So, launch Control Panel and go to Network & Internet > Network & Sharing Center. Now, click on the Change Adapter Settings option from the right panel. If your WiFi Adapter is disabled, right-click on it and select Enable. Once you are done with this procedure, reboot your computer and check if the issue is resolved.
5] Run Network Adapter Troubleshooter

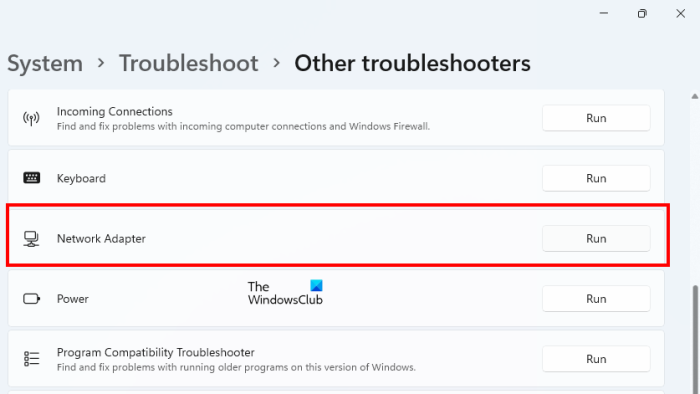
If there is something else at play here, our first solution is to run the Network Adapter troubleshooter, a built-in Windows utility that allows the user to scan and repair the issue at cause. To do the same, follow the prescribed steps.
Windows 11
- Launch Settings by Win + I.
- Go to System.
- Navigate to Troubleshoot > Other troubleshooters.
- Click on the Run button associated with Network Adapter.
Windows 10
- Open Settings.
- Go to Update & Security.
- Click on Troubleshoot and then on Additional troubleshooter or Find troubleshooter.
- Finally, select Network Adapter and click on Run this troubleshooter.
In both cases, you must follow the on-screen instructions to complete the job. Once you have installed the driver, check if the issue is resolved.
6] Scan for hardware changes
Another way to install the missing driver is to use Device Manager. We are going to scan your computer for connected hardware and install the missing one. So, in this case, since your WiFi driver is missing but its hardware is connected, in theory, your driver should be installed automatically. To do the same, follow the prescribed steps.
- Hit Win + X and then select Device Manager from the list.
- Right-click on Network adapters.
- Select the Scan for hardware changes option.
This will scan for connected drivers and install the required one.
7] Install the device driver from the Manufacturer’s website
We can also try downloading the driver from the manufacturer’s website and see if that helps. You won’t have to do this very often as Windows tends to automatically download and install drivers. However, because in this case, your driver is missing, and restarting doesn’t work, you need to install WiFi drivers on your computer. Once done, check if the issue is resolved.
8] Repair System Files
Maybe your system files are corrupted and because of this, it cannot detect the connected WiFi adapter. You need to repair the system files using Installation Media and see if that works. One can repair the files using the SFC and DISM tools that can be triggered using Command Prompt.
Hopefully, you can resolve the issue using the solutions mentioned in this article.
Also read: Network Adapter missing or not showing.
PCIe WiFi card not detected or showing up in Device Manager
If your PCIe Wi-Fi card isn’t showing up in Device Manager, check Physical Connection or try a different slot, ensure that the Wi-Fi card is properly seated in the PCIe slot, reinstall the Driver, and then use the Scan for Hardware Changes option.
How do I enable Wi-Fi disabled in Device Manager?
If your WiFi is disabled in Device Manager, it is pretty easy to enable it. All you need to do is launch Device Manager (you can also do the same from the Start Menu), expand Network adapters, right-click on your WiFi driver, and select Enable Device. You can enable a disabled driver, be it WiFi or something else.
How do I unhide hidden Network Adapters?
To unhide Network Adapters, launch Device Manager, and click on View > Show hidden devices. This will unhide all the drivers including Network Adapters. However, if the network adapters are hidden or disabled, you must check the solutions mentioned in this post.
Leave a Reply