If you have no WiFi after upgrading to Windows 11/10, installing Windows Update or installing a Feature Update, or getting disconnected randomly, this post will show you how to try and fix the problem.
WiFi disappeared after Windows Update
Fix No WiFi after Windows Update
After installing Windows Updates or a Feature Upgrade, you may find no wireless networks are available. Wired Ethernet connections may also not function properly if you use a built-in Ethernet adapter or a USB Ethernet adapter. This could occur due to the presence of unsupported VPN software.
If WiFi option has gone missing or has disappeared after Windows Update, and only Ethernet option is available, take these steps to fix the issue.
- Check Router setting
- Reset your Wi-Fi router
- Disable VPN software
- Disable Firewall software
- Ensure that Airplane mode is Off
- Check networking protocols
- Update WiFi driver
- Run Network and Internet Troubleshooter
- Uninstall that particular Windows Update
- Use the Network Reset feature.
WiFi does not work after installing Windows Update
1] Check the Router setting
If you do not see the Wi-Fi network’s name at home, ensure your router is set to broadcast the network’s name.
2] Reset your Wi-Fi router
Restart your computer. Reset your Wi-Fi router and see if that works.
Read: Network devices not showing after Windows Update
3] Disable VPN software
Next, check if you have any VPN software installed on your computer. If it does not support Windows 11/10, uninstall it and see if it resolves the issue. If it does, visit the software vendor’s website and download the version supporting Windows 11/10.
4] Disable the Firewall software
Disable your Firewall and see if that is the cause.
5] Ensure that Airplane mode is Off
Open Settings > Network & Internet > Airplane mode. Ensure that Airplane mode is Off.
Read: Fix WiFi problems on Windows.
6] Check networking protocols
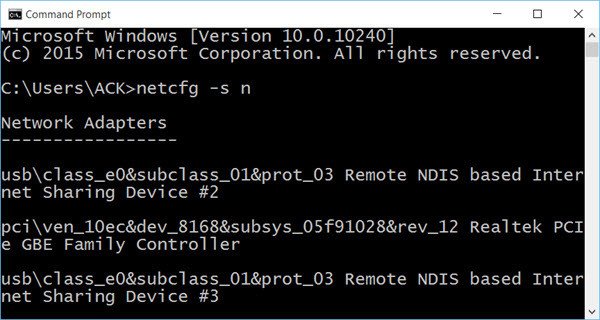
To resolve this issue, KB3084164 recommends the following. First, in a CMD, Run netcfg –s n to see if DNI_DNE is present in the resulting list of networking protocols, drivers, and services. If so, proceed.
Run the following commands, one after the other, in an elevated command prompt:
reg delete HKCR\CLSID\{988248f3-a1ad-49bf-9170-676cbbc36ba3} /va /f
netcfg -v -u dni_dne
If this does not work for you, create a system restore point and then Run regedit to open the Registry Editor. Navigate to the following registry key:
HKEY_CLASSES_ROOT\CLSID\{988248f3-a1ad-49bf-9170-676cbbc36ba3}
If it exists, delete it. It does the same thing as the ‘reg delete‘ command.
7] Update the WiFi driver
You may want to update your WiFi driver and check. You may run Windows Update or use Devices Manager.
Alternatively, you may uninstall your WiFi driver and then download and install the WiFi driver using the manufacturer’s website.
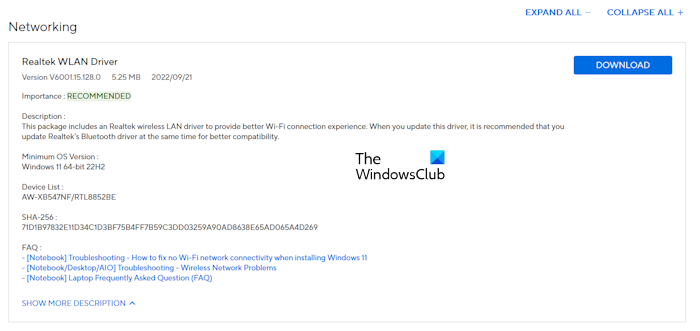
Download the latest version of your WiFi card driver from the official website of your computer manufacturer and install it manually. You can connect your system to the internet via an ethernet cable to download the latest version of your WiFi card driver. If your computer does not have an ethernet port, you have to use another working computer to download the driver.
Read: WiFi keeps disconnecting in Windows
8] Run Network and Internet Troubleshooter
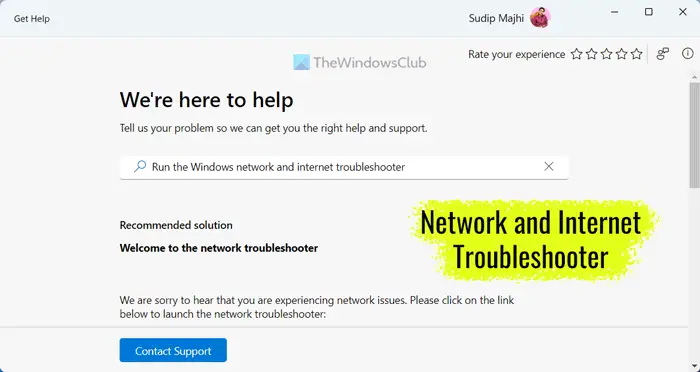
The first step is to run the automated troubleshooter. Your issue is related to the Internet. Therefore, running the Network and Internet Troubleshooter can be helpful for you. You can launch the Network and Internet Troubleshooter via the Get Help app or through Windows 11 Settings.
9] Uninstall that particular Windows Update
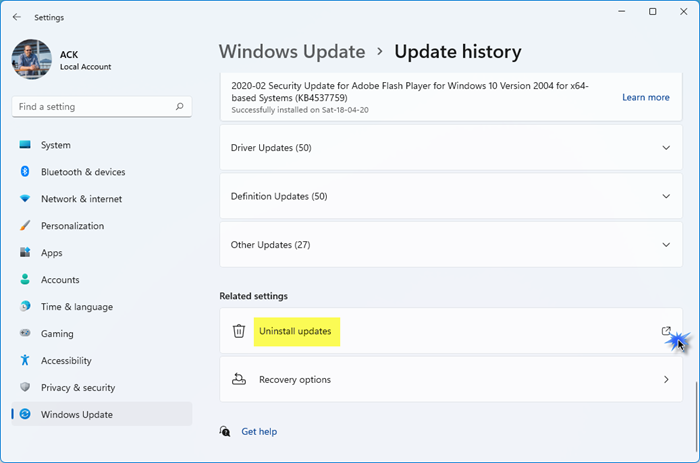
You can also uninstall that particular Windows Update after which this problem started occurring on your system.
10] Use the Network Reset feature
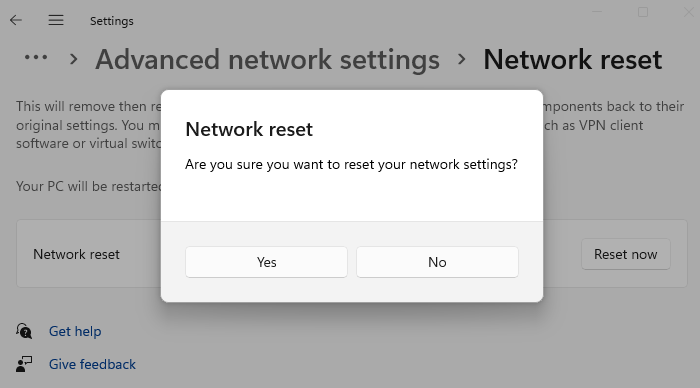
The Network Reset feature in Windows will help you reinstall Network adapters and reset Networking Components to their original settings.
You must connect your PC to your router using an Ethernet cable to check this. Next, open your browser, type your wireless router’s IP address in the address bar, and hit Enter. Sign in and visit the Wireless Settings page. Ensure that the settings Enable SSID Broadcast, Wireless SSID broadcast, etc., are set to On.
The issue could affect Surface devices too.
Let us know if anything helps you. Also, see if Demóstenes comment below helps you.
Related read: Limited WiFi connection problem in Windows.
How do I know if my WIFI adapter is faulty?
The easiest way to determine if the hardware is faulty is to connect it to another working PC or Laptop. If everything is working as expected, and you can connect with a wifi connection, then the problem is on your Laptop. If not, you must check with the OEM and get a replacement if it’s still under warranty.
Why has the Wi-Fi icon disappeared from Windows?
If the WiFi icon has disappeared in Windows, check your system Settings. In Windows 10, you can hide the WiFi icon on the Taskbar through Windows Settings. However, this feature is not available in Windows 11. A corrupted network adapter can also cause such an issue.
How to reinstall the Wi-Fi driver?
Reinstalling the WiFi driver is easy. Uninstall your system’s currently installed WiFi driver via Device Manager, then restart your computer. Windows will automatically install the missing or uninstalled driver on restart. Alternatively, you can download the latest WiFi driver version from the manufacturer’s website and install it manually.
Read next: Fix Slow Internet speed on Windows.
Can a WiFi adapter stop working?
Yes, the adapter may stop working. The hardware is constantly running and can temporarily suspend its operation unless restarted. If it happens occasionally, it is still ok; however, if the frequency increases, the hardware faces an internal issue. You can connect with the service center and get it checked. At times, there are minor issues that can be rectified with a small budget.