Accounts Settings in Windows 10 allows you to manage your Microsoft Account, set your user picture, change sign-in options, change password, change PIN, set a picture password, connect your PC to work or school, add family members, and set your sync settings.
Accounts Settings in Windows 10
To open Accounts Settings in Windows 10, click on the Start menu > Windows Settings > Accounts. The Accounts Settings window will open and you will see 5 categories under it.
- Your info
- E-mail and accounts
- Sign-in options
- Access work or school
- Sync your settings
Let us now look in detail how one can make all the Account related changes.
1. Your Info
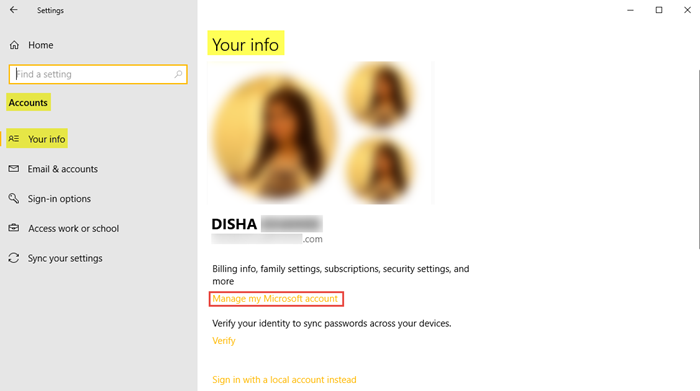
This section lets you upload or change your picture. By clicking on Manage my Microsoft Account takes you to your online account where you can manage all your personal details, your devices, your security and privacy tied with your Microsoft account.

Click on Verify to verify your identity to sync passwords across your devices. You can also sign in with a local account.
Read: Complete Guide to Manage User Accounts in Windows 10.
2. E-mail and Accounts
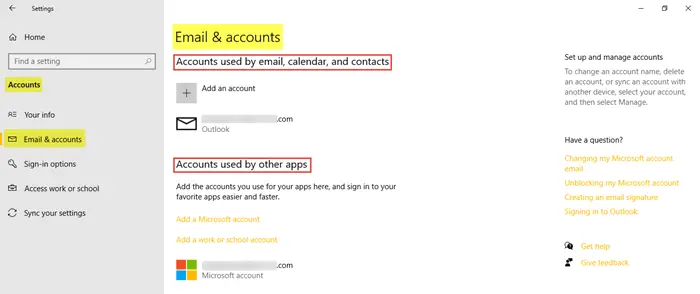
You will find the already existing email accounts as well as you can add a new one here. To do so, click on Add a Microsoft account and follow the desired steps. You can also add a work or a school account here.
Read: How to obtain List, Settings & Details of all User Accounts using the command line.
3. Sign-in Options
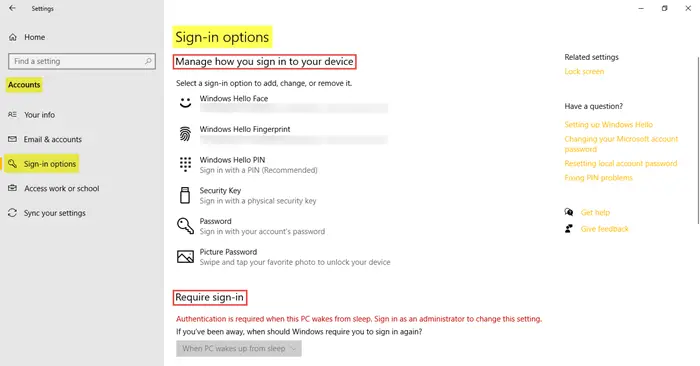
You can see six sign-in options here – Windows Hello Face, Windows Hello Fingerprint, Windows Hello Pin, Security Key, Password, and Picture Password. You can choose the sign-in option you prefer. You can choose whether or not you want to make Windows 10 require password on wake-up from Sleep or never.
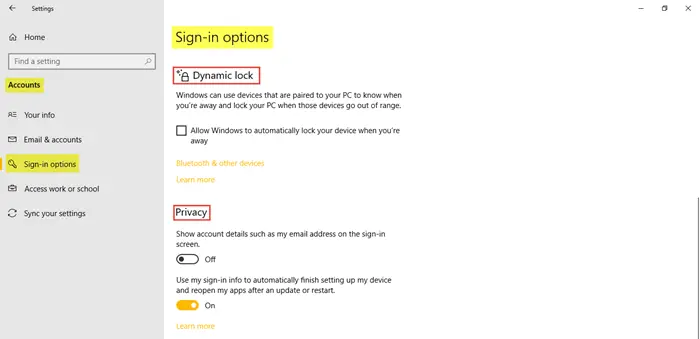
You can make use of the Dynamic Lock if you wish to allow Windows to automatically lock your device when those devices go out of range. Under Privacy, turn on the two additional settings as required. The Related Settings takes you to the Lock screen settings in Personalization.
Read: How to set up Windows 10 in Kiosk Mode using Assigned Access.
4. Access Work or School
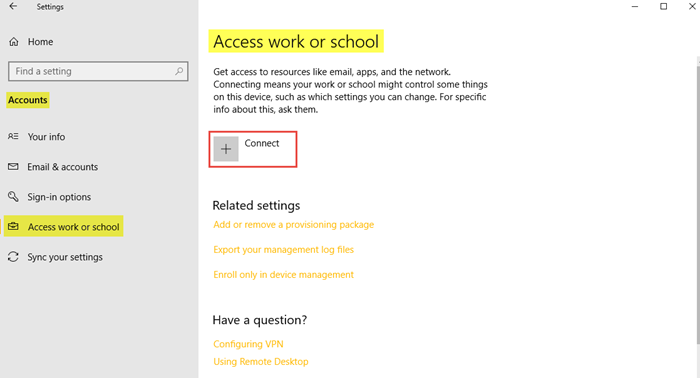
This allows you to connect your work or school account so that you share your files and resources. The Related settings here show the options to add or remove a provisioning package, to export your management log files, and to enroll only in device management.
5. Sync Your Settings
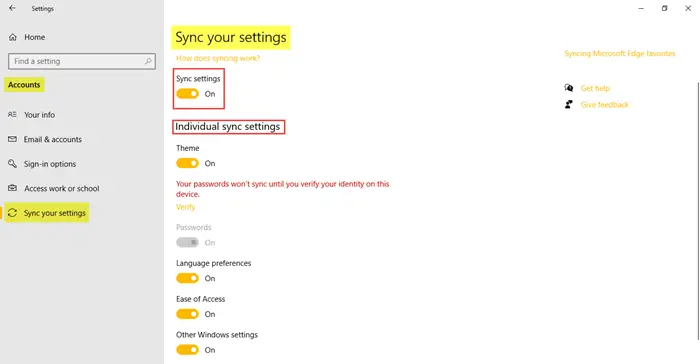
This section lets you manage the Sync settings of your Windows 10 PC. You can sync your PC to other devices using your Microsoft account. If you turn it on, you can sync your desktop theme, browser settings, and passwords, language preferences, ease of access settings, and your Windows settings across all your Windows 10 devices. You have to be signed in with your Microsoft account.
You can see the Individual sync settings, where you can manage the sync for each item separately. Click on Verify to sync your passwords if you wish to.
This is how you can manage and make changes to your Account by accessing your Accounts Settings in your Windows 10 PC.
To learn more about all that Windows 10 has to offer you, take a look at the Windows 10 Personalization Settings, Privacy Settings, Devices Settings, Time and Language Settings and the Update and Security settings.
How can I Disconnect or Remove work account in Work access section?
I need to make this binding to another account. But I can not do that because that already have a work account
Hello Artem, this problem is still now active (as per status on 06.08.2016), he can’t help you because he is unable to fix this problem, truly.
I am sorry I do not have any idea – but I think you would have to deactivate it from the AD or MDM, and then add a fresh account.
I would be happy if you could help him, rather than just spamming.
Windows 10 has just finished updating. I now have to both put my password in and then my pin. How to remove one of them?
The change password setup is confusing. I went to change the password and it changed my Microsoft account password, but the PC password didn’t change. I don’t see a separate section to change the PC password. How do I do this?
For a friend – no, seriously – she has been locked to of her hotmail account, seemingly permanently, and so has set up a gmail account. Her log in screen still displays her hotmail address – can she change this?