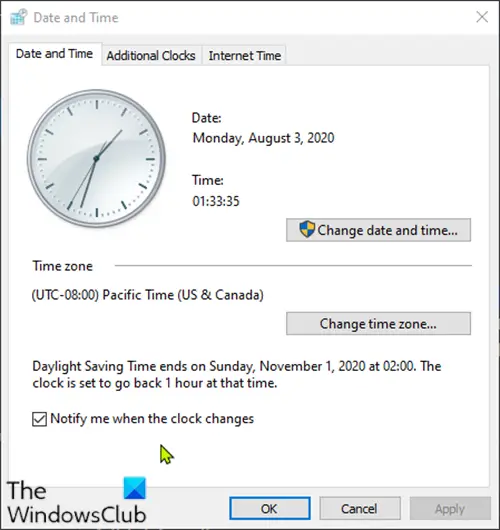
If you notice that your Windows 11/10 computer does not update Daylight Savings Time (DST) change or that the Windows Time has been changed automatically from DST to Normal Time and changes again every time the PC starts or wake up from hibernate, then this post is intended to help you. In this post, we will provide the appropriate solution you can try to remediate this anomaly.

Windows 11/10 does not update Daylight Savings Time
The computer uses the date and time to identify when files are created, modified, or deleted; to manage email messages and catalog system restoration points, and to manage many other important system-related activities.
If you’re faced with this issue, you can follow the instructions outlined below to resolve the issue.
Do the following:
- Right-click the displayed time in the system tray/notification area on the right end of the taskbar, and then click Adjust date/time.
- In the Date & time window that appears, under the Related settings section, click the Add clocks for different time zones link.
- Click the Date and Time tab on the windows that pop up.
- Click the Change time zone.
- Make sure the correct time zone is selected. Place a checkmark next to Automatically adjust clock for Daylight Saving Time, if it is not already selected.
- Click OK.
- Next, click Change date and time button.
- Click the small left and right arrows in the calendar to select a month and year, and then click a day within the month.
- Change the time by entering the hour, minute, AM or PM, or by clicking the up-down arrow buttons.
- Click OK when the time matches the current time.
The time zone, date, and time have been set!
Related: Adjust for daylight saving time automatically is grayed out.
Now, you’ll need to Synchronize time regularly with the Internet Time Server.
Windows can automatically synchronize the date and time with a time server to make sure the accurate time is displayed.
Follow these steps to enable Internet Time:
Note: If your computer is part of a domain, the Internet Time feature is not available. Contact your System Administrator for clock synchronization information.
- Right-click the displayed time in the taskbar, and then click Adjust date/time.
- In the Date & time window that appears, under the Related settings section, click the Add clocks for different time zones link.
- Click the Internet Time tab on the window that pops up.
- Then, click Change settings.
If you are prompted for an administrator password or confirmation, type the password or provide confirmation.
- Now, make sure that Synchronize with an Internet Time server is checked.
- Next, make sure the computer is connected to the Internet and click the Update Now button.
The computer will now connect to an Internet server and updates the time on the computer.
Note: If the computer fails to receive an update from the selected Internet Time server, a message opens stating that an error has occurred. Select a different server and try again.
- Click OK.
Internet Time is now enabled on your computer!
The issue should now be resolved. However, if you’re still having problems with the clock showing the wrong time when the PC switches from Normal time to Daylight Savings Time (DST), make sure to uncheck the Notify me when clock changes option.
I hope this helps!
Related post: