Does your Mouse click twice automatically when you single-click? If your mouse keeps double-clicking on a single click randomly, here are a few things you need to take a look at to fix your problem. This problem can be traced to hardware, software, or even drivers. Some Windows users have encountered this mysterious problem of mouse double-clicking at a random time. This weird problem hampered the workflows in the middle and produced the task far beyond intended. This problem is analogous to where a single left click will cause a false double click, leading to the execution of a different activity than the task undertaken.
Windows Mouse clicks twice automatically
If your mouse is double-clicking, you may need to do the following:
- Check the mouse on another system. Maybe the hardware is defective.
- Test the mouse on multiple programs. Maybe a particular program is creating issues.
- Check the Mouse Properties
- Reinstall the Mouse & Touch Drivers
- Run the Hardware Troubleshooter
- Troubleshoot in Clean Boot State.
While the issue is incredibly frustrating, we discuss in this article some solutions to resolve the problem.
Mouse keeps double-clicking on single click in Windows 11/10
If your Mouse keeps double clicking automatically in Windows 11/10 even when you click once, follow these suggestions to resolve the issue:
1] Select Double-click to open an item in Control Panel
Open File Explorer Options in the Control Panel.
Under the General tab, Click items as follows section, click on the radio button that reads Double-click to open an item (Single click to select).
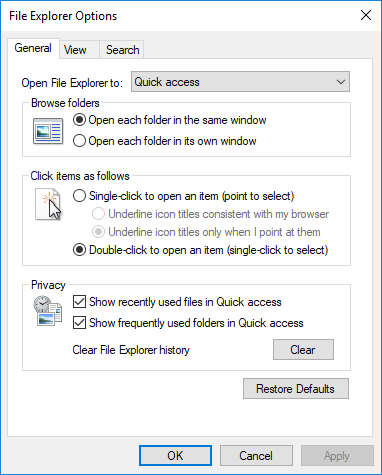
Click on Apply and OK.
Read: Double-click does not open files & folders in Windows.
2] Reinstall the latest Mouse driver
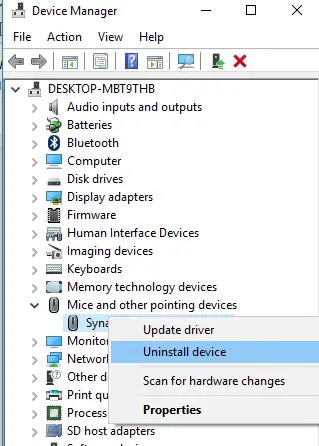
Open the Quick Access menu by pressing Win+X. Go to Device Manager from the list of menu.
Search and locate Mice and other pointing devices from the list on the left side of the window.
Expand Mice and other pointing devices.
Right-click on the driver and click on Uninstall.
Restart the computer.
If the drivers aren’t installed automatically on restarting the PC, go to the computer manufacturer website and install the latest drivers.
Read: How to disable Mouse Acceleration.
3] Run the Hardware and Devices Troubleshooter
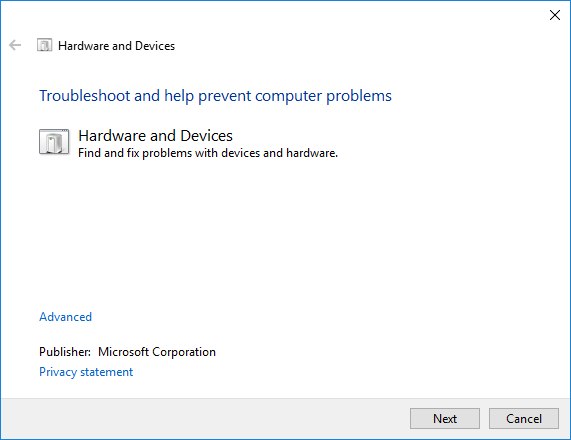
The Hardware and Device Troubleshooter is an automated tool that will assist in identifying issues with hardware and other devices. The troubleshooter also provides the details on how to fix them. The following steps will guide you to run the troubleshooter.
Open Run dialog by pressing Win+R.
Type the Control Panel to open it for you and Click Ok.
Click on Troubleshooting.
Under Hardware and Sound, click on Configure a device. This will open a new window for troubleshooting.
Click on the Next button to run the Hardware and Device troubleshooter. Wait till the scan is finished.
If there is an issue found, a report will be presented. Choose the one you want to fix and click on the Next button. The troubleshooter will resolve the issue if any.
4] Update the Touch drivers
Press Windows + X key on the keyboard.
Go to Device Manager.
Right-click your mouse devices/driver.
Click Update Driver Software and then follow the steps in the wizard that appears.
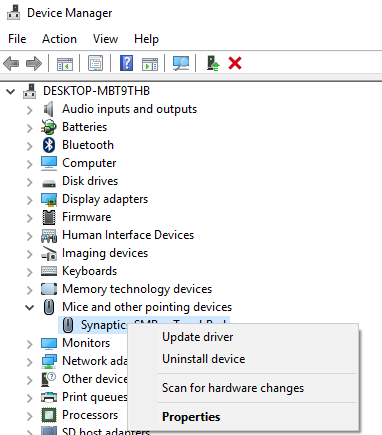
Restart the computer and check.
5] Troubleshoot in Clean Boot State
A Clean Boot helps to overcome the software conflicts and checks if any third party application is conflicting on the system. When you start the computer in clean boot, the computer starts by using a pre-selected minimal set of drivers and startup programs, and because the computer starts with a minimal set of drivers, some programs may not work as you expected.
Clean-boot troubleshooting is designed to isolate a performance problem. To perform clean-boot troubleshooting, you must take a number of actions, and then restart the computer after each action. You may need to manually disable one item after another to try and pinpoint the one that is causing the problem. Once you have identified the offender, you can consider removing or disabling it.
Follow these steps to perform a clean boot.
Press the “Windows + R” key to open a Run box. Type msconfig and click OK.
Go to General tab and click on the radio button for Selective startup.
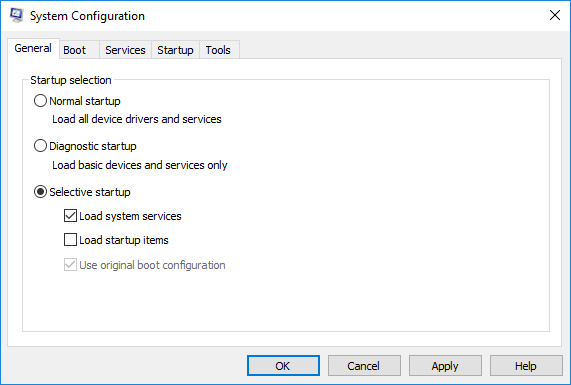
Untick the checkbox with the Load startup items.
Go to the Services tab.
Select the Check box that says Hide all Microsoft services.
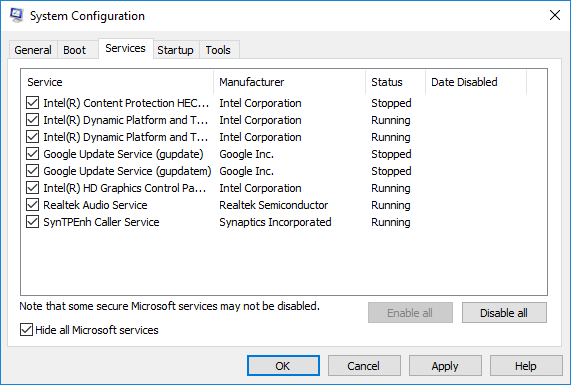
Click Disable all.
Go to the Startup tab and Click Open Task Manager.
On the Startup tab, right-click each enabled startup item and select Disable.
Click OK and Restart.
After troubleshooting, reset the computer to return to a normal startup mode by following these steps.
Open the Run prompt by pressing the “Windows + R” key.
Type msconfig and click OK.
Go to the General tab and select Normal startup.
Go to the Services tab and untick the checkbox that says Hide all Microsoft services.
Click Enable all.
Go to the Startup tab and Click Open Task Manager
Enable all of your startup programs.
Click OK and Restart.
If the above solutions don’t help, try to check for the latest Windows Updates. Sometimes installing the updates may fix the problems. Also, the problem arises if you have not installed the drivers properly or if you are running an incompatible driver. In this case, install the drivers in compatibility mode.
Why is my mouse double-clicking when I only single click?
A wrong Mouse setting, corrupted mouse driver, or a damaged mouse button can make this issue appear. Follow the suggestions in this post to fix the issue.
How do I stop my mouse from double-clicking Windows?
This has been known to help many. See if it helps you too. Open File Explorer Options in the Control Panel. Under the General tab, Click items as follows section, click on the radio button that reads Double-click to open an item (Single click to select).
Related: Mouse left-click button not working on Windows 11/10.
Leave a Reply