The Network Adapter is a crucial device for the smooth running of network connections on the Windows operating system. It is sometimes referred to as the interface for a computer network because it sends and receives data on wired and wireless connections.
At times you may find that the Network Adapter is missing on your Windows 11/10 computer. Being unable to access the internet is a significant effect, and you won’t see any device when you click on the Connectivity icon on your taskbar.
If you are experiencing this issue for the first time, you should try rebooting your PC first. For computers connected with an Ethernet cable, unplugging the cable and reconnecting it usually resolves the problem. If these don’t work, continue reading for more methods to solve it. Many other reasons could be the cause of this error; the most common of which are:
- Wrong settings after a system upgrade.
- Outdated, corrupted, or incompatible network adapter drivers on your device.
- Your device is infected with a virus or malware.
Network Adapter missing or not showing in Windows 11/10
If you’re unable to connect to any network because the network adapter is missing or not showing, the following solutions can help you repair it:
- Uninstall/Rollback the network driver.
- Show hidden devices.
- Troubleshoot the network adapter.
- Reset your network.
- Clean up network devices.
- Reset Winsock from CMD
- Other suggestions.
1] Uninstall/Rollback network driver
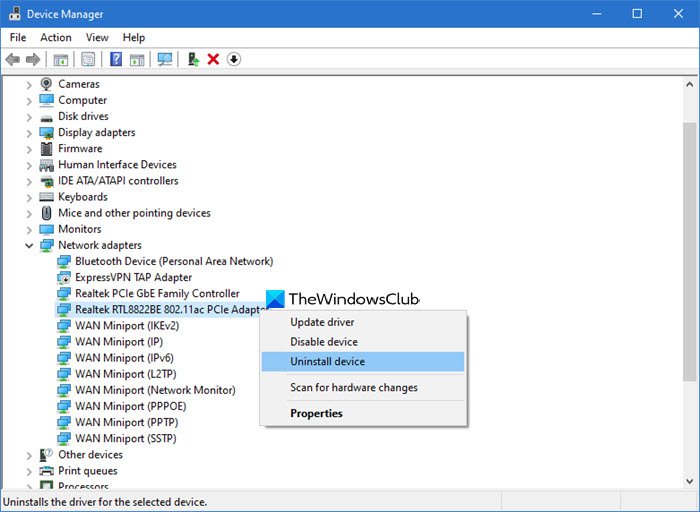
Most times, a corrupted or poorly installed Network Driver could be a cause of the aforementioned error. A simple uninstall or rollback could solve the issue. If you’ve tried restarting your PC or reconnecting your network and weren’t able to solve it, try this solution.
Steps to Uninstall Network Adapter
- Right-click on the Windows button then select Device Manager.
- Expand Network adapter.
- Locate the specific adapter
- Click Uninstall device > Uninstall.
Steps to roll back the network driver
- Right-click on the Windows button.
- Click on Device Manager.
- Go to Network Adapter.
- Browse through and right-click on a particular adapter.
- Click Properties then select the Driver tab at the top. Next, click on Roll Back Driver and follow all on-screen instructions.
Related read: Windows could not find a driver for your network adapter.
2] Show hidden devices
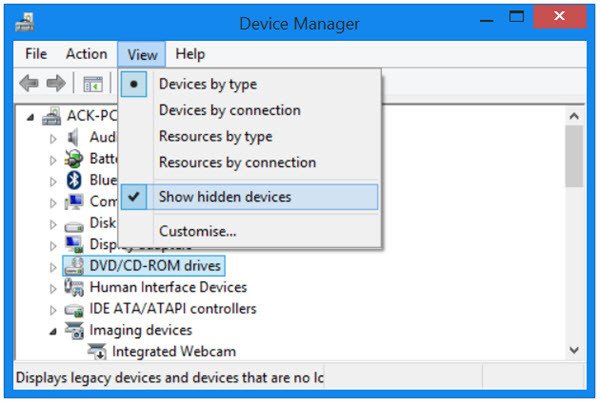
Sometimes Windows may hide your network adapters in the Windows Device Manager, and this may also cause the missing network adapters. Follow the steps below to unhide them.
- Right-click on the Start button and select Device Manager.
- Click on View and select the Show hidden devices option.
- Allow for a few seconds and then check again.
Read: Windows did not detect a properly installed network adapter
3] Troubleshoot the network adapter
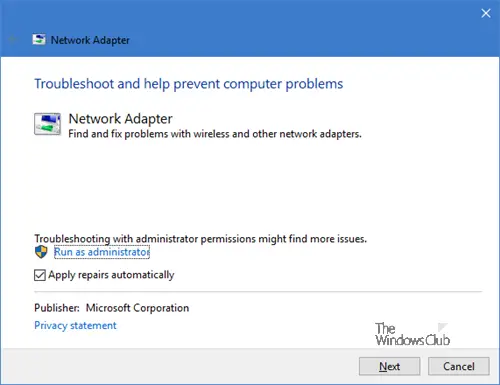
Windows has a troubleshooting feature that could help determine what is causing the error. Follow the steps below to diagnose the reason for the error.
- Press Windows + I then select Update & Security.
- Tap on Troubleshoot from the left pane then choose Network Adapter under the Find and Fix other problems section.
- Click Run the troubleshooter and wait for the process to complete.
To bring it up directly, from the WinX Menu, open the Run box and execute the following command:
msdt.exe /id NetworkDiagnosticsNetworkAdapter
4] Reset your network
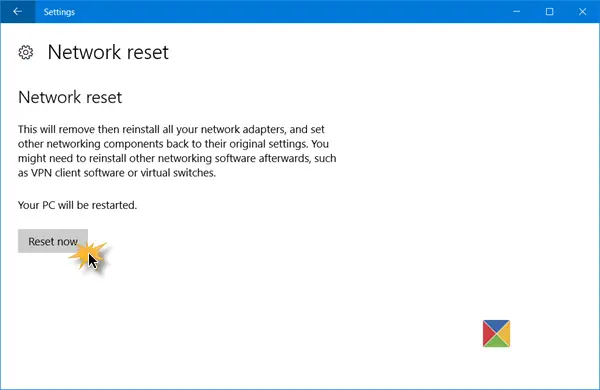
You could also reset your Network. Many users have attested to this method solving the Windows 10 Network Adapter Missing error.
Open Windows Settings app > Network & Internet. Ensure that Status remains selected in the left pane, then scroll down and select Network to reset on the right pane.
Click on Reset now to confirm.
This will reinstall Network adapters and reset Networking Components to default.
5] Clean up network devices
Carrying out a Network cleanup of your device using Command Prompt may help resolve this issue, follow the steps below.
Press Win + R, type cmd.
Press CTRL+SHIFT+ENTER to launch Command Prompt in administrator mode.
Type the following code into the command prompt and hit ENTER to run it:
netcfg-d
Restart your machine.
Related: How to check Network Adapter Speed on Windows.
6] Reset Winsock from CMD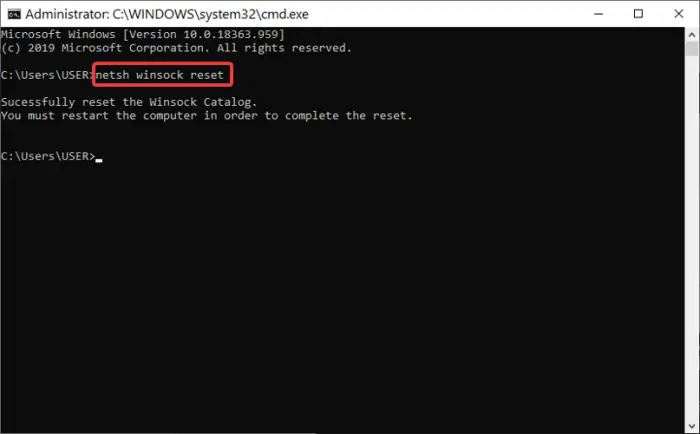
The next solution will be to reset Winsock from your command prompt by following the steps below.
Open Command Prompt with administrative control.
Type in the following code into the command prompt interface and hit Enter:
netsh Winsock reset
Close the command prompt and restart your computer.
7] Other suggestions
You could reconnect your WiFi. Ensure you completely delete it before reconnecting it to your computer.
Consider disabling any active VPN on your device and temporarily disabling your Antivirus.
Confirm if the physical network button is still working and try upgrading your system to the latest version.
Any of these could help solve the error. Hope something here helped you.