The Settings app in Windows 11/10 offers you a search bar that lets you quickly search for any setting. However, some users have reported that the Search Bar in Windows Settings is not working, with the settings themselves not getting indexed. Even if you search using the taskbar search bar, you will not see any settings listed. It may not find Control Panel or Settings app items or simply show no results. If you are facing any issues, try these solutions.
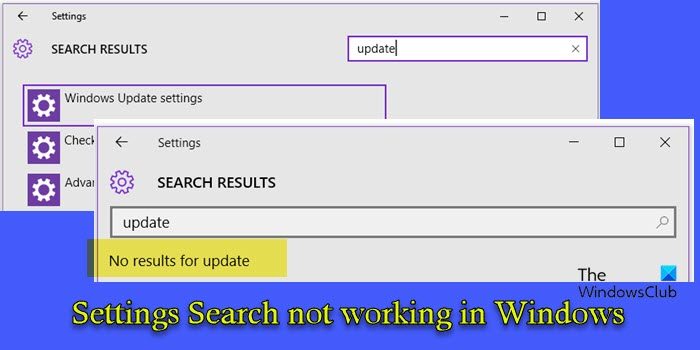
Search in Settings app not working in Windows 11/10
If the Search Bar in Windows Settings is not working on your Windows 11/10 PC, use these fixes:
- Enable indexing for the ‘LocalState’ folder.
- Run the Search and Indexing Troubleshooter.
- Reset the Settings app.
- Rebuild the search index.
Let us see this in detail.
1] Enable indexing for the ‘LocalState’ folder
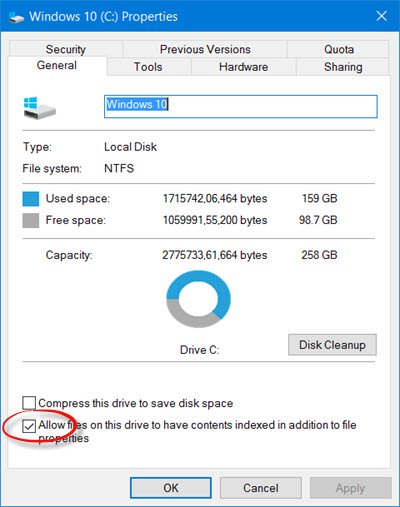
First of all, open your Computer folder, right-click on your system Drive which is ‘C:’, and select Properties. Ensure that the Allow files on this drive to have contents indexed in addition to file properties box is checked. If not, select it and then select Apply changes to subfolders and files.
Now, open the following folder location:
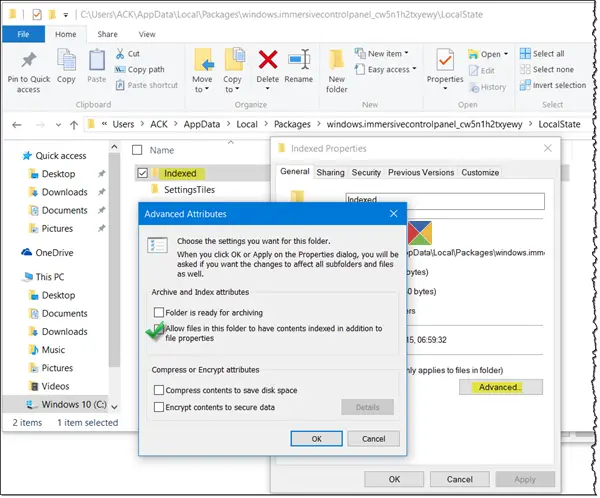
C:\Users\<username>\AppData\Local\Packages\windows.immersivecontrolpanel_cw5n1h2txyewy\LocalState
Here, right-click on the Indexed folder, and select Properties.
Next, click on the Advanced button and check the Allow files in this folder to have indexed in addition to file properties setting.
If it is already checked, uncheck it and click OK. Then again check it and click OK > Apply and exit.
Restart your computer and see if it has helped.
2] Run the Search and Indexing Troubleshooter
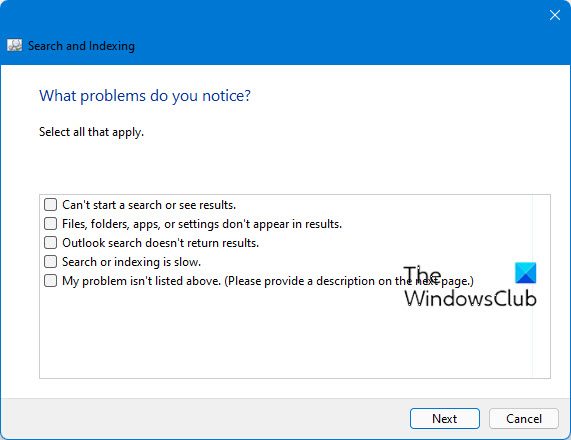
The Search and Indexing Troubleshooter is a built-in tool that can help diagnose and fix common issues related to the Search feature and the indexing of files on a Windows computer.
Press Win+I to open the Settings window. Navigate to Privacy & security > Searching. Locate Indexer troubleshooter under ‘Related settings’ and click on it. The troubleshooter will appear. Select the issue, click Next, and follow the on-screen instructions for assistance.
3] Reset the Settings app
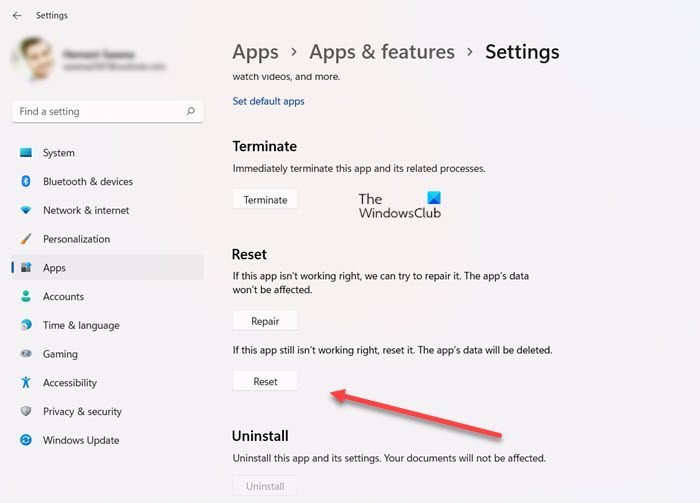
Next, try resetting the Settings app. This will restore the app to its default state, clearing any corrupt files or misconfigurations that might be causing the search functionality to malfunction.
Type ‘settings’ in the Windows Search bar. Click the ‘App settings’ option under the Settings app on the right side of the search results. The Settings window will open. Scroll down and click the Reset button.
4] Rebuild the search index
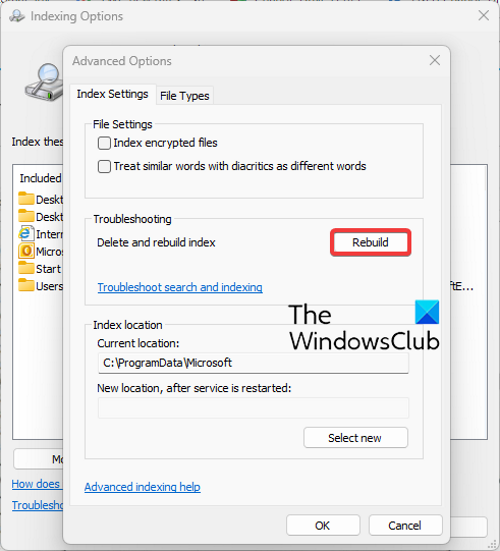
Over time, the search index can become corrupt or outdated, leading to issues with finding items or displaying the search results. By rebuilding the search index, Windows can potentially fix problems related to missing or incomplete search results.
If this does not help, you may want to run System File Checker, repair System Image, or update Windows and see if that helps.
If you have any queries, please let us know in the comments section below.
Why is Search for apps Settings and Documents not working in Windows 11?
If the search for apps, settings, and documents is not working in Windows 11, you can rebuild the search index. Go to Settings (WIN+I), then Privacy & security > Searching Windows > Advanced indexing options > Advanced > Rebuild > OK. This refreshes the search index, fixing potential issues.
Why is my Settings app not working on Windows 11?
If the Settings app is not working on Windows 11, re-register it using Windows PowerShell. Open PowerShell as an administrator by searching for it in the Windows Search bar, then enter the command Get-AppxPackage windows.immersivecontrolpanel | Reset-AppxPackage to resolve the issue.
Why is my search option not working in Windows 11?
If the search function is not working on your Windows 11 PC, the search index that helps Windows quickly find files and settings might be corrupted or certain folders or drives might be excluded from it. The issue can also occur when the File Explorer experiences temporary glitches. To fix the issue, restart Windows Search services, run the Windows Search troubleshooter, rebuild the Search Index, and if nothing works, consider resetting your PC.
How to enable Windows Search in Windows 11?
The Search feature in Windows 11 is usually enabled by default. But in case you find it’s not enabled or hidden on your Windows 11/10 PC, you can enable it from the Settings page. Click the Start button in the taskbar and select Settings. In the Settings window, click on the Personalization option in the left panel. Select Taskbar in the right panel. Under Taskbar items, you will see a dropdown next to the Search option. Click the dropdown and select Search box/Search icon only/ Search and label.
Read Next: Fix Search Indexer High Disk or CPU usage in Windows.
it doesn’t help for me. Any settings search in cortana shows in spanish and when I click them nothing happens. Also while searching in settings app there no result.
1. Navigate to the folder C:WindowsSystem32
2. Locate ctfmon (Application)
3. Right-click > Send to > Desktop (Create shortcut)
4. Open run > type
shell:startup
5. Drag & drop the ctfmon shortcut placed in the Desktop to the Startup folder.
6. Restart Windows & observe if the issue re-appears.