If Windows Update is being enabled itself even after turning it Off in Windows 11/10, you need to follow these solutions to fix the issue. Instead of using Windows Setting panel, you can use Services and Local Group Policy Editor to manage the Windows Update settings.
While we still suggest you to use the inbuilt option to delay Windows Updates, or make Windows inform you before downloading updates, there are many who want to completely disable Windows Updates. Windows 11/10 users may have however noticed that Windows Update enables itself even after turning it Off. Well, here is how you can fix this problem.
Windows Update keeps turning itself back On after turning it Off
If Windows Update keeps starting & turning itself back On after turning it Off in Windows 10, then apart from turning off Automatic Windows Update Service (wuauserv), setting a Guest Log on, you need to disable Windows Update Medic Service as well.
If Windows Update keeps turning itself back On after turning it Off, follow these solutions:
- Disable Windows Update using Windows Services
- Change the Log on account for Windows Update Service
- Turn Off Windows Update using Group Policy
- Disable Windows Update Medic Service
To learn more about these solutions, continue reading.
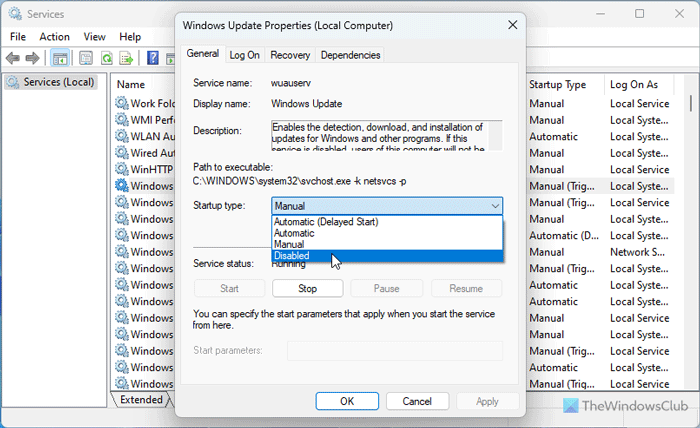
1] Disable Windows Update using Windows Services

To disable Windows Update using Windows Services, follow these steps:
- Search for services in the taskbar search box.
- Click on the individual search result.
- Double-click on the Windows Update service.
- Choose the Disabled option.
- Click the Apply and OK buttons.
2] Change the Log on account for Windows Update Service
It seems one of the Windows 10 major upgrades has made sure that Windows 10 re-enables the wuauserv service on its own, even if the service has been set to disable, even by the administrator. That’s the key here. Windows 10 uses Admin credentials to make sure it can re-enable Windows Update everytime it is in a disabled state. In our tip, we will prevent the Service from running by changing the account credentials used to run the Service.

- Open Run Prompt (Win+R) with administrator privileges.
- Type services.msc, and hit Enter.
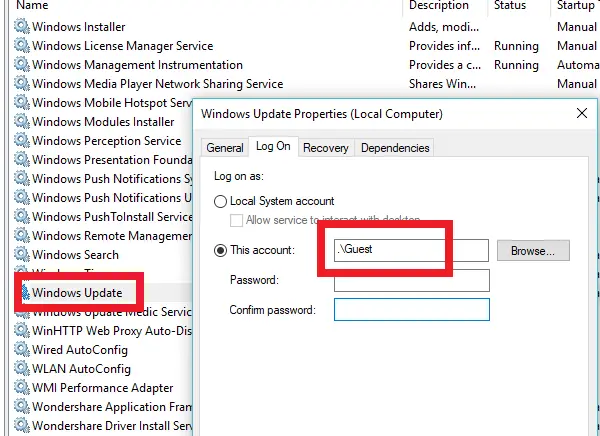
- Find Windows Update Service and double-click to open Properties.
- Click on the Stop button to stop the Service.
- Now switch to the Log On tab, and select Log on as ‘.\Guest’ (This is the Guest account)
- Leave the password blank, and Click on Apply
After this, whenever the Windows 10 Update Service tries to run, you may receive an error. The error is going to be something like – Windows could not start the Service. The exact error message would be “The account specified for this service is different from the account specified for other services running in the same process.”
This is the real advantage of using this method over any software or batch file to keep turning it off. You don’t disable it, but you just change the account which is used to run the Windows Update, and since there is a password, it never works. It is, however, to be noted that Windows Defender cannot be stopped using this. They will keep getting an update.
3] Turn Off Windows Update using Group Policy

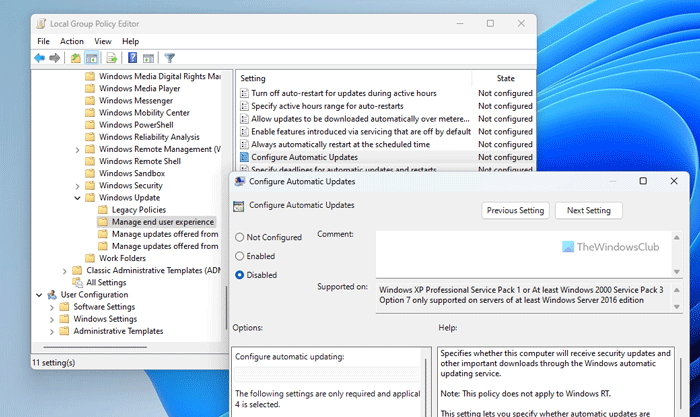
To turn off Windows Windows Update using Local Group Policy Editor, follow these steps:
- Open the Local Group Policy Editor.
- Go to Computer Configuration > Administrative Templates > Windows Components > Windows Update > Manage end user experience.
- Double-click on the Configure Automatic Updates setting.
- Choose the Disabled option.
- Click the Apply and OK buttons.
4] Disable Windows Update Medic Service
There is another way you can do it, and that is by also disabling the Windows Update Medic Service or WaaSMedicSVC using Windows Update Blocker. The Windows Update Medic Service is a new Windows Service introduced in recent versions of Windows 11/10. This Service has been introduced to repair Windows Update components from damage so that the computer can continue to receive updates. We recommend you try this method first.
Let us know if this works for you.
Read: Windows Update fails to install or will not download in Windows
How do I permanently disable Windows 11 update?
There are multiple ways to permanently disable Windows 11 update. For example, you can use Windows Services, Local Group Policy Editor, etc. That being said, open the Services panel and double-click on the Windows Update service. Choose the Disabled option and click the OK button.
How do I force disable Windows Update on Windows 11?
If you want to force disable Windows Update on Windows 11, it is better to use the Local Group Policy Editor method. For that, you need to navigate to this path: Computer Configuration > Administrative Templates > Windows Components > Windows Update > Manage end user experience and double-click on the Configure Automatic Updates setting. Then, choose the Disabled option and click the OK button.
Read: Configure Windows Updates using Registry in Windows Server.