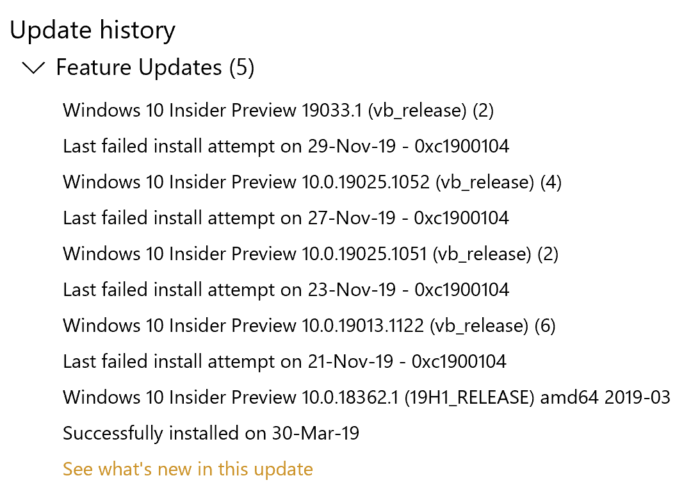
While installing a Windows Feature Update, if you see The installation process did not complete within the required time limit with error code 0xc1900104 or MOSETUP_E_PROCESS_TIMEOUT, here are some fixes that you can try out. The entire error message says:
0XC1900104
MOSETUP_E_PROCESS_TIMEOUT
The installation process did not complete within the required time limit.

Fix Windows Update Error 0xc1900104 when installing Feature Update
To fix Windows update error 0xc1900104 when installing a Feature Update, follow these steps:
- Make disk space for the update
- Use Media Creation Tool
- Download update from Microsoft Update Catalog
- Remove unused SATA drives
- Delete this Registry key
- Other troubleshooting tips
To learn more about these steps, continue reading.
1] Make disk space for the update
Whether it is a feature update or anything else, you must have some free storage left to install it on your computer. If you do not have the minimum storage left, there is a chance of getting the error mentioned above. Use a disk space analyzer software to identify unwanted files. You can then free up disk space using Windows Settings.
2] Use Media Creation Tool
Media Creation Tool is the official app, allows you to upgrade from one version to another without much hassle. It is a free app, and you can use it on your existing Windows 10 system. Do follow this detailed guide to learn how you can use the Media Creation tool to quickly upgrade Windows 10 version.
3] Download update from Microsoft Update Catalog
Microsoft lists down all the updates on the official Microsoft Update Catalog website, and users can download the update from there. If you face the error message while installing a feature update, you can search for it on the official website. For that, visit the catalog.update.microsoft.com website, and search for the update you want to download.
Let’s say you want to download KB4480967. Therefore, search for it to get a panel where it asks you to choose the update according to your system architecture.
You have to click the respective Download button to start downloading. Once the download is complete, you can double-click on it to start the installation.
4] Remove unused SATA drives
If you have an unused SATA hard drive, it is recommended to unplug it before trying out the troubleshooting steps. At times, multiple SATA drives may create a conflict, and as a result, you can encounter the error.
If you know about your computer hardware, do it yourself. Otherwise, it is recommended to get a professional.
5] Delete a Registry key
If you have Citrix Virtual Delivery Agent installed, then make this registry change.
To get started, press Win+R, type regedit, hit the Enter button, and click on the Yes option to open Registry Editor on your computer. After that, navigate to the following path:
HKEY_LOCAL_MACHINE\SYSTEM\CurrentControlSet\Control\Class{4d36e967-e325-11ce-bfc1-08002be10318}\CtxMcsWbc
Here you can find a REG_DWORD value named Start. By default, it should have the value data as 0. You have to double-click on it and set the Value data as 4.
Click the OK button to save the change.
Next, navigate to the following path:
HKEY_LOCAL_MACHINE\SYSTEM\CurrentControlSet\Control\Class{4d36e967-e325-11ce-bfc1-08002be10318}\CtxMcsWbc
Here you can find CtxMcsWb. You have to right-click on it, select the Delete option, and confirm the removal.
6] Other troubleshooting tips
- Restart your computer and try again. At times, a restart resolves everything without much problem.
- Try running the Windows Update troubleshooter. As it is a Windows Update-related issue, running this troubleshooter makes sense.
- Check out this tutorial to fix Windows Update errors using Microsoft’s online troubleshooter.
That’s all! These are some of the working suggestions to fix Windows Update error 0xc1900104.
Read next:
Leave a Reply