Windows Update problems are likely one of the most serious issues that users have to face on a regular basis. It is because some problems are easy to solve while others might be challenging tasks to deal with. If you encounter a Windows Update Error Code 0x8e5e03fa while trying to update your Windows 11/10 system, then this guide gives you some suggestions that may help you to fix this issue.

Fix 0x8e5e03fa Windows Update Error
This error 0x80070490 indicates a corrupted system file or process in the Windows Component Store or in Component-Based Servicing (CBS) in Windows 11/10. To fix this error, follow the below suggestions:
- Run the Windows Update Troubleshooter
- Reset SoftwareDistribution and Catroot2 folders
- Run SFC and DISM Scans
- Reset the Windows Update Components
- Install the Update using the super admin account
- Install the Update Manually
Before you begin, create a system restore point first. This will help you to revert the changes if you ever need it.
I would suggest you try them one by one. Let’s see them in details:
1] Run the Windows Update Troubleshooter
Windows 10 operating system comes with an inbuilt troubleshooter tool that can effectively fix the common issues related to the Windows update. It commonly resolves the issues or at least identifies the real culprit. Therefore, it would be a good idea to give it a try before applying anything else.
In order to run the Windows Update Troubleshooter, navigate to the following pathway, Start > Settings > Updates and Security > Troubleshoot.
In the right pane, scroll a bit and then select Windows Update.
Click on Run the troubleshooter and let the Windows fix the problem automatically.
Windows may take a while to detect the problems, so keep patience.
When it completes the process, close the window, and restart your device.
Check whether it resolves the problem, if not then move down to the next effective workaround.
2] Reset SoftwareDistribution and Catroot2 folders
Reset the SoftwareDistribution and Catroot2 folders and see if it helps you.

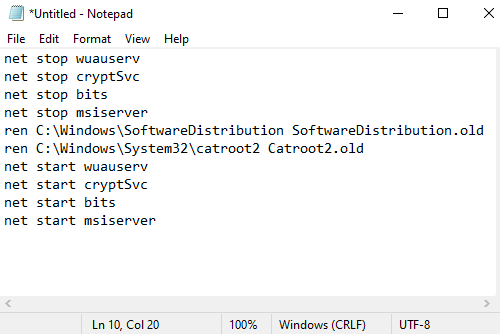
To do this, open Notepad and copy and paste the following text –
net stop wuauserv
net stop cryptSvc
net stop bits
net stop msiserver
ren C:\Windows\SoftwareDistribution SoftwareDistribution.old
ren C:\Windows\System32\catroot2 Catroot2.old
net start wuauserv
net start cryptSvc
net start bits
net start msiserver
Click the File menu and select Save as to open the window as shown in the below snapshot.
Choose a suitable location and then select All Files in the Save as type drop-down menu.
After that, type WindowsUpdate.bat in the File name text field.
Then click on the Save button and close the text editor window.
Once the batch file is created, go to the saved location and do a right-click on the file. Thereafter select Run as administrator from the context menu.
If the UAC dialog box appears on the screen, simply hit the Yes button to grant the administrative privileges.
This will launch the command prompt and start resetting the Windows Update components instantly.
3] Run System File Checker and DISM tool
If the Update Error Code 0x8e5e03fa is still appearing on the screen, you can run the System File Checker and the DISM tool. It would properly scan the storage for missing or corrupt system files. And then, it will repair or replace the damaged system files automatically.
4] Reset the Windows Update Components
Reset the Windows Update Components and see if that works for you.
5] Install the Update using the super admin account
In an alternative way, you can use the super administrator user account to download and install the updates without any interruption. So, all you need to create a new user account in your Windows device and then log in using the same account. Follow the instructions below in order to fix this issue.
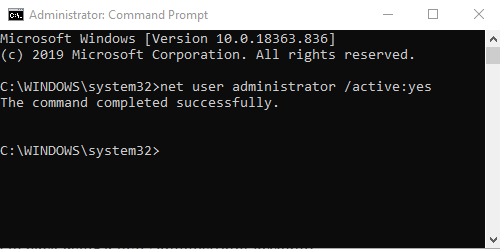
Press Win+R keyboard shortcut to open the Run dialog box. In the text field, type cmd and then press the Ctrl+Shift+Enter shortcut key. This will open the command prompt with administrative privileges.

In the elevated command prompt window, type the following command –
net user administrator /active:yes
Pressing the Enter key, that will enable the built-in administrator account.
When the command completed successfully, close the command prompt window.
Here you need to Sign out of your Windows. To do this, press the Ctrl+Alt+Del keyboard shortcut and choose the Sign out option from the corresponding page.
Thereafter, sign in back using a new Administrator account.
Check to see if the problem is fixed now.
6] Install the Update Manually
Alternatively, you may try to fix this issue by downloading and installing the required update manually from the Microsoft Update Catalog.
I hope something in this guide may helps you to fix this annoying error code.