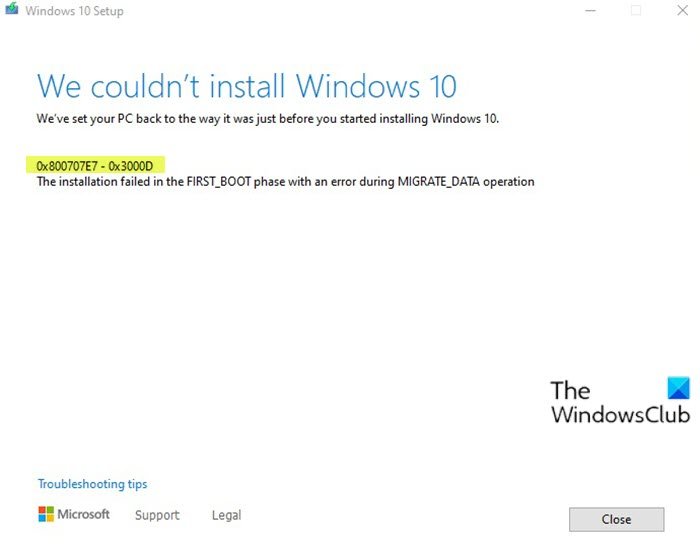
If when you attempt to upgrade to the latest version of Windows from an earlier version and you run into the error 0x800707E7 – 0x3000D, then this post is intended to help you.

When you encounter this issue. you’ll receive the following full error message-
Windows Setup
We couldn’t install Windows 11/10
We’ve set your PC back to the way it was just before you started installing Windows.0x800707E7 – 0x3000D
The installation failed in the FIRST_BOOT phase with an error during MIGRATE_DATA operation
When you encounter this Windows Install-Upgrade error, the installation will stop at a certain percentage and fail repeatedly whenever you try. Mostly, this issue will occur because of a third party graphics card. NVIDIA display driver interference in the installation is the main culprit. Additionally, low disk space, external software, and some other reasons also interfere with the upgrade install process.
Windows 11/10 Upgrade Install error 0x800707E7 – 0x3000D
If you’re faced with this issue, you can try our suggestions below and see if that helps to resolve the issue:
- Verify system specifications requirement
- Delete rogue User Profiles
- Uninstall any third-party conflicting software
- Directly download the Windows ISO
Let’s take a look at the description of the process involved concerning each of the listed solutions.
1] Verify system specifications requirement
These are the basic requirements for installing Windows 10 on a PC. If your device does not meet these requirements, you may not have the great experience intended with Windows and might want to consider purchasing a new PC.
| Processor: |
1 gigahertz (GHz) or faster compatible processor or System on a Chip (SoC)
|
| RAM: | 1 gigabyte (GB) for 32-bit or 2 GB for 64-bit |
| Hard drive size: | 32GB or larger hard disk |
| Graphics card: | Compatible with DirectX 9 or later with WDDM 1.0 driver |
| Display: | 800×600 |
| Internet Connection: | Internet connectivity is necessary to perform updates and to download and take advantage of some features. Windows 10 Pro in S mode, Windows 10 Pro Education in S mode, Windows 10 Education in S mode, and Windows 10 Enterprise in S mode require an internet connection during the initial device setup (Out of Box Experience or OOBE), as well as either a Microsoft account (MSA) or Azure Activity Directory (AAD) account. Switching a device out of Windows 10 in S mode also requires internet connectivity. |
Similarly, check the Windows 11 hardware requirements.
If your system meets the minimum requirement but you’re still encountering the error, then you can try the next solution.
2] Delete rogue User Profile
GeForce pushes updates on a regular interval of time for its graphics card adding new features and fixing previous bugs. As already noted, NVIDIA is the prime cause for this issue, as a wrong user profile is created to handle the update-related tasks. This account present on the system prevents installing Windows 10 thereby triggering the error.

This solution requires you to delete the rogue user profile. Here’s how:
This procedure also involves a registry operation, so make sure you take precautionary measures like back up the registry or create a system restore point. Once done, proceed as follows:
- Press Windows key + R to invoke the Run dialog.
- In the Run dialog box, type
control systemand hit Enter to open the System Control Panel. - Choose Advanced system settings.
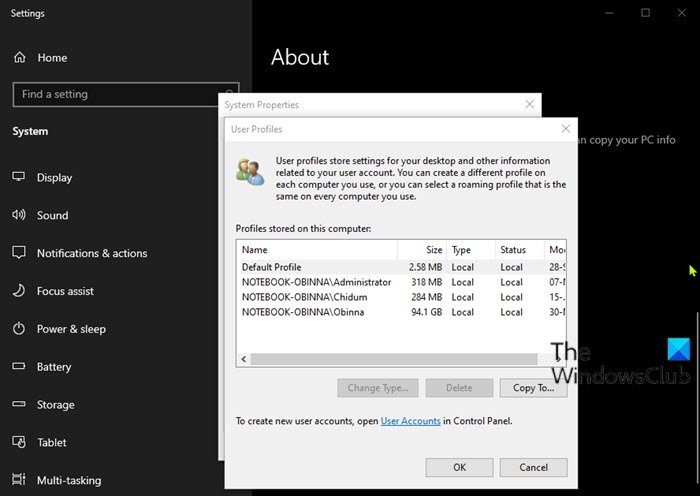
- Click the Settings button under User profile section.
- Check the usernames in the Profiles stored on this computer.
- Click on UpdatusUser (if present) and then click the Delete button.
- Find and delete any other unusual usernames here.
- Next, go to C:\Users\ in File Explorer and delete the same user profiles.
- Now, invoke the Run dialog box again and type
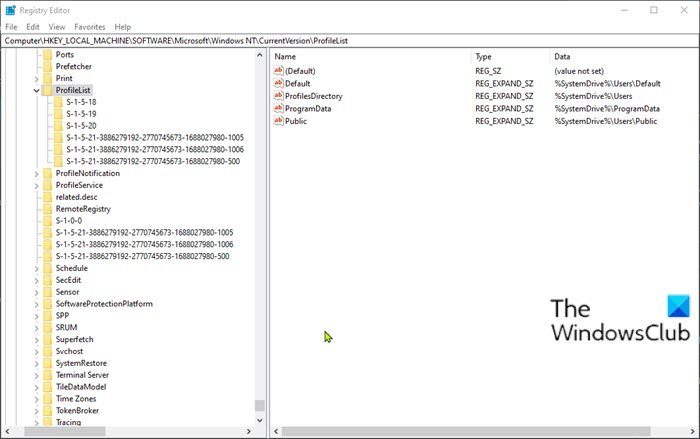
regeditand hit Enter to open Registry Editor. - Navigate or jump to the registry key path below:
HKEY_LOCAL_MACHINE\SOFTWARE\Microsoft\Windows NT\CurrentVersion\ProfileList
- At the location, on the right pane, right-click Updateuser, and select Delete.
- Restart computer.

Afterward, you can try the upgrade install again. The process should complete without any errors.
3] Uninstall any third-party conflicting software
For some reason, 3rd-party software having low-level coding has been known to cause different issues on Windows 11/10, including this upgrade install error. Moreover, the lack of compatibility in the applications also leads to creating conflict with built-in files and resources. The software might cause various errors during Windows upgrade, update, install and running certain programs. In this case, you can uninstall any third-party software on your system and then retry the upgrade install process.
4] Directly download the Windows ISO
Since you’re encountering this Windows 11/10 upgrade install error using the Media Creation tool aka Windows Update Assistant, this solution entails you directly download the Windows ISO image file from the Microsoft website. Once you have downloaded the ISO to a location (preferably the desktop) on your device, double-click the ISO image to mount it as a virtual drive then double-click the setup.exe file to start the in-place upgrade process.
Note: If you’re attempting the upgrade from Windows 7, you’ll need a third-party virtual drive software to mount the ISO image.
5] Clean install Windows 11/10
If all fails, you can clean install Windows 11/10 on the device.
Hope this helps!
Similar Error Codes:
Leave a Reply