If you see Windows 11 Installation Assistant Error 0x80041010, when trying to install or upgrade Windows 11, then this post may be able to help you resolve the issue.
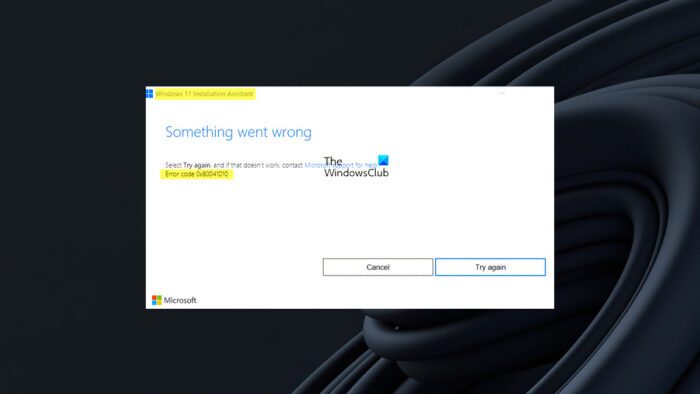
Windows 11 Installation Assistant Error 0x80041010
To fix Windows 11 Installation Assistant Error 0x80041010, follow these suggestions:
- Restart the PC and Run it again
- Run Windows Update Troubleshooter
- Clear Software Distribution Folder
- Run Network Troubleshooter
- Temporarily Disable Security Software
- Use Media Creation Tool.
Make sure you are using an administrator account to execute these suggestions.
1] Restart the PC and Run it again
Windows not getting updated can be a temporary issue, and a restart should fix it most of the time. So before we get into any complicated fixes, go ahead and give your computer a restart and then try to run the Windows update manually and see if it’s working. If not, move to the below fixes.
Read: Error 0x800f0830-0x20003 while upgrading Windows 11
2] Run Windows Update Troubleshooter
Windows Troubleshooting is built into Windows and helps fix many problems that would need a lot of manual effort. We strongly suggest running these to specific issues. That said, even if it doesn’t work, it can give you any hints why the error is causing it if not helping you with a fix.
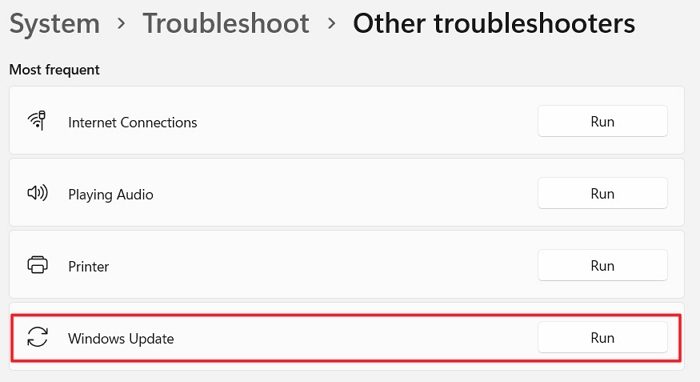
The tool can help you diagnose common Windows update issues, and to run it, follow the below steps:
- Go to Windows Settings.
- System > Troubleshoot > Other troubleshooters.
- Click on the Run button next to Windows Update.
Not let Windows run its troubleshooting function and see if it helps you with a fix or any hint to look further.
Related: Fix Error 0x80072efe on Windows Update Assistant
3] Clear Software Distribution Folder
When Windows or Windows Update Assistant downloads essential files, they are stored in the Software Distribution folder. Multiple failures or improper downloads can lead to corrupt Windows updates; hence, the Windows update assistant may fail.
So by clearing it, you will force Windows to recreate the folder and possibly fix the issue on the go. To clear the folder, follow these steps:
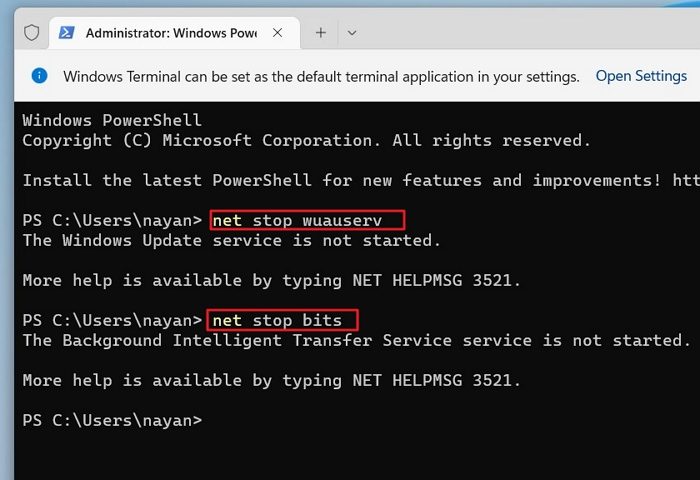
- Right-click on the Start menu and select Windows Terminal (Admin).
- In Windows Terminal, first type this command and press enter to stop Windows Update Service
net stop wuauserv
- Next, run the following command to disable all the Background Intelligent Transfer services:
net stop bits
- Now press Windows Key + R to launch Run.
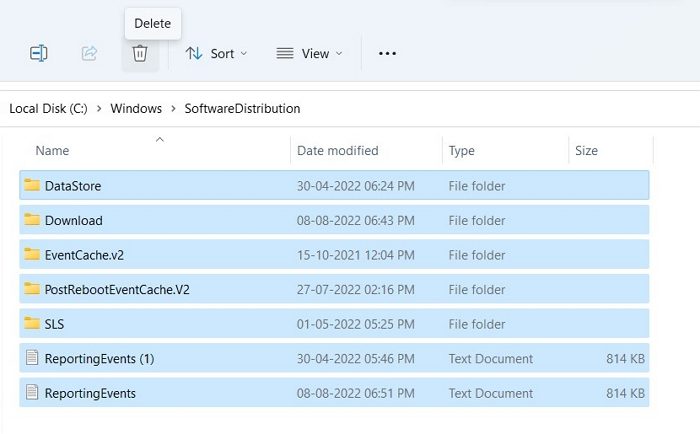
- In Run, copy and paste this path and press enter:
C:\Windows\SoftwareDistribution
- Over here, select all the files using CTRL + A and delete the files.
- Once done, come back to Windows Terminal and now run these two commands one by one to enable the modules that we have disabled in 2 and 3:
net start wuauserv

net start bits
- Finally, reboot your computer and rerun the upgrade assistant to check if the issue is now sorted.
Related: Windows Update Assistant error 0x80072f76
4] Run Network Troubleshooter
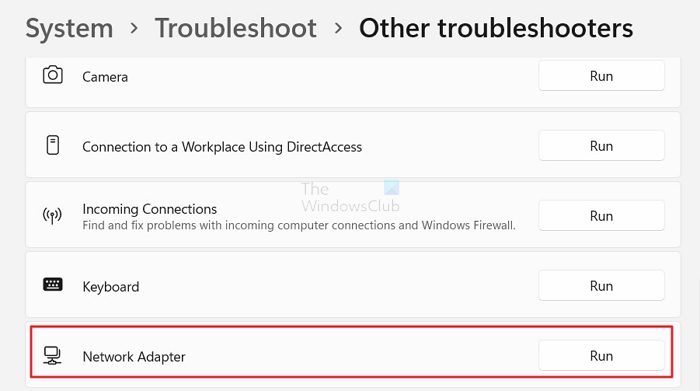
There might be an issue with your network. In such a case, you can try the network troubleshooter to see if there is any issue. For this, follow the below steps:
- Go to Windows Settings.
- System > Troubleshoot > Other troubleshooters.
- Click on the Run button next to Network Adapter.
- Let Windows run a search and see if it helps you with a fix.
Once done, rerun the assistant, check if it can download all the files, and complete the process.
Read: Windows Update Assistant is stuck at 99%
5] Temporarily Disable Security Software
There could be an issue with your security software too. If you are using any antivirus or other security software, you can disable it and check if the Windows update assistant is working. If it’s working fine, you can keep it turned off until the download is complete. Ensure you do not do anything else during the download process.
6] Use Media Creation Tool
Use the Media Creation Tool to upgrade your Windows installation.
What can you do if nothing else works?
If, in the end, nothing works out for you, then you can consider using Windows Media Creation Tool. The tool helps you with two things. First, it upgrades your Windows. Secondly, it lets you create a bootable flash drive to reinstall Windows.
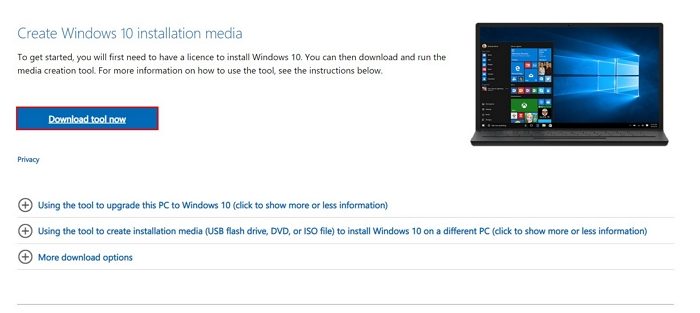
However, to fix the Windows update assistant not working, we need to upgrade our PC to the latest build. And here is how you can do so:
- First, download Windows Media Creation Tool from Microsoft Website
- Once downloaded, run the tool and wait for a few seconds.
- Next, Accept the license agreement to continue.
- Now select, Upgrade this PC now and click on Next.
- Next, it will start downloading Windows files. So make sure you have an active internet connection.
Once downloaded, you will have an option to keep all your personal files. So select that, and it will install a new version of Windows on your computer.
Now go ahead and try these fixes yourself and see if they work for you. Also, for additional help, you can comment below.
Is Microsoft Windows Update Assistant built into Windows?
No. In Windows, you can go to Windows Update and check for any new download available for Windows. Windows Update Assistant is a separate tool that usually appears in Windows during a major release.
Can I reinstall Windows Update?
It can be reinstalled if you have removed any existing Windows update from your PC. All you need to do is check for Windows Update again, and the removed update will be visible in the list.
How do I fix a corrupted Windows update?
Apart from running the Windows Update troubleshooter, you also need to clear the Windows Update Software Distribution folder. You can also restore your PC to an earlier date, i.e., before the update was installed. Once done, you can download the update again.