If the rounded corners are not working on your Windows 11 PC, read this post to know how to fix the issue. Rounded corners are part of the new and improved Windows 11 design elements that Microsoft introduced to provide users a modern and visually appealing UI experience.
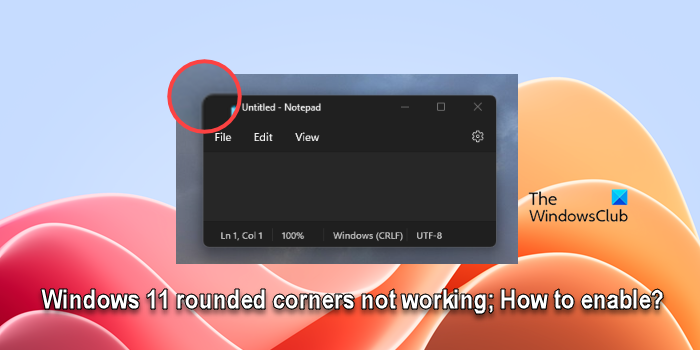
Rounded corners contribute to a more unified look and feel across various components and applications. However, sometimes, they may not work in Windows 11.
Why can’t I find rounded corners in Windows 11?
If you don’t see rounded corners in Windows 11:
- You might be running an older version of Windows 11 that doesn’t have the rounded corners implemented.
- You may have outdated or incompatible graphics drivers or your graphics hardware may not fully support the UI enhancements for Windows 11.
- Your system may be configured for best performance or using a high-contrast theme. Both can alter the appearance of UI elements, potentially removing rounded corners.
- Certain visual effects may not be supported while running Windows 11 on a virtual machine, depending on the VM’s settings and the host computer’s capabilities.
Windows 11 rounded corners not working
If Windows 11 rounded corners are not working on your PC, here are the steps you can take to troubleshoot and enable the feature:
- Update Windows
- Enable hardware acceleration
- Enable visual effects
- Update your graphics drivers
- Modify registry settings
- Reset Windows
How to enable rounded corners in Windows 11
1] Update Windows
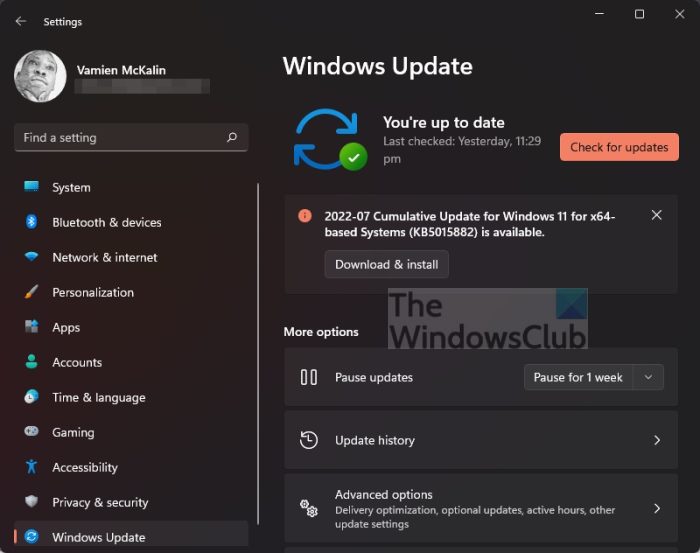
Make sure your Windows 11 installation is up to date.
Press Win+I to open the Settings window. Click Windows Update in the bottom left corner. See if any updates are available to download or click the Check for updates button. If updates are available, click Download & install. Reboot your PC and see if your apps now have rounded corners.
2] Enable hardware acceleration
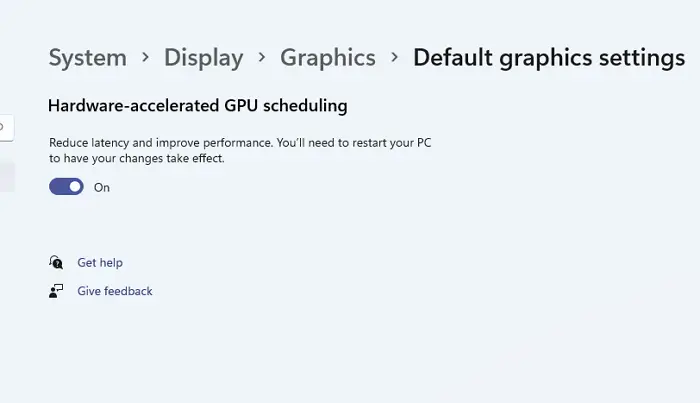
Rounded corners require hardware acceleration. Make sure it is enabled in settings.
Open the Settings app on your Windows 11 PC and navigate to System > Display. Scroll down and click Graphics under ‘Related settings’.
Click ‘Change default graphics settings‘ link. Toggle ON the switch below Hardware-accelerated GPU scheduling to enable hardware acceleration on your Windows 11 PC. If you do not see this setting, your hardware does not support it yet.
3] Enable visual effects
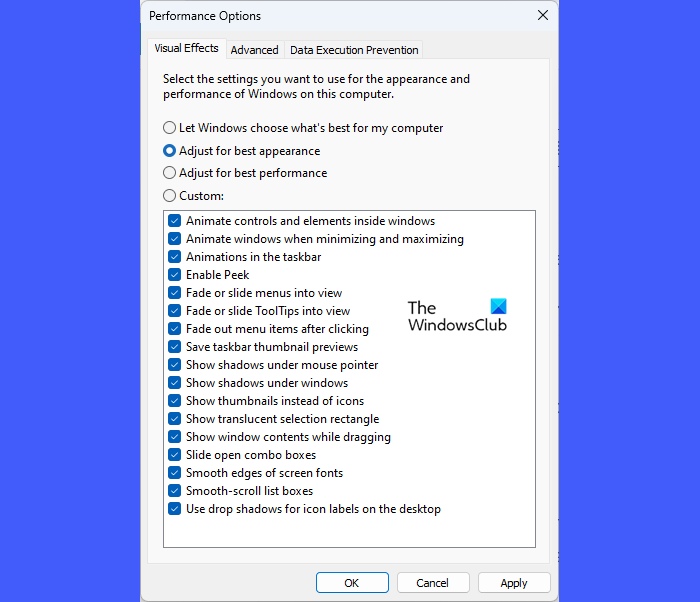
Also, enable visual effects and see if it helps.
Type ‘performance’ in the Windows Search bar and select ‘Adjust the appearance and performance of Windows‘ from the list of results. Make sure that the ‘Let Windows choose what’s best for my computer’ or ‘Adjust for best appearance‘ option is selected in the Performance Options window.
If none of these is selected, choose one, then click Apply followed by OK.
4] Update your graphics drivers
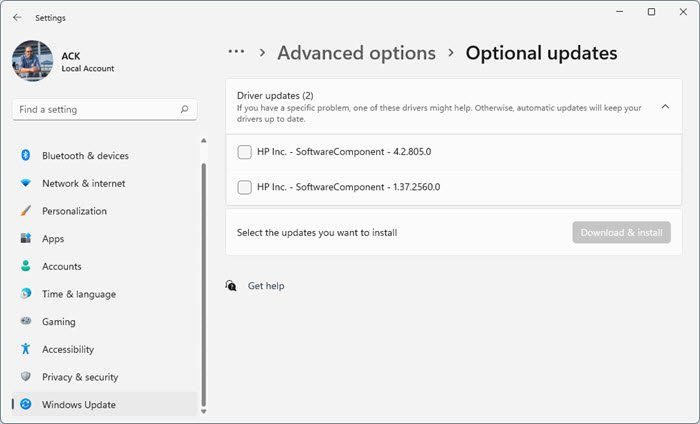
Outdated or corrupted graphics drivers can sometimes cause display issues. Update your graphics drivers to the latest version and see if it fixes the app’s rounded corner issue.
Right-click the Start button icon in the taskbar and select Device Manager from the WinX menu. Click the arrow for Display adapters to expand the section. Right-click the first driver and select Update driver from the context menu. The Update driver wizard will appear. Click Search automatically for drivers. The wizard will scan for available updates and download and install them automatically.
Repeat the process for all the available drivers in the Display adapters section and then reboot your PC.
You can also run Windows Updates and see if Driver updates are available under Optional Updates.
5] Modify registry settings
If you find that rounder corners are missing after installing Windows 11 on a Virtual Machine (Hyper-V or VirtualBox), you can modify the registry to enable rounded corners. However, be cautious and back up your registry first, as incorrect changes can cause serious issues.
Press Win+R, type ‘regedit‘ in the Run dialogue, and press Enter. Click Yes in the User Account Control prompt. Registry Editor will open up.
Navigate to the following key in the registry editor window:
HKEY_LOCAL_MACHINE\SOFTWARE\Microsoft\Windows\Dwm
Right-click on the Dwm key, and select New > DWORD (32-bit) value from the menu. Rename the key as ForceEffectMode. Double-click ForceEffectMode and set its Value data to 2.
Close the registry editor and restart your Hyper-V or VirtualBox machine. This should hopefully fix the issue.
6] Reset Windows
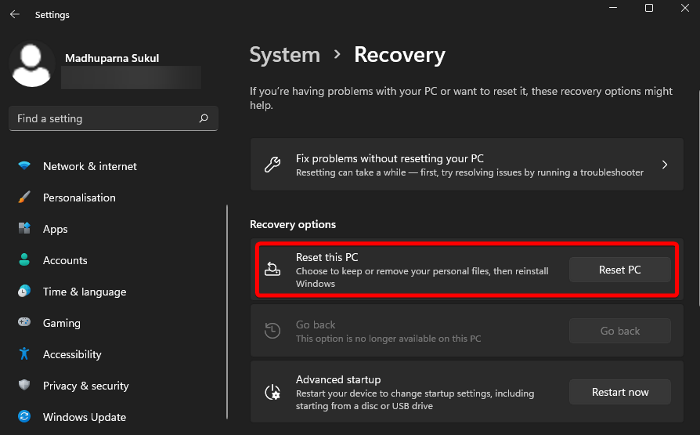
If nothing helps, try resetting Windows to its default settings, which include rounded corners in Windows 11. The ‘Reset’ option will reinstall Windows while keeping your personal files intact.
To do this, go to Settings > System > Recovery, and click the Reset PC button under Recovery options. Follow the on-screen instructions and wait for the process to complete.
I hope this helps.
Read: How to Turn On/Off Rounded Corners in Microsoft Edge.
What is the PX for rounded corners in Windows 11?
Windows 11 uses three levels of rounding, based on the UI component being rounded and how it is positioned relative to nearby elements. Top-level containers such as program/app windows, flyouts, and dialogs have an 8px corner radius (corners are not rounded when windows are snapped or maximized). In-page elements such as buttons and list backplates have a 4px corner radius. Straight edges that intersect with other straight edges are not rounded.
How do I disable the rounded corner in Windows 11?
Disabling the rounded corners is a bit tricky as Microsoft has integrated the feature deeply into the operating system. If you still want to disable rounded corners in Windows 11, use third-party tools that allow detailed customization of Windows UI elements. You can also disable rounded corners by disabling the graphics driver or hardware graphics acceleration on your PC, but these are not recommended methods as they can lead to significant performance and usability issues.
Read Next: How to get the new Office UI on Windows 11.
Leave a Reply