If File Explorer’s Sort by Date Modified is not working correctly on your Windows 11 PC, read this post. We will guide you through some effective troubleshooting steps to quickly resolve the issue.
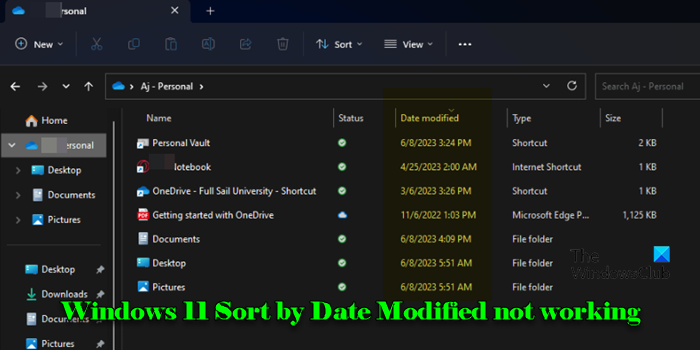
Several users have reported inconsistent behavior while using the Sort by option in Windows. The files are not getting sorted as expected by the ‘Date modified’ attribute. They either revert to Sort by ‘Name’ after closing and reopening folders or behave unexpectedly by placing newer files among older ones or prioritizing certain file types above regular folders.
The issue stems from various factors, including software glitches, folder view settings, and inconsistencies in file metadata, and is particularly frustrating for users dealing with large collections of files, like photos and videos, which are challenging to manage without proper sorting.
Fix Windows 11 Sort by Date Modified not working
If the Sort by Date Modified option is not working for you on your Windows 11/10 PC, use these fixes:
- Set Group by to None
- Reset Folder View
- Change folder optimization
Let us see this in detail.
1] Set Group by to None
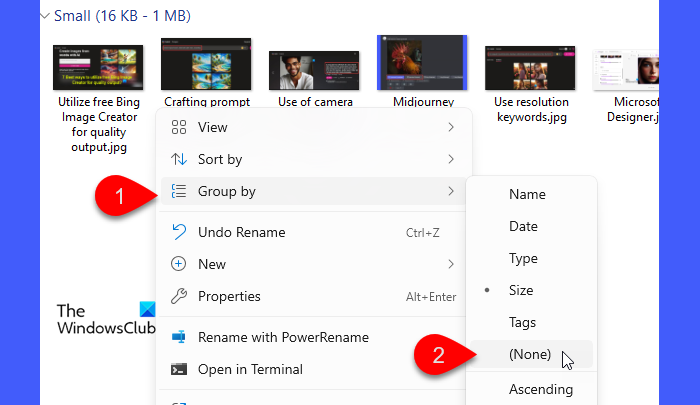
When a folder is grouped by certain attributes (like name, date, or type), the files are displayed in groups, which may affect the sorting order within those groups. Setting Group by to None removes any additional grouping that could interfere with the natural sorting of files, ensuring they are listed correctly.
To set Group by to None:
- Open the folder where the issue occurs.
- Right-click on an empty space within the folder.
- Go to Group by and select (None).
Now, retry sorting the files and see if the issue disappears.
2] Reset Folder view
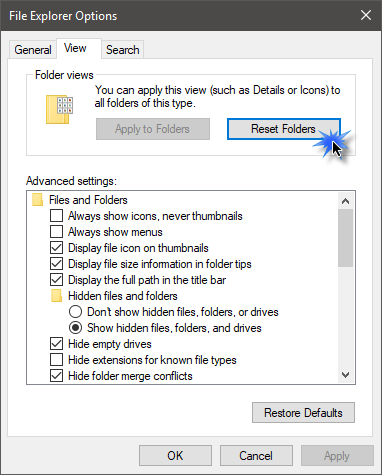
Folder view settings determine how files and folders are displayed in File Explorer. When you set a folder to sort files by date modified, Windows tries remembering the setting for future visits to that folder. However, due to system changes, updates, or other software alterations, the settings can sometimes become corrupted, causing File Explorer to display files in an unintended way. Resetting clears this out, allowing File Explorer to return to its default, uncorrupted state.
To reset Folder View in Windows 11, follow these steps:
- Open File Explorer.
- Click the three dots icon in the File Explorer toolbar and select Options.
- In the Folder Options window, switch to the View tab.
- Click the button labeled Reset Folders under Folder views.
- Click Apply to Folders to ensure that the current folder’s view settings are applied across similar folders.
- Click Apply and then OK to close the window.
After resetting, File Explorer will revert to its default behavior (Sort by Name). Re-apply Sort by Date modified and see if it works.
You may also use WinSetView to lock in your preferred settings in File Explorer.
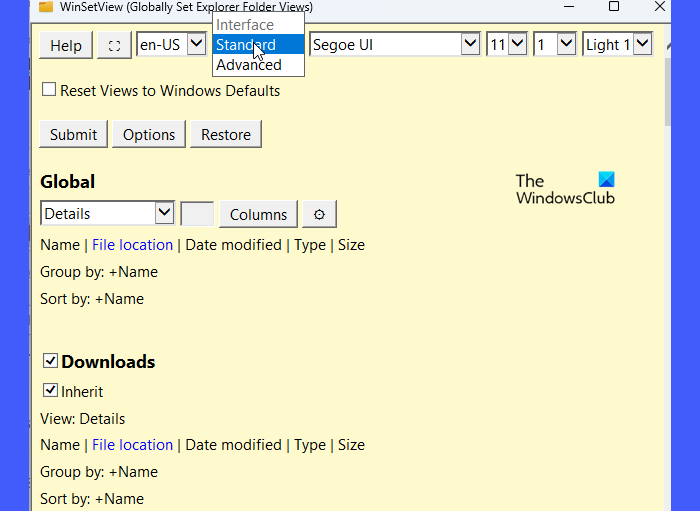
It’s a free software that allows you to force a uniform folder view setting across all directories, ensuring every folder opens with the desired sorting option only.
3] Change folder optimization
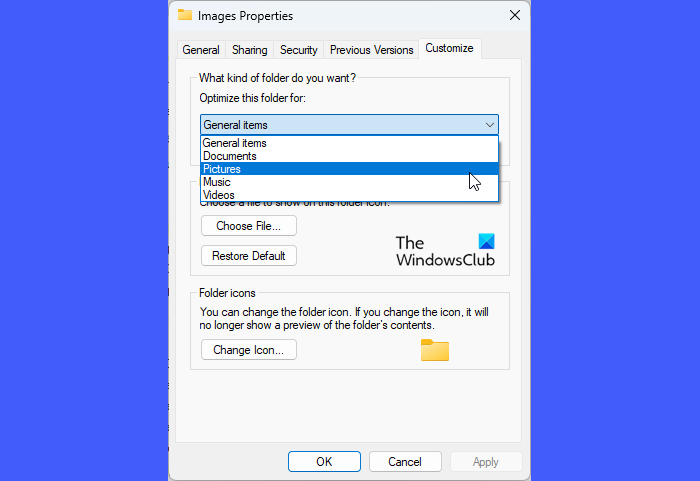
Different file types need specific view settings for optimal display, like thumbnails for images and detailed metadata for documents. Windows auto-optimizes folders based on content type, but it sometimes misidentifies the primary content of a folder, especially if it contains mixed file types, leading to incorrect optimization and display issues in File Explorer.
By manually selecting the right optimization, you ensure that the correct sorting options are available and applied to the folder.
To change folder optimization in Windows 11, follow these steps:
- Open File Explorer and navigate to the folder where you’re experiencing sorting issues.
- Right-click on the folder and select Properties.
- In the Properties window, switch to the Customize tab.
- Under the ‘Optimize this folder for:’ dropdown menu, choose the appropriate option based on the content of the folder.
- Check the box for ‘Also apply this template to all subfolders‘ to apply the same optimization to any subfolders.
- Click Apply and then OK to save the changes.
Lastly, if the sorting issue is tied to incorrect file metadata or missing data in the index, rebuilding the index can help.
If the problem persists, consider using a third-party file manager until a Windows update potentially resolves the issue.
Read: How to sort Folders by Size or Month in Windows.
How to sort files by date modified Windows 11?
Press Win + E or click the File Explorer icon in the taskbar. Navigate to the folder containing the files you want to sort. Click the View option in the toolbar at the top and select Details. Right-click anywhere on the file list, select Sort by, and choose Date modified. Alternatively, click the Date modified column header to sort the files by that criteria. Clicking it again toggles between ascending and descending order.
How do I change the date modified in Windows 11?
The ‘Date modified’ attribute of a file is automatically updated whenever the file is edited, so you cannot directly change it through File Explorer in Windows 11. However, you may use a third-party tool, such as BulkFileChanger, to modify file timestamps. BulkFileChanger is a lightweight utility that allows you to modify file attributes, including Date modified, for multiple files simultaneously.
Read Next: Files showing wrong dates in Explorer in Windows.
Leave a Reply