Setting up a Windows 365 Cloud PC is now easier than ever. This post outlines the various provisioning issues (with fixes) related to Hybrid Azure AD and Azure AD during the setting up of a Windows 365 Cloud PC.

Windows 365 Cloud PC provisioning issues with Fixes
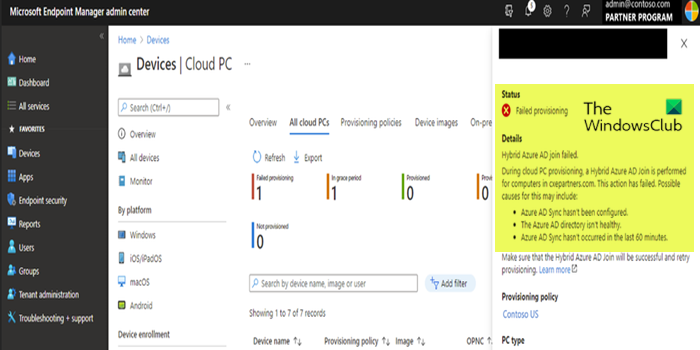
Below is the typical error message that may be displayed when encountering these issues:
Error message 1
Failed provisioning
Details
Active Directory (AD) computer object is not syncing to Azure AD.
Ensure the AD computer object is successfully syncing to Azure AD in a timely manner. Ensure the target Organizational Unit (OU) is in the sync rule scope.
Error message 2
Failed provisioning
Hybrid Azure AD join failed.
During cloud PC provisioning. a Hybrid Azure AD Join is performed for computers in <NameOfDomain>. This action has failed. Possible causes for this may include:
- Azure AD Sync hasnt been configured.
- The Azure AD directory isni healthy.
- Azure AD Sync hasnt occurred in the last 60 minutes.
Typically, these errors may occur based on the following case scenarios:
- The service connection point (SCP) record is missing.
- The OU that you added your Cloud PCs to isn’t in the scope of your Azure AD Connect synchronization.
- Azure AD synchronization and replication cause delays.
Some Windows 365 Business Cloud PC may face provisioning issues. This includes users with Microsoft Intune and other users who do not use Azure AD Premium P1. This and this Microsoft technical resources contain the Windows 365 Cloud PC provisioning issues with the corresponding fixes in case you encounter them.
That’s it!
Related post: Windows 365 Cloud PC Setup & Known Issues with Fixes
How long does it take to provision a cloud PC in Windows 365?
As soon as you assign a license to a user, Windows 365 will create a Cloud PC for that user. Typically, this process can take up to 30 minutes. You can assign different Windows 365 Business license types to a user, based on the user’s business needs. To provision your desktop in Windows 365, sign in to the Microsoft Intune admin center, select Devices > Windows 365 (under Provisioning) > Provisioning policies > Create policy.
Read: This Cloud PC doesn’t belong to the current user [Fix]
How do I change the Provisioning policy in Windows 365?
To change the Provisioning policy in Windows 365, sign in to the Microsoft Intune admin center, select Devices > Windows 365 (under Provisioning) > Provisioning policies > select a policy. On the policy page, you can edit the General information, Image, and Assignments by selecting Edit next to each header. The grace period for Cloud PC is seven days after which the user has logged off the Cloud PC, will lose access and the Cloud PC will be de-provisioned.
Leave a Reply