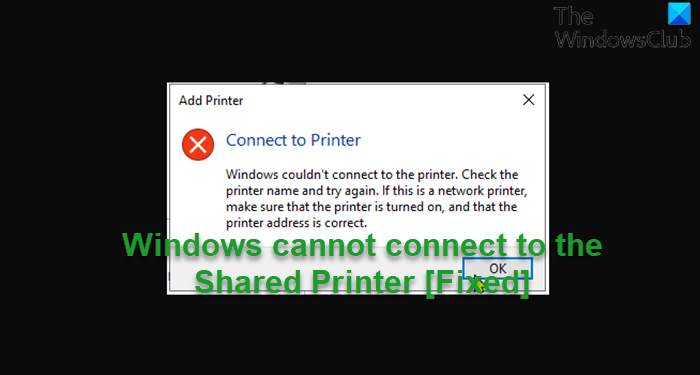
If you have successfully installed and shared a network printer on your network, but somehow when you attempt to connect to the shared printer on your Windows 11 or Windows 10 computer, the operation fails and Windows cannot connect to the shared printer, then this post is intended to provide the most suitable solutions to this issue.

Why I can’t connect to a shared printer?
There are quite a number of reasons why PC users may not be able to connect to a shared printer – the main reasons include File and Printer Sharing is turned off. Also, File and Printer Sharing is not allowed through the Windows Firewall on your computer and the computer to which the printer is attached. In this case, to fix the issue, enable File and Printer Sharing and as well make sure Network Discovery is enabled on your Windows 11/10 PC.
Fix Windows couldn’t connect to the Printer
If your Windows couldn’t connect to the Printer, you can try our recommended solutions below in no particular order and see if that helps to resolve the issue.
- Temporarily enable SMB1.0
- Fix Network Printer errors
- Modify the registry
- Connect printer to Network Device with a LAN cable
Let’s take a look at the description of the process involved concerning each of the listed solutions.
Before you try any of the solutions listed below, sometimes power-cycling your printer can resolve the issue. Turn off your printer and unplug it, wait 30 seconds, plug your printer back in, and then turn the printer back on.
1] Temporarily enable SMB1.0
The first troubleshooting you can try to fix this issue on your Windows system is to temporarily enable SMB1.0. Once enabled, see if the issue is resolved. Once your work is done, remember to disable SMB1.0 as it could pose a security risk.
Read: How to reset Printer to default factory settings.
2] Fix Network Printer errors
A shared printer is basically a network printer – so you can follow the instructions in our guide on how to fix Network Printer errors – Windows cannot connect to the printer with Errors 0x00000002,0x0000007a, 0x00004005, 0x00000057, 0x00000006 or 0x0000052e and see if it helps to resolve the issue at hand. Otherwise, try the next solution.
Read: Windows can’t open Add Printer. The remote procedure call failed
3] Modify the registry

This solution requires you to modify the RpcAuthnLevelPrivacyEnabled registry key value. The Printer Remote Procedure Call (RPC) binding handles authentication for the remote Winspool interface. PC users can disable or enable Enforcement mode on the server-side to increase the authentication level.
Since this is a registry operation, it is recommended that you back up the registry or create a system restore point as necessary precautionary measures. Once done, you can proceed as follows:
- Press Windows key + R to invoke the Run dialog.
- In the Run dialog box, type regedit and hit Enter to open Registry Editor.
- Navigate or jump to the registry key path below:
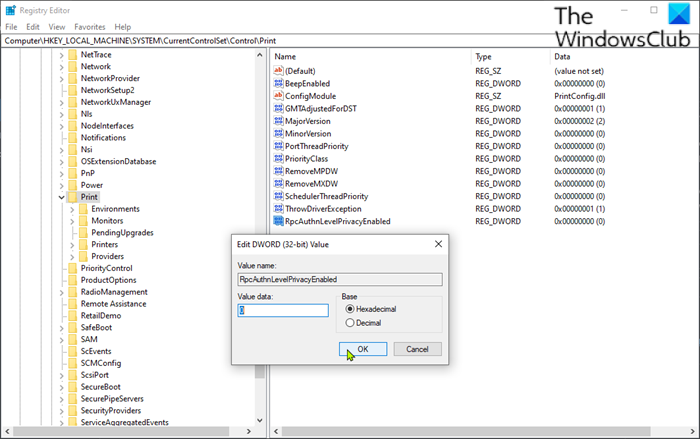
HKEY_LOCAL_MACHINE\System\CurrentControlSet\Control\Print
- At the location, on the right pane, double-click the RpcAuthnLevelPrivacyEnabled entry to edit its properties.
If the key is not present, right-click on the blank space on the right pane and then select New > DWORD (32-bit) Value to create the registry key and then rename the key as RpcAuthnLevelPrivacyEnabled and hit Enter.
- Double-click on the new entry to edit its properties.
- Input 0 in the Value data field.
- Click OK or hit Enter to save the change.
- Exit Registry Editor
- Restart your PC.
On boot check if the issue is resolved. If not. you’ll need to delete Client Side Rendering Print Provider registry key on your Windows PC.

Do the following:
- Back up the registry or create a system restore point.
- Next, stop the Printer Spooler Service.
- Now, launch Registry Editor.
- Navigate or jump to the registry key path below:
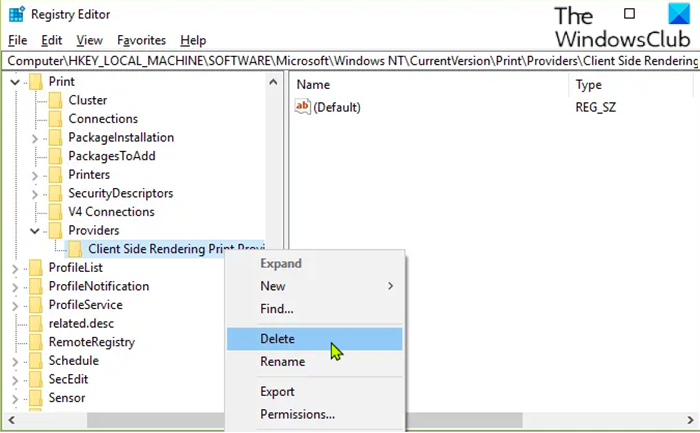
HKEY_LOCAL_MACHINE\SOFTWARE\Microsoft\Windows NT\CurrentVersion\Print\Providers\Client Side Rendering Print Provider
- At the location, on the left navigation pane, right-click the Client Side Rendering Print Provider folder and select Delete from the context menu.
- Start the Printer Spooler service.
- Reboot your PC to save changes.
Related: Error 0x00000520, Windows cannot connect to the Printer
4] Connect printer to Network Device with a LAN cable
This solution requires you to connect the printer to your network device (modem/router) with a LAN/ethernet cable – some affected users reported they were able to resolve the issue at hand by hooking the printer up to the modem with a LAN cable and all the computers on the network were able to have access to the shared printer.
Hope this helps!
Similar error: Windows cannot connect Printer, Operation failed error 0x0000011b
Why isn’t my computer connecting to my wireless printer?
Amongst other reasons, the main reason why your Windows 11/10 computer isn’t connecting to your wireless printer or your wireless printer is not responding is that your printer is not powered on or connected to the mains. To fix this issue, connect your wireless printer to your computer or other device and make sure it’s connected to the mains and turned on. Other actions you can take, includes checking the printer’s toner and paper, plus the printer queue. Also, try reconnecting your device to the network, reconfigure security settings to include printers, and/or install updated drivers.
Related post: Can’t access shared folder because of organization’s security policies.
Leave a Reply