The problem with external storage devices is the fact that removing them directly is dangerous. Because without using the Safely Remove Hardware feature, taking out a USB Storage Device is prone to data loss and data corruption. But many times, even when a user ejects their USB Storage device using Safely Remove Hardware utility, it throws an error.
Windows can’t stop your ‘Generic volume’ device because a program is still using it. Close any programs that migt be using the device, and then try again later.
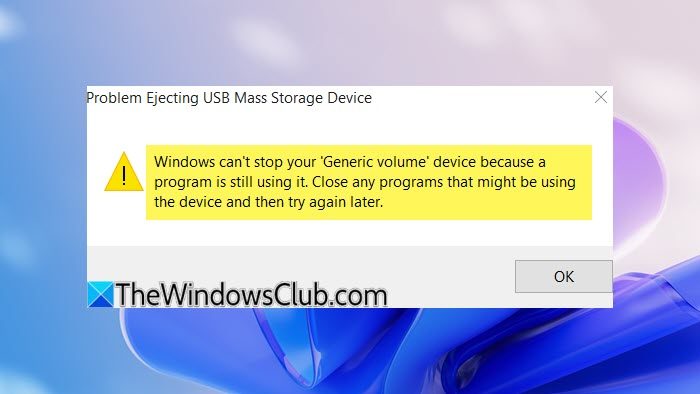
Let us see what you can do now!
Windows can’t stop your Generic volume device
This error is caused because the system is currently still using the drive – a Copy operation may still be in progress, Windows is indexing the contents of the drive in the background or the drive is not configured to be quickly removed.
So, we will be taking a look at the following fixes to get rid of this error:
- Close all open Program & Explorer windows.
- Configure Device Removal Policy.
- Change the file system to FAT32.
- Change drive letters.
- Using DISKPART to get the drive to be offline.
- Manage the hogging processes.
1] Close all open Program & Explorer windows
You can try to close all open Programs and File Explorer instances and check if that fixes your issue. This is because of the fact that some programs or the File Explorer might be using the device in the background which could be resulting in a conflict.
2] Configure Device Removal Policy
Open File Explorer, and right-click on the drive that is encountering the error that is mentioned above. From the context menu, select Properties.
Now, navigate to the tab labeled as Hardware. Under the section of All disk drives, select the disk drive that is causing you the issue.
Select Properties under the section of Device Properties.
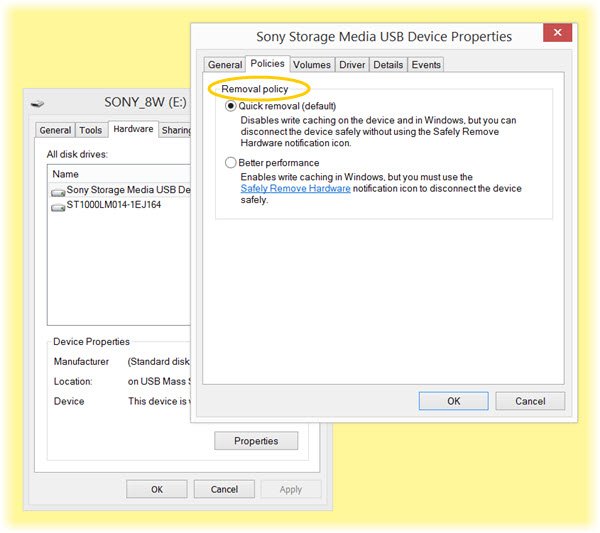
This will open another mini window. On the bottom portion of the mini window, select Change Settings.
Navigate to the tab labeled as Policies. Under the section of Removal Policy, select Quick Removal (default).
Select OK and then click on Apply and check if that fixes your issues.
3] Change the file system to FAT32
If you face this issue often for a particular USB, then copy its contents safely and then format the disk. Do note that this will remove all the contents of your storage device.
Open File Explorer. Right click on the drive that is encountering the error that is mentioned above. From the context menu, select Format.
It will open a new mini window. For the menu of File System, select the option of FAT32 from the drop-down menu.
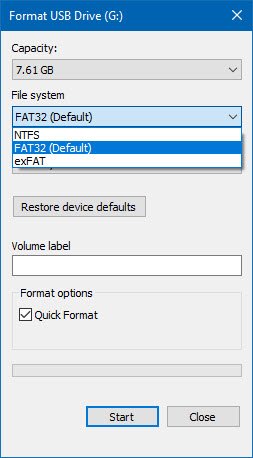
Check the box that is labeled as Quick Format. Finally, click on Start.
4] Change drive letters
Type diskmgmt.msc in the text box and hit the OK button. Find the entry for your USB Storage device by the drive letter assigned to it and right click on it.
Select Change Drive Letter and Paths… It will open a new mini window.
Select the drive letter you want to change and click on the button called Change.
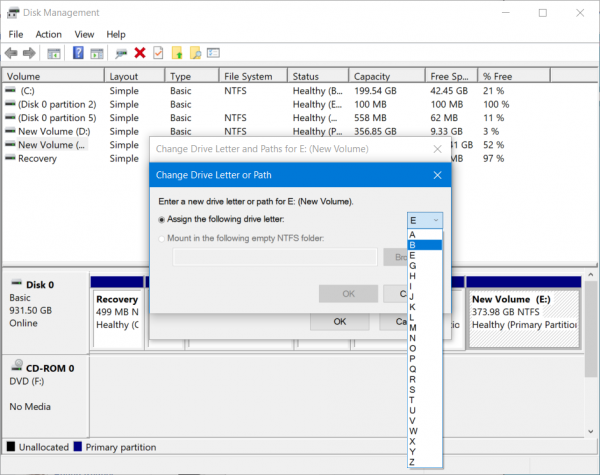
From another smaller window that opens, select the new drive letter from the drop-down menu and select OK. When you get warning prompt, click on Yes.
Reboot your computer.
5] Using DISKPART to get the drive to be offline
Execute the following commands in an elevated command prompt
diskpart
This will initiate the Diskpart utility. Then type-
list disk
and then-
list volume
These commands will help you in either listing all the Disks connects or all the partitions on those disks formed.
From here, you will have to choose one command depending on the list command you entered.
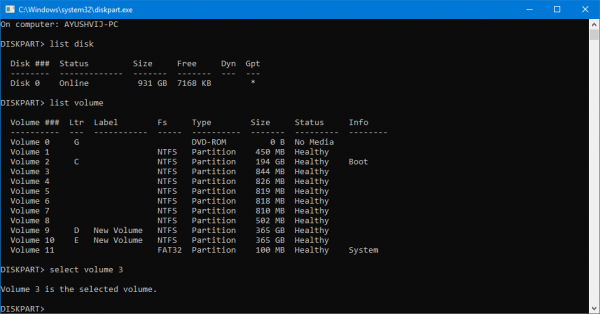
Type in-
select disk #
or
select volume #
Hit Enter. This will select the Disk or Partition you want to select.
Next, type in-
offline disk #
or
offline volume #
Then hit Enter. This will mark the selected disk as Offline.
Now you can take out your USB Storage device physically. But when you plug it in again, you need to carry out the same method but in the last command. You need to enter the following command-
online disk #
or
online volume #
This will get your device back online.
6] Manage the hogging processes
Open the Task Manager and then look for the running processes and programs hogging on your USB Storage device.
When you have a program using a USB drive, it will hog on to some Disk or CPU while transferring data and interacting with the device. This could be the offender.
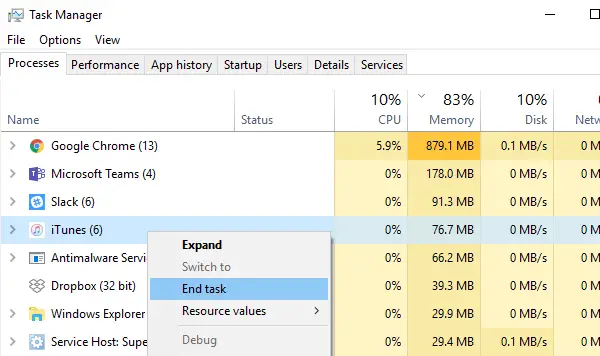
Select them, then right-click on them, and finally click on End Task or End Process depending upon if you are terminating a Program or an entire process for it.
You may also restart Explorer.exe and see if this works.
I hope this helps.
Related read: Problem ejecting USB Mass Storage Device, This device is currently in use
How do I eject my USB when it says it’s in use?
If your USB says it’s in use, close any open files or programs using it. Press “Ctrl + Shift + Esc” to open Task Manager, find related processes, and end them. Then, try ejecting the USB again by right-clicking the drive in “File Explorer” and selecting “Eject.” This should safely remove the device.
How do I force eject a USB device in Windows 11?
To force eject a USB device in Windows 11, right-click the USB icon in the system tray and select “Eject.” If it fails, try restarting your computer and then ejecting it. Alternatively, open File Explorer, right-click the USB drive under “This PC,” and select “Eject” from the context menu.
Leave a Reply