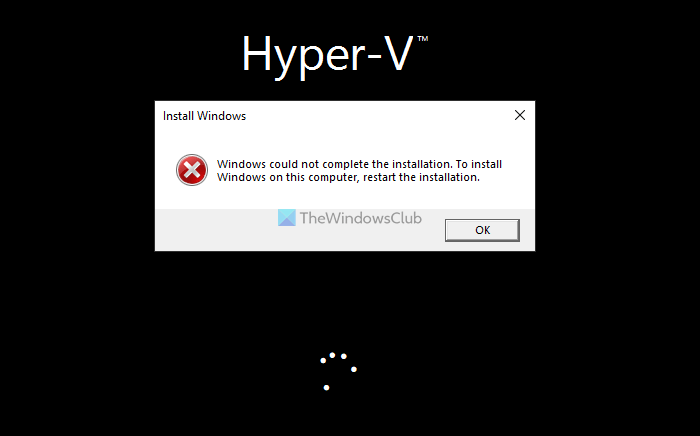
While installing Windows 11/10 on Hyper-V, if you get Windows could not complete the installation error, you can follow these solutions. Although this error doesn’t appear frequently, you might encounter it at times.

The entire error message says something like this:
Windows could not complete the installation. To install Windows on this computer, restart the installation.
Before getting started with the solutions to fix this issue, you must know that the same error might occur while doing a fresh installation. However, this error can also appear on Hyper-V. You need to follow the solutions based on when you are getting the error. You can follow all these solutions even if you have restarted the installation earlier.
Hyper-V Windows could not complete the installation
If you see error Windows could not complete the installation while installing on Hyper-V, follow the suggestions laid down below:
- Do not Shut down when installing
- Make sure the ISO is intact
- Re-download ISO
- Reduce RAM
- Re-create virtual machine
To learn more about these solutions, continue reading.
1] Do not Shut down when installing
At times, Hyper-V takes a lot of time to go to the next screen while installing Windows 11/10. Many people often click the Shutdown or Turn off button to stop the installation after getting bored. However, the same thing could cause the aforementioned issue. That is why it is not recommended to click the Shutdown or Turn off button while it is installing the OS.
2] Make sure the ISO is intact
Throughout the installation, the selected ISO must be intact in the same location. Otherwise, Hyper-V won’t be able to fetch the file and continue with the installation. That is why it is recommended not to change the location of the ISO and delete the ISO.
3] Re-download ISO

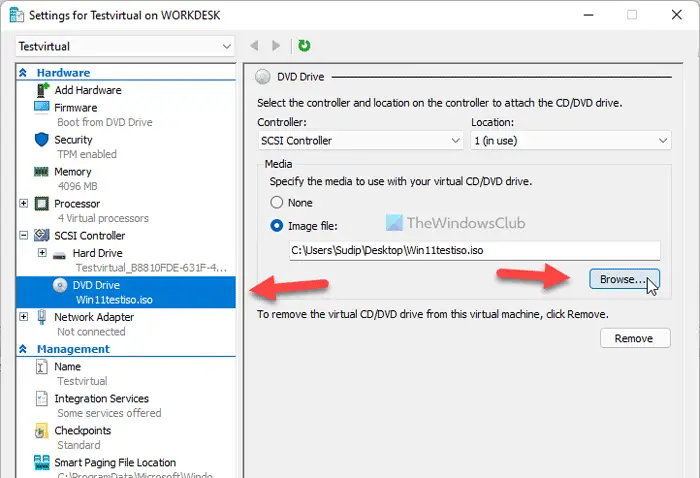
At times, the ISO might be corrupted due to some reasons. If that happens, Hyper-V won’t be able to complete the installation. That is why you can re-download the ISO and restart the installation. To replace the ISO path, do the following:
- Open Hyper-V Manager on your computer.
- Right-click on the virtual machine and select Settings.
- Go to SCSI Controller > DVD Drive.
- Click the Browse button.
- Choose the new location of the ISO.
4] Reduce RAM

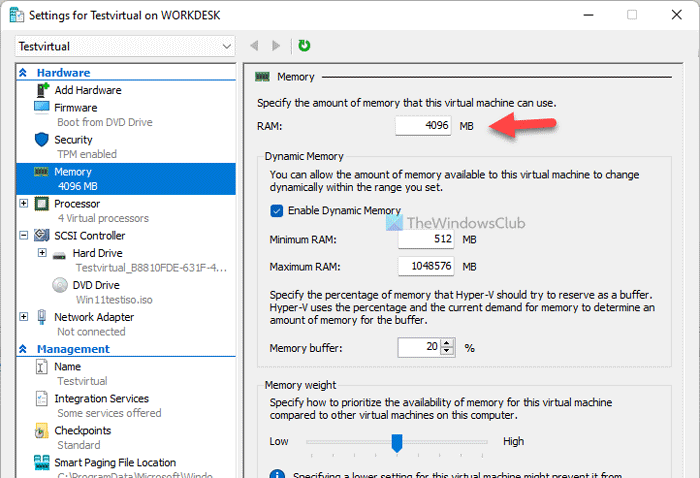
If your computer doesn’t have a good amount of RAM, you should not assign more than 50% to the virtual machine. If you have done that with the current virtual machine, it is recommended to reduce the amount. For that, follow these steps:
- Right-click on the virtual machine and select Settings.
- Switch to the Memory tab.
- Enter an amount less than the existing one.
- Click the OK button.
Then, restart the installation.
5] Re-create virtual machine
If none of the aforementioned solutions worked for you, you could re-create the virtual machine. To create a virtual machine and install Windows 11 using Hyper-V, follow this guide.
How do you fix Windows could not complete the installation error?
If you get Windows could not complete the installation error, you can run the Automatic Startup Repair, turn on an Administrator account, start Account Creation Wizard, etc. However, if you get the same problem with Hyper-V, you can follow the aforementioned solutions. That said, you can reduce the RAM, re-download the ISO, etc.
How do I fix Windows 11/10 stuck on completing installation?
If Windows is stuck on completing the installation wizard, there is only a couple of things you can do other than waiting for it to finish. However, the solutions depend on the situation you are in. For example, if the stuck on adding a Microsoft account, you can skip it. If it is stuck on logo spinning dots, you can disable Legacy BIOS.
That’s all! Hope this guide helped.
Leave a Reply