WiFi or Network Printers are popular, and since most of the homes have a router at home, putting them at any place makes it convenient. You can print it from anywhere, and go ahead, and get the printout. That said, if you are trying to set up a WiFi printer or already have done it, but Windows is not able to find it, then in this post, we will suggest some tips so you can resolve it. The error message related to this may say—Windows could not search your Network for printers.
Windows could not search your Network for Printers
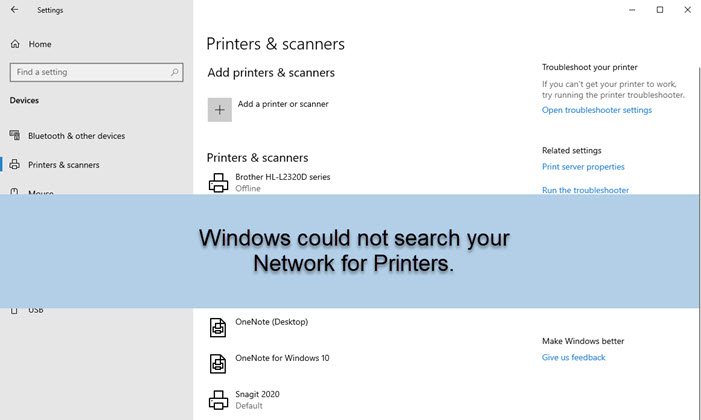
The error message “Windows could not search your Network for Printers” means that it is not able to find the Printer that was discovered in the Network with which the computer is connected. You will only realize it when you try to print a document, and nothing happens with the Printer. Then when you uninstall the Printer and try looking for it, it will reveal this error. Since this is a network issue, let’s take a look at those suggestions:
- Basic Troubleshooting
- Enable Network Discovery
- Run Printer Troubleshooter
- Check if the devices are on the same Network
- Share Printer from Computer
- Firewall Settings.
Follow the steps one by one, and then check which one resolves the problem.
1] Basic Troubleshooting
Make sure you have checked a few basic things before going ahead. The network cable is plugged, WiFi is turned on, the Printer is turned on, etc. When the print is often sent to the Printer, it remains in the print queue waiting for the Printer to come online.
2] Enable Network Discovery
If the computer can not look into the Network, it will not be able to find anything. If along with the Printer, you cannot see any other computer or other devices, then the PC’s network discovery settings have changed.
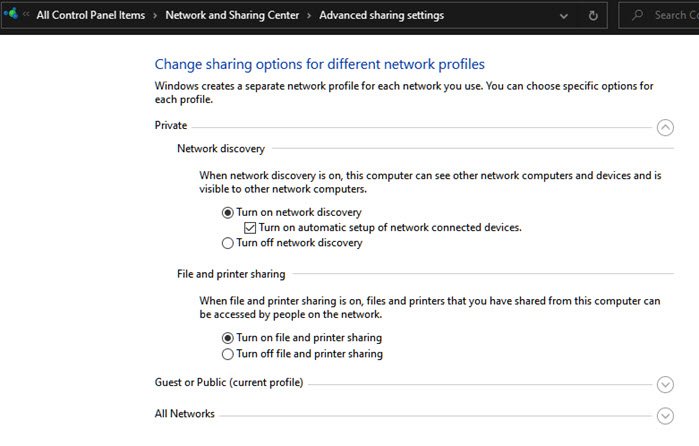
- Open Windows 10 Settings.
- Select Network & Internet.
- Under the Advanced network settings, select Network and Sharing Center. This will open the Control Panel.
- Now, click on the Change advanced sharing settings link on the left side.
- Select the following options:
- Turn on network dictionary
- Turn on file and sharing
If you have joined a Private Network, you will turn on the discovery in that. So choose accordingly
Windows 11 users need to follow the following steps to turn on Network Discovery:
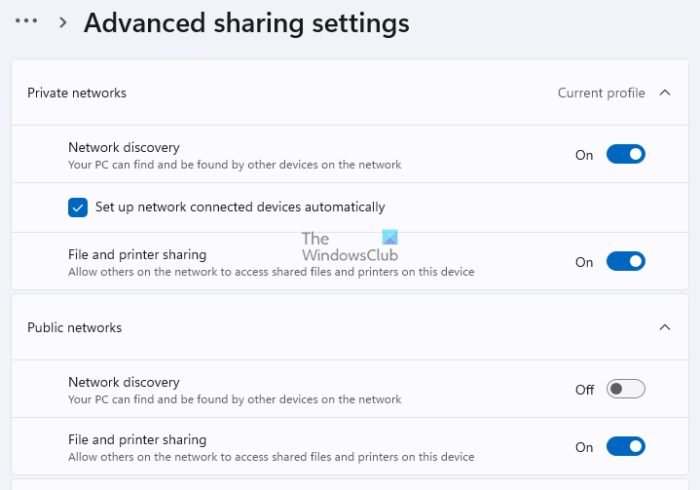
- Open Windows 11 Settings.
- Go to Network & internet > Advanced network settings.
- Now, select the Advanced sharing settings option under the More settings section.
- You can turn on the following options for Private, Public, or all networks.
- Network dictionary
- File and printer sharing
3] Run Printer Troubleshooter
You can run the Printer troubleshooter in two ways. One is through Windows Settings, and the second is from the Run prompt (Win + R).
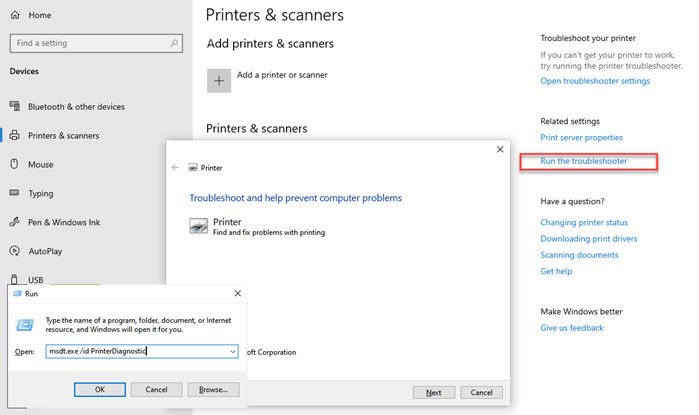
- Open Windows 10 Settings
- Navigate to Printer and Scanners
- Under Related Settings click on Run the troubleshooter
Let the Wizard complete the process, and try adding the Printer again.
If you get into Printer issue often, you can open the Run box, type the following and press the Enter key.
msdt.exe /id PrinterDiagnostic
It will open the same Printer Diagnostic Prompt, but it is faster to launch. You can also choose to create a shortcut using this and launch it whenever you want it.
In Windows 11, you can run the Printer Troubleshooter via the Get Help app. However, all the troubleshooters in WIndows 11 are redirected to the Get Help app. Hence, if you run the Printer Troubleshooter by following the steps provided below, Windows 11 will open the Printer Troubleshooter automatically in the Get Help app.
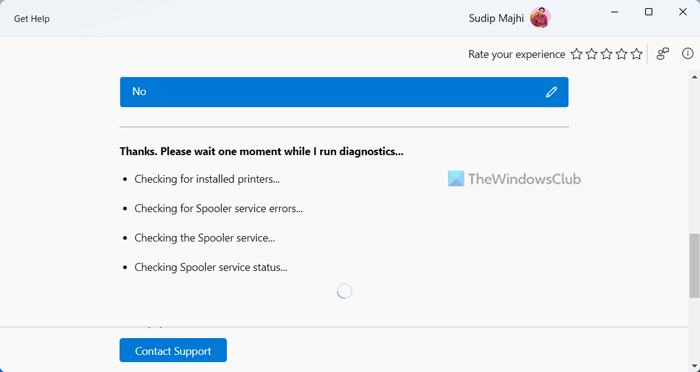
- Open Windows 11 Settings.
- Go to System > Troubleshoot > Other troubleshooters.
- Click on the Run button next to the Printer.
4] Check if Printer and Computer are on the same Network
The computer can only discover the Printer which is on the same network as the computer. Many of us create multiple WiFi SSID or Names. If you have a WiFi Printer, make sure the computer and printer are connected to the same WiFi. It applies to devices connected over Ethernet cables.
5] Share Printer from Computer
If you have a non-network enabled printer which is connected to a computer, then unless it is shared, no one else can use it. I have Brother Printer which doesn’t have WiFi or Ethernet port. I can share it with the rest of my family only when I enable sharing. The Printer is visible when it is turned on and connected to the network. If you have, for some reason, removed the printer sharing status, then it will not be visible to others.
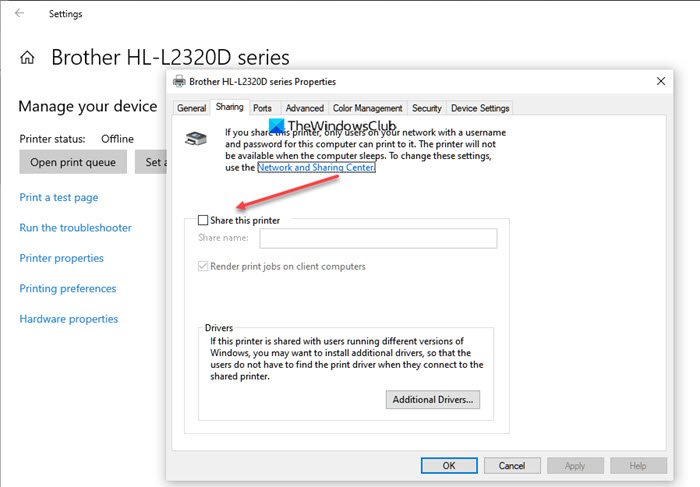
- Open Windows 10 Settings (Win + I) and navigate to Devices > Printer & scanners
- Select the Printer and click on Manage Button
- Click on the Printer properties and then switch to the Sharing tab.
- Check the box which says Share this Printer, and add a name to it.
- Click on OK to make the Printer available with the rest of the computers on the network.
Windows 11 users can follow the steps provided below to open the printer properties:
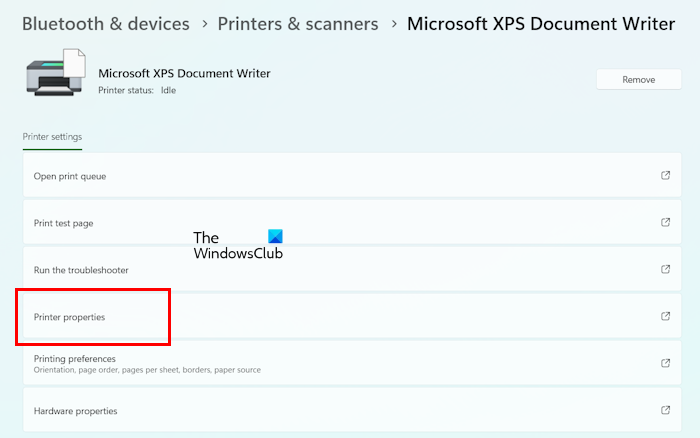
- Open Windows 11 Settings.
- Go to Bluetooth & devices > Printers & scanners.
- Select your printer from the list displayed on the screen.
- Now, click on the Printer Properties tab.
6] Check Firewall Settings
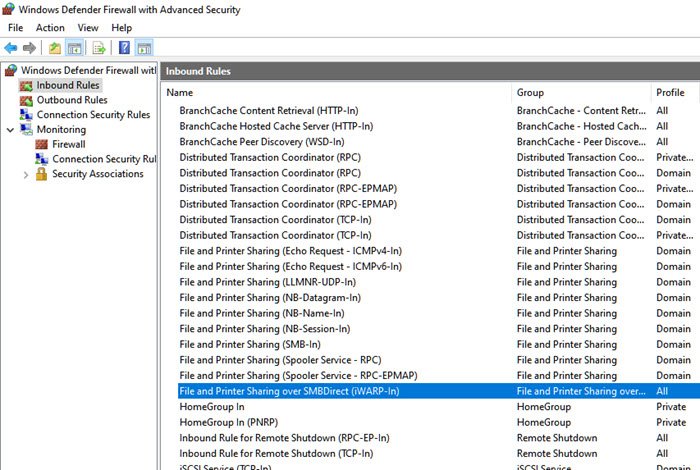
The Firewall settings are known to block services and ports. If the third-party service has blocked the Printer on the computer, it will not be able to find the Printer. You will need to check-in the Firewall exception list to confirm.
- Open Windows Security App
- Switch to Firewall and network protection
- Click on the Advanced Settings followed by UAC prompt to open Windows Defender Firewall with Advanced Security window
- Under Inbound and Outbound rules, check the Status of the File and Printer sharing group to find if there is anything blocked.
If you wish, you may also reset Windows Firewall settings to default.
There is a bright chance that Windows could not search your Network for printers is the case where either the Printer is not on the same Network or is turned off. So makes sure to go through all the most straightforward solutions first, followed by rest.
I hope the post helped you to resolve the problem.
How do I manually connect to a network printer?
If Windows cannot detect your network printer, you can add it manually. For this, open Windows 11/10 Settings and go to Bluetooth & devices > Printers & scanners. Now, click on the Add device button. You will see a message “The printer I want isn’t listed.” Click on the Add manually link next to this message. A new popup window will appear. Here, you can add a network printer by entering its IP address or Hostname. You can also add your network printer with manual settings. Here, you can use either an existing port or create a new port.
How to reset printer spooler?
Clearing the Print Spooler resets it. Sometimes, print jobs get stuck which creates problems while printing. In this case, deleting the print jobs by clearing the Print Spooler fixes the issue. To do this, first, you need to stop the Print Spooler Services through the Windows Services Manager. After that, delete all the data inside the PRINTERS folder. After doing that, restart the Print Spooler Service.
Read next: How to cancel Print Job on HP, Brother, Epson and other printers.