You may have noticed a message that implies that your computer created a temporary paging file because of a problem. This might raise some eyebrows as the paging file is a file on your hard drive that Windows uses as virtual memory when your system’s physical RAM runs low on memory. In this post, we are going to see what to do if Windows created a temporary paging file on your computer.

Windows created a temporary paging file on your computer because of a problem that occurred with your paging file configuration when you started your computer. The total paging file size for all disk drives may be somewhat larger than the size you specified.
Windows created a temporary paging file on your computer
If Windows has created a temporary paging file on your computer, execute the solutions mentioned below to address the issue:
- Set Virtual memory manually
- Change Registry value
- Disable AFS
- Reset the paging file
Let us get started with the troubleshooting guide.
1] Set Virtual memory manually
If the system does not have a properly allocated paging file, this can lead to performance errors and an error message. Setting the Virtual memory can ensure stability by preventing temporary paging file creation.
- Click Win + R to open the Run dialog box, type systempropertiesadvanced to open System Properties, and hit OK.
- In the Advanced tab, navigate to the Performance section, and click the Settings button.
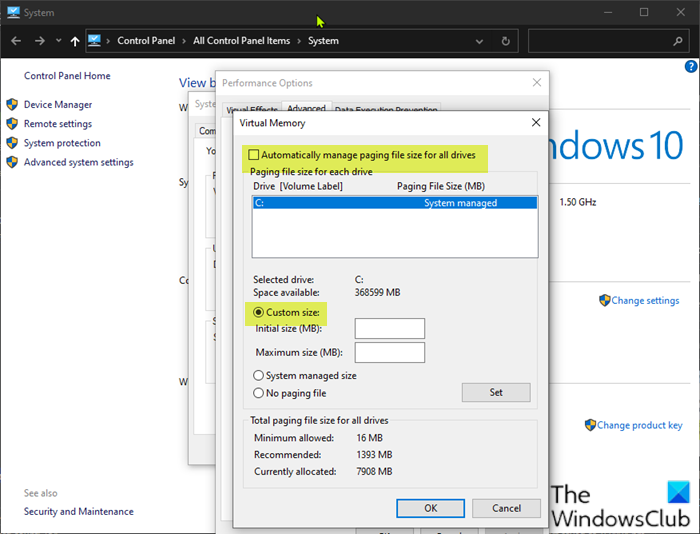
- Once again, navigate to the Advanced tab, and click the Change button under the Virtual Memory section. Here, ensure that the Automatically manage paging file size for all drives box is unticked, and select System managed size.
- Lastly, Click on the Set button and hit Ok to save the changes.
Check if the issue persists. Move to the next solution if it does.
2] Change Registry value
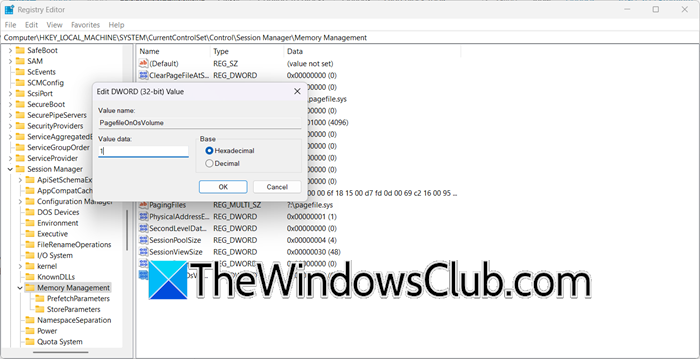
The registry key HKEY_LOCAL_MACHINE\System\CurrentControlSet\Control\Session Manager\Memory Management\PagefileOnOsVolume controls whether the Page file (a file used by Windows for virtual memory) is located on the same volume as the operating system.
- Value 1: The page file is on the same volume as the OS.
- Value 0: The page file is on a different volume.
By changing this value from 1 to 0, you instructed Windows to move the page file to a different volume. So, first, create a backup of your registry. Then, go to the following registry key:
HKEY_LOCAL_MACHINE\System\CurrentControlSet\Control\Session Manager\Memory Management\PagefileOnOsVolume
If the value is set to 1, switch it to 0; however, if it is 0, set it to 1.
In case, PagefileOnOsVolume is missing, navigate to Memory Management, right-click on an empty space, select New > DWORD (32-bit) Value, and set it to 1.
Finally, reboot your computer and check if the issue is resolved.
3] Disable Active File Scavenging
AFS (Active File Scavenging) may interfere with the virtual memory management by preventing Windows from properly accessing or modifying pagefile.sys. It is recommended to disable AFS, and here’s how to do it.
- Click Win + X, press A to open the Command Prompt, and click the Yes button.
- Type the following command to disable AFS, and hit the Enter button:
sc config afs start= disabled
- Once done, close the command prompt and reboot the device.
Ensure that the error is resolved. Otherwise, see the next solution if it continues to persist.
Read: How to increase Page File size or Virtual Memory
4] Reset the Paging file
A fresh paging file can eliminate conflicts, allow Windows to recreate the file with optimal settings, and ensure proper virtual memory allocation. Follow the steps mentioned below to reset the Paging file.
- Click Win + R to open the Run dialog box, type systempropertiesadvanced to open System Properties, and hit the OK button.
- In the Advanced tab, go to the Performance section, and click the Settings button.
- A new window will appear. Navigate to the Advanced tab and select the Change button from the Virtual Memory section.
- Untick the Automatically manage paging file size for all drivers, tick the Custom Size box, and set both the values of Initial Size and Maximum Size to 0 to disable it.
- Click on the Set option, and hit the Yes button when prompted.
- Once done, reboot the PC, and open the Run dialog box.
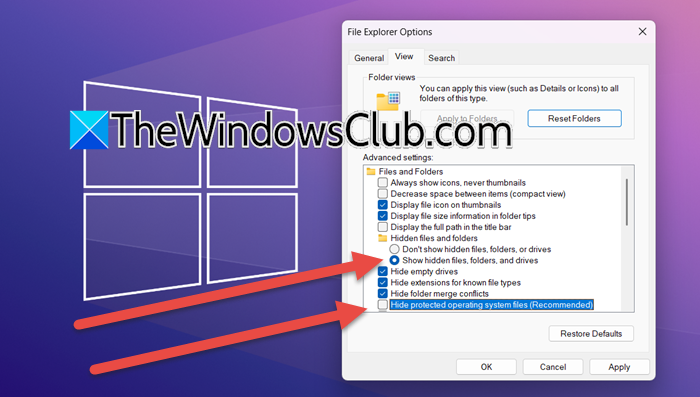
- Type control.exe folders to open the Folders option, and navigate to the View tab. In the Advanced settings section, tick the Show hidden files, folders, and drives box, and uncheck the Hide Protected operating system files box.
- Click Yes when warned and hit the Apply button to unhide the pagefile.sys file. Once done, navigate to the C: drive, search Pagefile.sys file, right-click on it, and select the Delete option.
- Once again, open System Properties, navigate to the Virtual Memory section, enable the Automatically manage paging file size for all drivers, and hit the OK button.
Reboot the PC, and verify whether the issue is resolved.
Read: How to create Virtual Memory on a secondary SSD
Is it okay to disable Paging file?
Disabling the paging file is generally not recommended since it helps manage memory efficiently and provides a buffer in case RAM is fully utilized. It’s in users’ best interest to let Windows manage virtual memory.
Read: Enable Virtual Memory Paging File Encryption in Windows
Should Paging file be on C: drive?
Generally, the paging file is on the C: drive because it is the system drive to ensure optimal performance. However, users can move it to another drive, especially, in the case of systems with multiple drives.
Also Read: Your system is running low on virtual memory on Windows.