In this post, we will show you how to fix the error message Windows did not detect a properly installed network adapter which you may see after running the Network Adapter Troubleshooter on a Windows 11/10 PC. The error occurs when Windows fails to detect a network adapter due to corrupt or missing driver files or OS incompatibility issues. Network adapter issues are the prime cause of a slow or intermittent connection, lost connection, or even no connection to a wired or wireless network.
A Network Adapter controls the interface of an operating system and connects the system to the wireless network.
Device drivers play a significant role in managing the communication between the computer and the hardware device. For network adapters, the driver is known as a network adapter driver. When you connect a network adapter to the computer, Windows checks for the available drivers and install them automatically. However, not all pre-installed drivers work as expected. Sometimes, they become corrupt or outdated, or incompatible and, throw errors. This post talks about one such error that results in a failed network adapter installation.
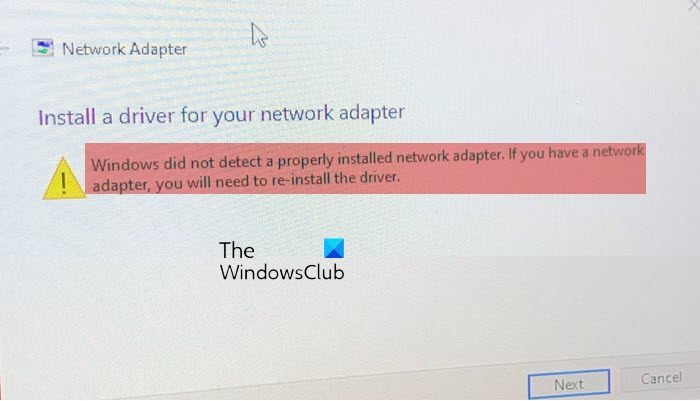
The complete error message reads:
Network Adapter
Install a driver for your network adapter
Windows did not detect a properly installed network adapter. If you have a network adapter, you will need to re-install the driver.
If you cannot use a network connection (WiFi or Ethernet) on your system due to the same error, continue reading this post to know how to fix the issue.
Windows did not detect a properly installed network adapter on Windows 11/10
Use the following solutions to fix the error message Windows did not detect a properly installed network adapter which you may see after running the Network Adapter Troubleshooter on a Windows 11/10 PC:
- Update/Reinstall Network adapter drivers.
- Run the Hardware and Devices troubleshooter.
- Perform a Network Reset.
Let us see these in detail.
1] Update/Reinstall Network adapter drivers
Outdated or incompatible drivers can also cause Windows to show error messages.
While updating, it is important to install the right drivers manually. Since the internet may not be working on your system, you should download the drivers from the manufacturer’s website using another Windows system that has access to the internet. Then you can transfer the drivers to your system using a USB drive.
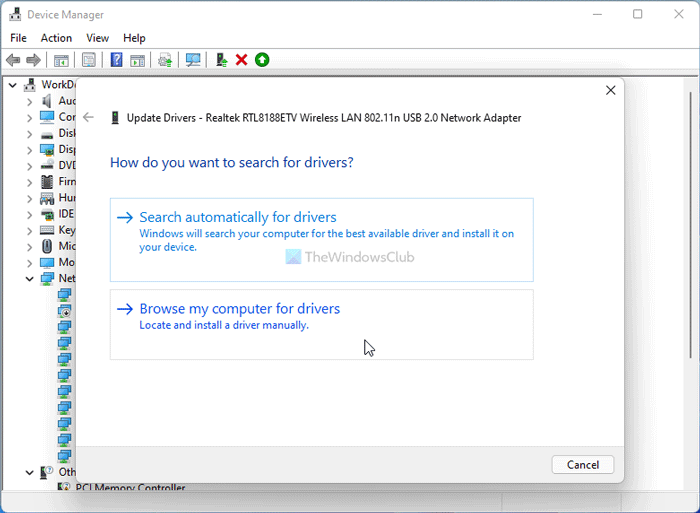
To update the Network drivers, right-click on the Start button icon and select Device Manager. Click on the arrow before the Network adapters section to view the list of available drivers. Right-click on a driver and select Update Driver. In the Update Drivers window, select Browse my computer for drivers. Then browse and select the downloaded driver.
Repeat this for all available network adapter drivers. Reboot Windows and see if the error is gone.
If not, you should try reinstalling the network adapter drivers. Open Device Manager, right-click on the driver and select Uninstall device.
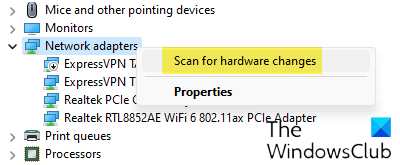
Now select Action > Scan for hardware changes. Windows will automatically detect and install the right drivers for you.
2] Run the Hardware and Devices troubleshooter
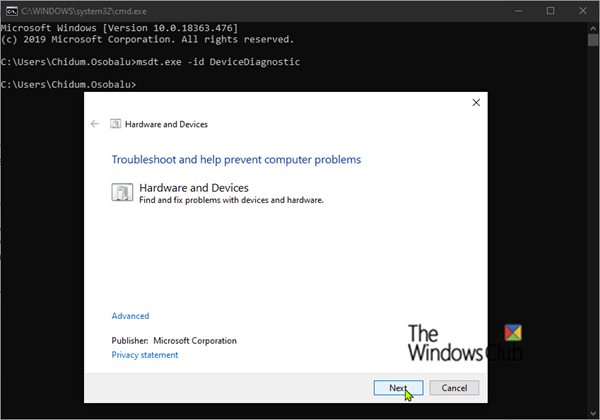
Hardware and Devices troubleshooter is a Windows troubleshooter that can detect issues with hardware devices attached to the PC. It no longer appears in the Troubleshoot section, so you must access it using Command Prompt. You can also use our freeware FixWin to open the troubleshooter with a mouse click.
Open Command Prompt using administrator privileges. Click on Yes in the UAC prompt. Type the following command in the Command Prompt window and press Enter:
msdt.exe -id DeviceDiagnostic
Hardware and Devices troubleshooter will appear. Click on the Next button and follow the on-screen instruction to troubleshoot the issue.
Read: Network Adapter missing or not showing in Windows
3] Perform a Network Reset
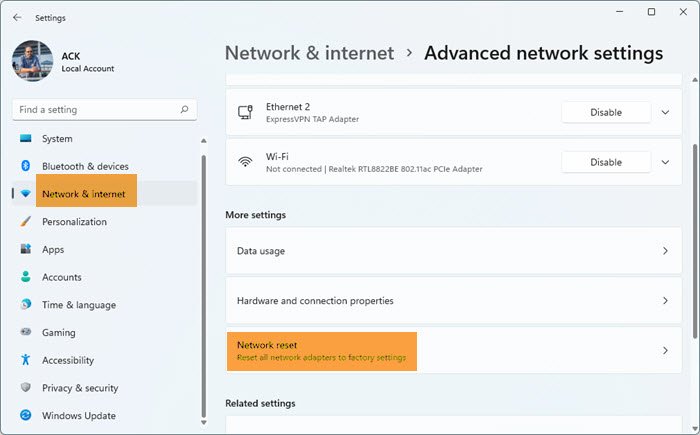
Network reset is a feature that reinstalls network adapters & set networking components to default on a Windows 11/10 PC. You may use this feature if you’re facing connectivity issues and the built-in Network troubleshooters in Windows won’t help you out.
Here’s how to use the Network reset option on a Windows 11 PC:
- Click on the Start button icon and select Settings.
- Click on Network & internet in the left panel.
- Scroll down to the bottom of the right panel and click on Advanced network settings.
- Click on Network reset under More settings.
- On the next screen, click on the Reset now button. Wait till the process uninstall and reinstalls the network drivers.
- Reboot your PC.
This will reinstall Network adapters, Reset Networking Components to default.
If none of the above solutions work, you can perform a system restore to roll back your system to a previous working state. Once the computer reboots, you may check if Windows can detect the network adapter on your PC.
I hope this helps.
Similar: Windows could not find a driver for your Network adapter.
Why is my PC not detecting my Network Adapter?
If Windows does not detect your network adapter, then the network adapter driver installed on your system might have gone corrupted or outdated. The adapter’s power management settings can also make this happen. If you can’t see the network adapter or see an ‘unknown device’ in the Device Manager, try updating the network adapter driver to fix the issue.
How do I enable Network Adapter in BIOS?
Open Windows Settings. Go to System > Recovery. Click on the Restart Now button next to the Advanced startup option. You will enter the Windows Recovery Environment. Choose Troubleshoot > Advanced options > UEFI Firmware Settings. On the next screen, click on the Restart button. Press the F10 key to enter BIOS Setup. Go to the Main tab. Go to Network Boot. Enable Network Boot. Press F10 to save changes and exit.
Leave a Reply