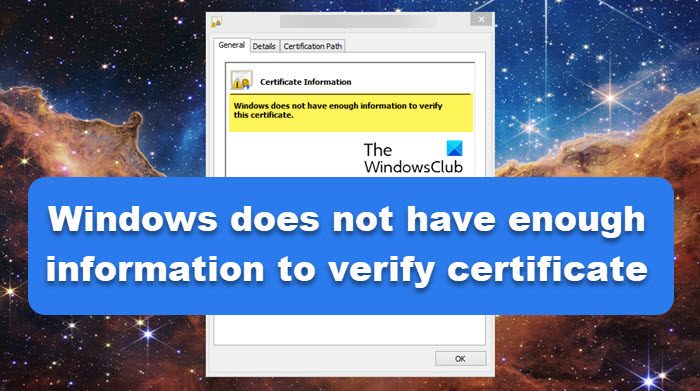
While trying to connect to a website if you see an error message due to lack of a certificate, then you have to install the valid certificate in your system or you may be facing some network issues. You may see an error message Windows does not have enough information to verify this certificate. This error often comes when you are trying to access any websites and the certificate is not installed on your system. In this article, you will know how to fix this problem.
In Windows, the certificate will provide security to users. If the certificate has been installed in your system no unknown users can access your resources, only those users can access the resources who have the appropriate permission because the main function of a certificate is to authenticate the identity of the owner.
Windows does not have enough information to verify this certificate
If you see Windows does not have enough information to verify this certificate message, follow the solutions mentioned below:
- Switch to Incognito Mode
- Clear Cache and Cookies Data
- Reset your Network
- Alter DNS Setting
- Reset the web Browser
- Reinstall the Certificate
Let’s try to resolve your issue by using these methods.
1] Switch to Incognito Mode
Opening a website in Incognito mode means your browsing activity is not saved on your computer also, it doesn’t use the stored cache allowing the website a clean slate. So, open the website in Incognito Mode on your web browser and check whether the website is working or not. If it opens in this mode, then the problem may be in your browser cache. But if the websites do not open in this mode then you can use another method to resolve this issue.
Follow the prescribed steps to enable Incognito mode in Browser.
- Open a web browser, which you have on your machine.
- On the right hand of the address bar, click on the three-dots or three-lines icon.
- Select the new Incognito window.
A new window appears and now you can open the website. If you are able to open the website without any errors, we can fairly conclude that there is something wrong with your browser, so, move straight to the next solution to clear your cache, and if that doesn’t help, execute the fifth solution.
2] Clear Cache and Cookies Data

If the browser’s cache file and cookies are corrupted it will show you various errors like the one in question. To
solve this problem, you should clear your browsing data from the web browser. To do this, follow our instructions below.
Chrome:
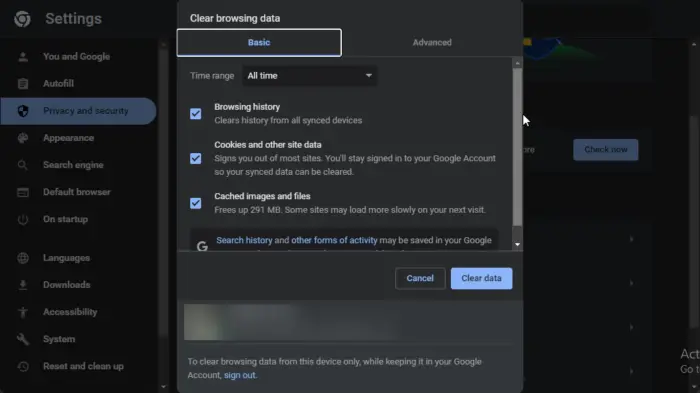
- Click on the three-dots icon, on the right hand of the address bar of your web browser and select More tools > Clear browsing data.
- Here, select All time in the Time range and check all three options given there.
- Click on Clear data to perform this operation.
Microsoft Edge:
- Click on the three vertical dots to open the menu and then click on Settings.
- Go to Privacy, search and service.
- Click on the Choose what to clear button from Clear browsing data now.
- Set Time Range to All time, select all the options, and click on Clear now.
Firefox:
- Open Firefox, paste “about:preferences#privacy” and hit Enter.
- Scroll down and click on Clear data.
- Finally, click on Clear.
You can implement this method on browsers other than Chrome, Firefox, and Edge as well. Hopefully, this method will resolve your error.
3] Reset your Network

Improper network configuration settings may also cause this said error. In that case, resetting network settings and protocols can resolve the issue.
First of all, in order to reset the Network setting, follow the prescribed instructions.
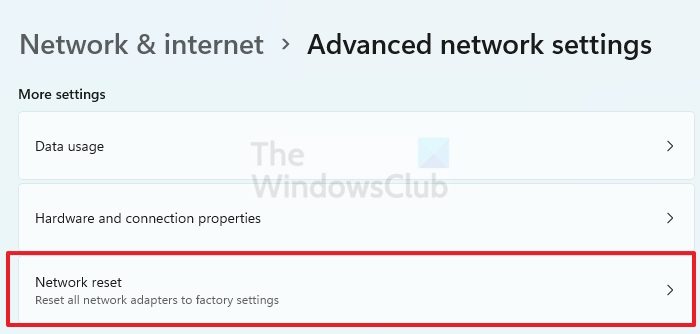
- Press the Win + I button to open the setting screen and then go to Network & Internet > Advanced network setting.
- Here, click on the Network reset button.
- Click on the Reset now option, click on Yes and now restart your system.
After resetting the network setting you will check whether this issue is resolved or not.
4] Alter DNS Setting
If resetting the network configuration didn’t resolve the said error then try to use the Google Public DNS to solve this issue. Now you will learn how to change DNS settings on a Windows machine. Here, you will configure 8.8.8.8 IP as the Preferred DNS server and 8.8.4.4 IP as Alternet DNS server. To do the same, follow the prescribed steps.
- Open Control Panel.
- Go to Network and Internet > Network and Sharing Center.
- Click on your WiFi name from the Connections option.
- Click on Properties.
- Select Internet Protocol Version 4 (TCP/IP4) and click on Properties.
- Select Use the following DNS server address option and set 8.8.8.8 as the Preferred DNS server and set 8.8.4.4 as the Alternet DNS server address.
Hopefully, using this solution you have resolved your said error.
5] Reset the web Browser
It has been seen that resetting the web Browser can resolve this error. To change the browser setting to its default. So, go ahead and reset Chrome, Edge, Firefox, etc to the factory settings. Hopefully, your issue will be resolved.
6] Reinstall the Certificate
Your browser may fail to verify the certificate if it is not installed properly. To do the same, all you have to do is right-click on the certificate and install the same. Once you have installed the missing certificate, your issue will be resolved.
After installing the certificate, you need to refresh it. To do the same, you need to make sure that you are a member of the Domain Administrators group, then refresh it using the command: gpupdate /target:computer /force that must be executed in the elevated mode of Command Prompt. Finally, open the Certificate console, go to Trusted Root Certification Authorities > Certificates and then check if the certificate is installed.
In order to fix this issue, installing the certificate is the last thing we will do, first, we need to make sure that it is not a result of a network or browser issue. So, read and execute all the solutions mentioned here, and hopefully, your issue will be resolved.

Leave a Reply