The Windows File Explorer is one of the most useful utilities on a computer running Windows 11/10. It is one of the most feature-loaded File Managers on all the platforms. But the main issue is when you try opening a location on the File Explorer, and it shows up Working on it… or Discovering files while it loads the content of that folder. It mostly occurs to the computers that are running on an HDD. But that does not mean it can not happen on SSD computers.
If your Windows 11/10 File Explorer is slow or often stuck on ‘Working on it..’ message with the green animation bar moving very slowly while loading the contents here is what you need to do to fix the issue.
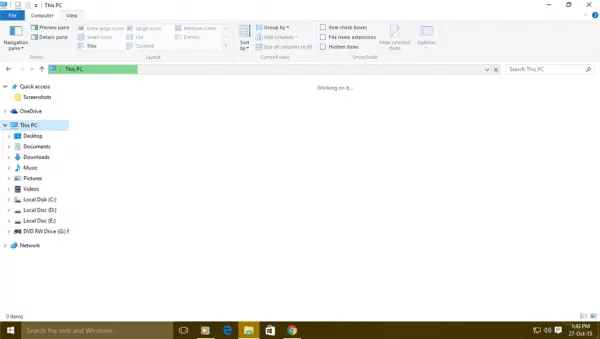
File Explorer stuck on Working on it in Windows 11
We will be undertaking the following fixes to resolve the issue:
- Using System Restore.
- Clear File Explorer History
- Delete the contents of the Automatic Destinations folder.
- Rebuilding the Search Index.
- Optimizing the folder for General Items.
1] Using System Restore
If you create a System Restore point usually, you can try to undo any modifications on your computer, by performing System Restore.
2] Clear File Explorer History
Clear your File Explorer history and see if it helps. The following instructions will guide you on this:
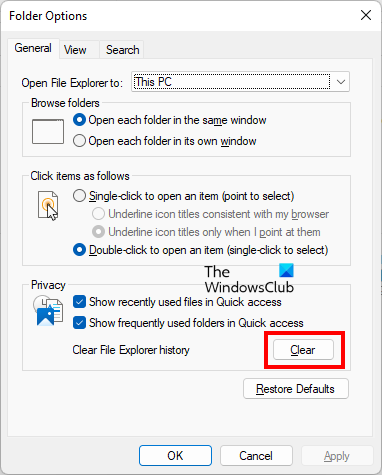
- Open File Explorer.
- Now, open Folder Options. In Windows 11, click on three horizontal dots and select Options.
- In the Folder Options window, make sure that you are under the General tab. Now, click Clear under the Privacy section.
3] Delete the contents of the Automatic Destinations folder
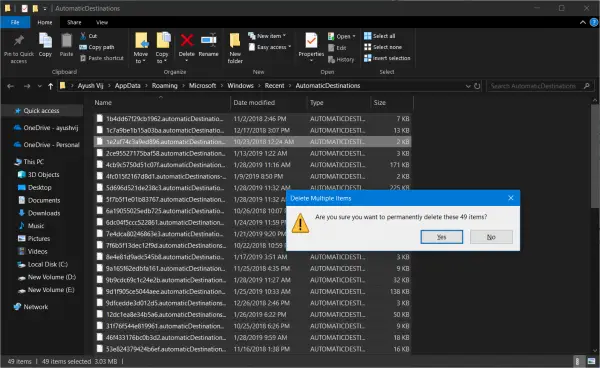
Hit the WINKEY + R button combination to launch the Run utility, type the following location and hit Enter:
%AppData%\Microsoft\Windows\Recent\AutomaticDestinations
Once the location opens in the File Explorer, just select all the files in there and hit the Shift + Delete button combination on your keyboard.
You will now get a prompt asking if you want to delete all the files permanently. Click on Yes.
This will now delete all the Quick Access cache; Now you can check if that fixed your error.
4] Rebuild the Search Index
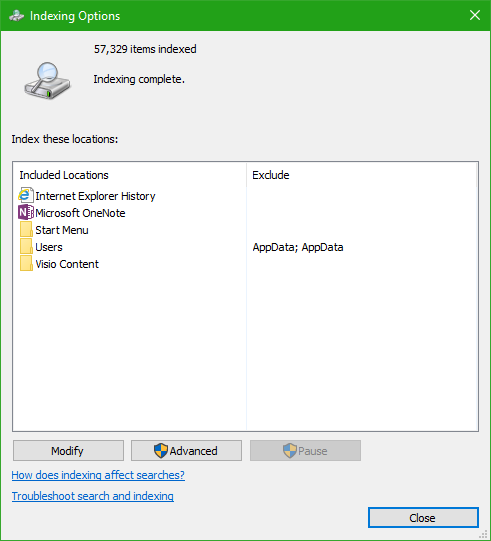
Open Indexing Options using the Search bar.
Click on the appropriate listing – say the Users folder. Now, click on the button called as Advanced.
A new mini-sized window will pop up. Make sure that you are under the tab that is labeled as Index Settings.
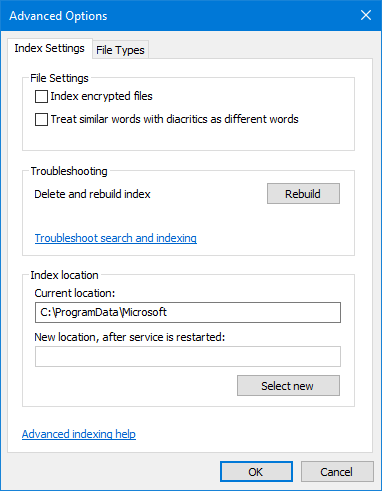
Under the section of Troubleshooting, click on the option called as Rebuild and click OK once the rebuilding is completed.
This will rebuild the search index for all the files.
5] Optimize the folder for General Items
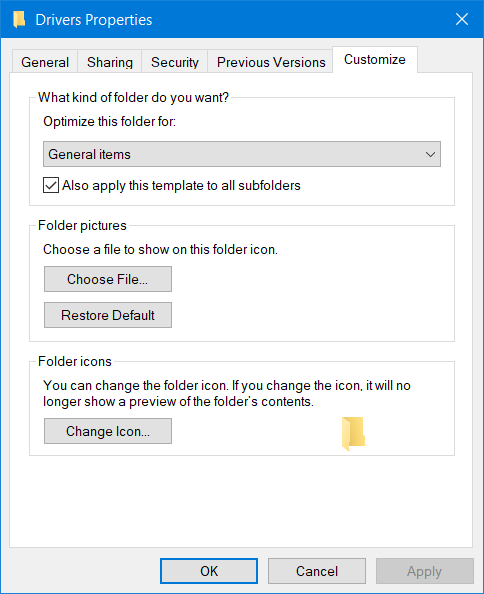
To make Explorer load contents faster, right click on the folder that takes time to load and shows the message of Working on it…
Now click on Properties. It will open the Properties mini window. Navigate to the tab called Customize.
Under the section of What kind of folder do you want?, click on the drop down to Optimize this folder for, and select General Items.
Also, check the box that says Also apply this template to all subfolders. Finally, click on OK.
Restart the File Explorer and check if that fixes your issue.
How do I unfreeze File Explorer?
If File Explorer keeps freezing or crashing, your system image files might have been corrupted. We suggest you repair your system image files by using the System File Checker. In addition to this, you can also use some fixes, like disabling Preview Pane, disabling Thumbnails, restarting Windows Explorer, etc. Such a problem can also occur due to faulty RAM. Run the Windows Memory Diagnostic tool to check the health of your RAM.
How do I force restart Windows Explorer?
You can force restart Windows Explorer via the Task Manager. Press the Ctrl + Shift + Esc keys to open the Task Manager. Now, select the Processes tab and scroll down to locate Windows Explorer. Once you find it, right-click on it and select Restart.
Were you able to fix your issue?
Leave a Reply