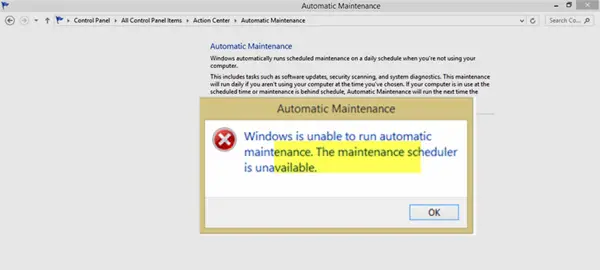
Windows comes with an inbuilt Automatic Maintenance feature which takes care of important tasks like security updating and scanning, Windows software updates, Disk Defragmentation, Disk Volume Errors, System Diagnostics, etc. If you receive an error which says ‘Windows is unable to run automatic maintenance, The maintenance schedule is unavailable‘, then this guide will help you fix the issue on your Windows 11/10 PC.

Windows is unable to run Automatic Maintenance
1] Run System File Checker
System File Checker will repair corrupted or damaged Windows system files. You will need to run this command from elevated CMD i.e. command prompt launched with admin privileges. Better still, Run SFC at Boot Time.
2] Run DISM Tool
When you Run DISM Tool it will repair Windows System Image and Windows Component Store in Windows 10. All of the system inconsistencies and corruptions should be fixed. You can either use PowerShell or command prompt to execute this command.
3] Enable Automatic Maintenance in Windows
It is possible that Windows Automatic Maintenance might have been disabled in Windows. You should manually enable it, and run to see if this works for you.
4] Enable Automatic Maintenance through Registry

If you see it disabled, you can also use the Registry to enable it. Make sure you create a system restore point first before going ahead.
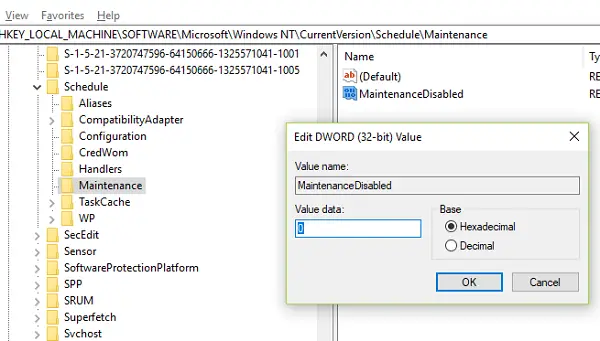
Type regedit in the run prompt and hit Enter. Now navigate to the following path:
HKEY_LOCAL_MACHINE\SOFTWARE\Microsoft\Windows NT\CurrentVersion\Schedule\Maintenance
Look for a key which says MaintenanceDisabled. Double-click to open it and set the value to 0.
Click OK, exit registry, and restart the computer.
If the key is not there, you can right click on the right pane, and create a new key, and set the value accordingly
5] Check Task Scheduler Services status

Most of the tasks in Windows 11/10 run through services. It is possible that either the Service has been stopped or is set to manual. You need to change it to automatic mode.
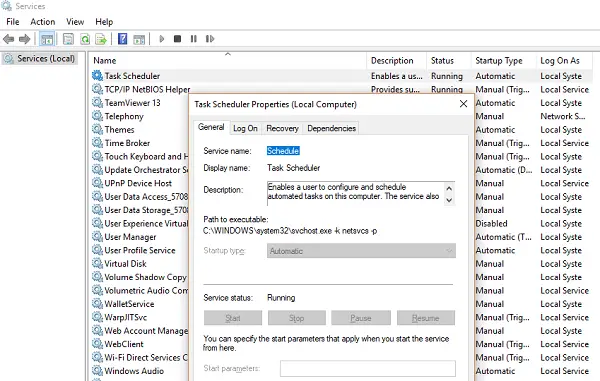
- Type services.msc in the RUN prompt and hit Enter.
- Look for Task Scheduler service. Press the T key on your keyboard, and it should take you to all services starting with T.
- Double click to open it. Under Startup Type, choose Automatic option. If it is not started, click on the Start button.
- Save, and exit.
6] Check Status in Task Scheduler
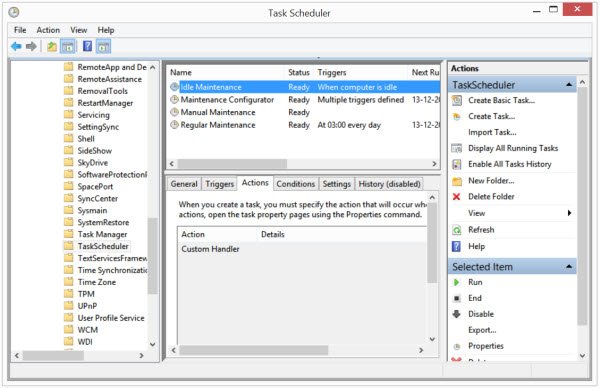
Open Task Scheduler > Task Scheduler Library > Microsoft > Windows > TaskScheduler.

Here Idle Maintenance, Maintenance Configurator and Regular Maintenance should be Enabled.
We hope these tips should help you run Automatic Maintenance on your Windows 11/10 PC.
Read next: Maintenance in progress message in Windows Action Center.
Leave a Reply