Your Windows license only supports one display language is a limitation error message on Windows that does not allow you to use multiple languages simultaneously. In this guide, we show you how to bypass this message.
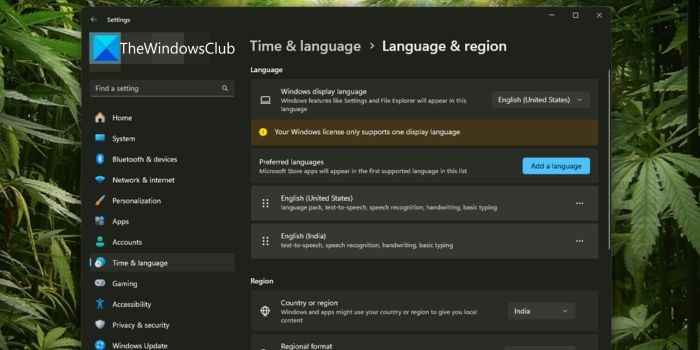
If you see the “Your Windows license only supports one display language” error on Windows, you cannot change your display language unless you change the Windows edition.
To find if a Windows edition supports a single language or multiple language packs, open the Settings app, click on System, and select About. Scroll down to the Windows Specifications tab. You can use one language as a display pack if you see Windows 11/10 Home Single Language beside Edition. If not, your Windows edition supports multiple languages.
Bypass Your Windows license only supports one display language
When you see Your Windows license only supports one display language limitation warning on Windows, you can use the following methods to bypass it.
- Install the Language pack and Switch the language via Registry Editor
- Upgrade Windows
Let’s get into the details of each method.
1] Install the Language pack and Switch the language via Registry Editor
It is the easy way to bypass Your Windows license only supports one display language error. To do this, you need to install the language pack and then switch the language using the Registry Editor.
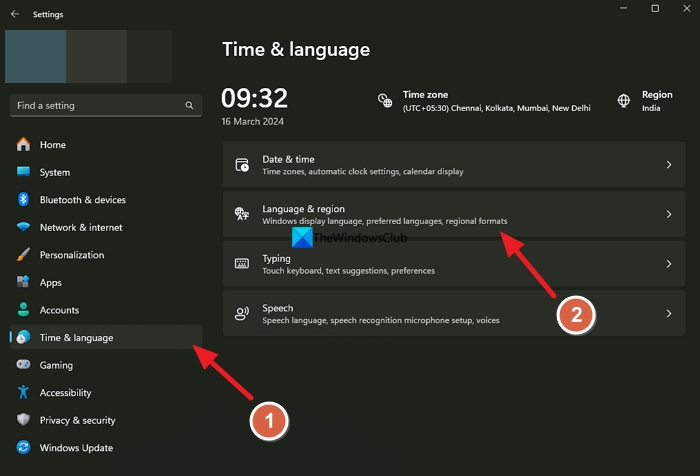
To install the language pack on Windows 11, open the Settings app and click on Time and language. Now, select Language & region.
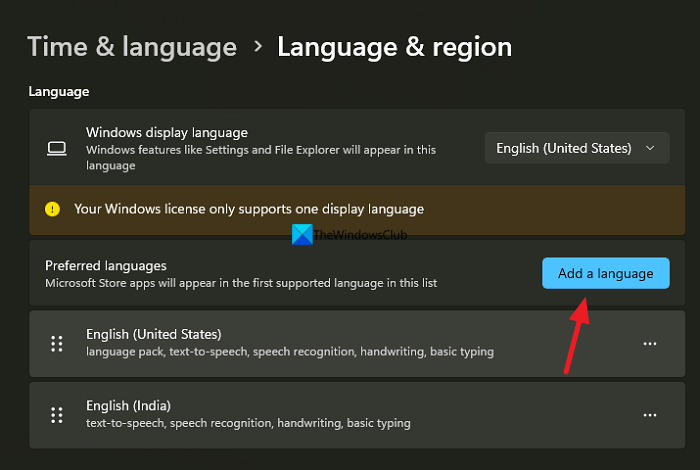
In the Language & region settings, click on Add a language.
Search for the language in the Type a language name text input box or scroll-down and select the language you want to install from the list. Then, click Next.
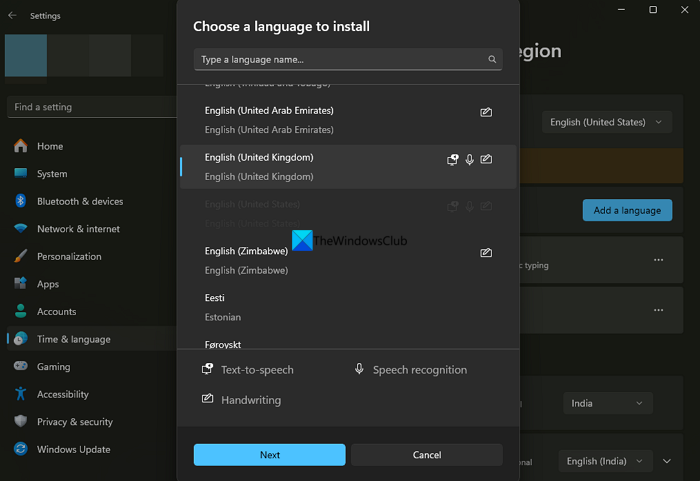
It will show all the language features of the language you have selected. Click on Install to start the installation.
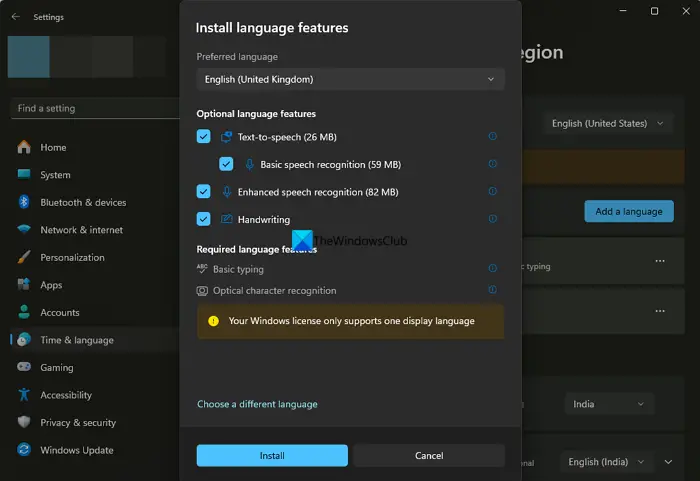
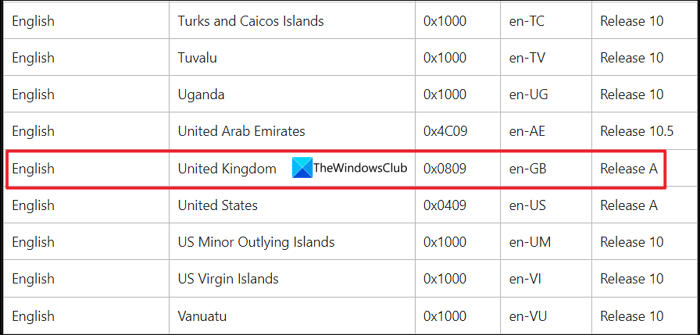
It will download the language pack and install it automatically. Now, to proceed to the next step of switching the language using the Registry Editor, you need to find the Language ID first. Each language we use on our Windows has an ID for its recognition by the operating system. The language IDs can be found on the Microsoft website. Go to the Microsoft website, and find the language ID based on the language you have installed. We have installed an English (United Kingdom) language pack. Its ID as per Microsoft documents is 0x0809. Similarly, find your language pack’s language ID and proceed to the next step.
Open Registry Editor from the Start menu by searching for Registry Editor. Navigate to the following path.
Computer\HKEY_LOCAL_MACHINE\SYSTEM\CurrentControlSet\Control\Nls\Language
In the path, double-click on the Default string, enter the last four digits of your Language ID, and press OK.
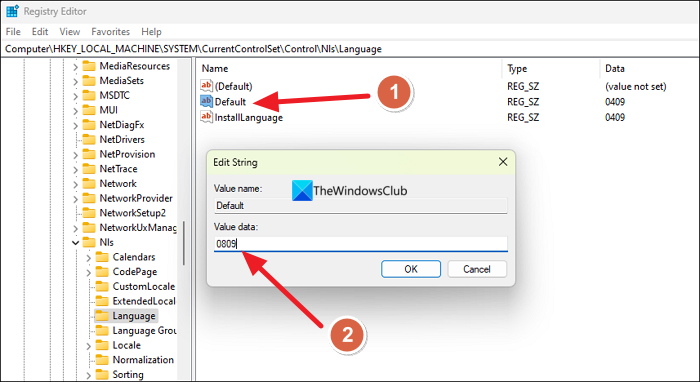
Then, double-click on the InstallLanguage string, enter the four digits of your language pack, and click OK. Restart your device to see the changed default language.
2] Upgrade Windows
The above method is a bypass that might be fixed or curtailed by Microsoft with its updates if they found users abusing it. It is better to upgrade your Windows edition from a Single language to Windows 11 Home or Windows 11 Pro.
Also read:
How do I change the language of Windows if only one language is supported?
If your Windows supports only one language, you need to upgrade it to an edition that supports multiple languages like Windows 11/10 Home, or Pro. You can also bypass the limitation by installing the language pack manually and switching the language using the Registry editor.
How do I get Windows 11 license only allows one language?
Most Windows editions that come free with laptops from manufacturers have single-language support. They are limited to one language if stated otherwise, like Pro or some other edition. You can find out if your Windows supports one or more languages in the Settings app > System > About > Windows Specifications.
Related read: Cannot remove a Language from Windows 11.
Leave a Reply