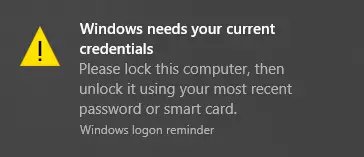
If you are annoyed with the “Windows needs your current credentials” popup message every time you log into your Windows 11/10/8/7 computer system, you are not alone. A lot of people face this irritating popup which makes them want to punch the screen maybe, because just like you, they too do not know why this is happening and how to get rid of the issue.
Windows needs your current credentials

If some cases the problem does not appear when you log in using your password, it only occurs when you login using a PIN. The error message that pops up reads:
Windows needs your current credentials. Please lock this computer, then unlock it using your most recent password or smart card.
It can be assumed that the problem occurs due to only PIN login. But that is not fair. So, here is one way you can fix this problem. This fix is exclusively for Windows 10 users.
For individual Windows 11/10 devices
This solution is for standalone devices running Windows 11/10. Follow the steps carefully in order. It is simple. Just pay attention while you’re at it.
- Go to the Start Menu.
- Right-click on your user profile.
- Go to Change account settings.
- Go to Your info and select Settings app.
- Hit the Verify link and you will be lead to a series of on-screen commands that you will need to be ready to follow in order to verify your info.
- Reboot the device after you’re done with the verification process.
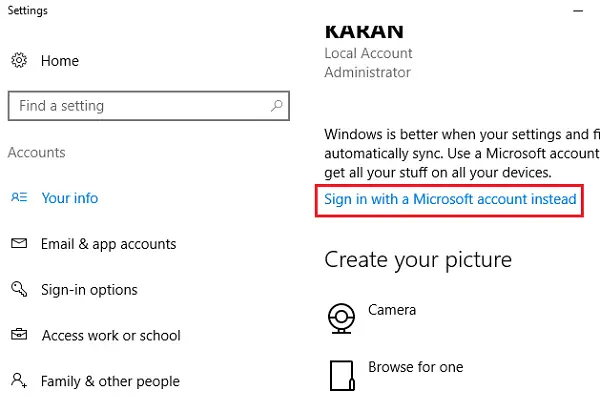
This option is available only if you are signed in from your Microsoft account. If not, it would show an option “Sign in with a Microsoft Account instead.”
This is it for a standalone device.
For domain connected devices
For a system that is domain connected, you will need to take the Group Policy route. For this, you will need Windows Pro or later versions. If you are on Windows Home, upgrade your system. There is no other way, and why won’t you upgrade to a version that enables Domain Join and Group Policy Management anyway? So, here is how.
Upgrade your Windows 11/10 system
You already know that in order to get rid of the Windows needs your current credentials popup you cannot be on Windows Home anymore. So if you are running Windows 11/10 Home, this section is for you. Follow these very simple steps. The process is a little time-consuming, that’s all.
1] Go to Settings.
2] Go to Update & security and via that, go to Activation.
3] Click the Change product key option in the right panel of the Activation window.
4] Click on Yes on the User Account Control popup.
5] Enter the product key prompt “VK7JG_NPHTM_C97JM_9MPGT_3V66T” in the space provided. This the default product key to upgrade from Windows Home to Pro free to test or try it. The OS will upgrade, but your copy of Windows Pro will not be activated.
6] You will then find the Start Upgrade button in the next move. Click it and wait till the system shuts down and restarts. You will come across the message:
- “Working on upgrades
- <__% complete>
- Don’t turn off your computer.”
7] After you’ve waited patiently for the whole process to complete, you will come across a similar adding features screen. Once again, your job here is to just wait till it completes to 100%.
8] The next step will be to log on to the upgraded version of Windows 11/10 Pro edition. You will see the message:
Edition upgrade completed
You’re all done and your PC is ready to go.”
9] Now that your upgrade is done, you can go open the Activation screen via the Settings app and check the current edition. You will need a genuine key to activate your Windows 11/10 Pro.
Now that you are all set to get rid of your primary Windows needs your current credentials error, let’s get back to the solution.
Change Group Policy setting
This is for connected domains on Windows 10 Pro and later versions. Here is how you go about it.
1] Go to Run and type “gpedit.msc” and click OK to open the Local Group Policy Editor.
2] A snap-in window appears where you will need to follow the path:
Computer Configuration > Administrative Templates > System > Logon.
3] Check the right panel of the Logon and find the “Always wait for the network at computer startup and logon” option.
4] If this option is ‘Enabled’ double-click to ‘Disable’ it. You can also set it to ‘Not Configured’.
5] Hit ‘Apply’ and then click ‘OK’.
6] Exit the Group Policy Editor and restart the device.
Your problem should have been resolved when you restart your computer after following all these steps.
Let us know what helped you.
PS: This post will help you fix Click here to enter your most recent credentials message in Windows 11/10.
The gpedit fix doesn’t seem to apply in a azure environment, any suggestions? Thanks in advance