Windows Remote Assistance is a good way to give control of your Windows computer to someone you trust. With your permission, your friend or technician can even use your mouse and keyboard to control your PC and show you how to fix a problem – or fix it themselves. In this post, we will see how to enable, set up, and use Windows Remote Assistance in Windows 11/10.
How do I fix Remote device does not support session invitation?
If you see Remote device does not support the session invitation message, then you will have to first set up the Windows REmote Assistance as mentioned in this post via the Control Panel.
Related read: Enable & use Remote Desktop Connection in Windows.
Set up & use Windows Remote Assistance
Press Win+X and from the menu, select ‘Control Panel’. Search “System.” The window will display all of the basic specifications of your computer such as model number, CPU configuration, installed memory, etc.
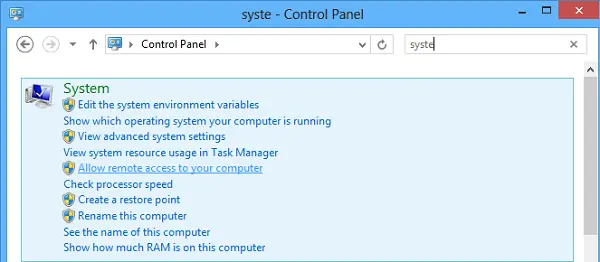
Navigate to the Remote tab in System Properties now and select the Allow remote assistance to this computer option and click hit the ‘Apply’ button. If you uncheck this option, it will disable Remote Assistance.

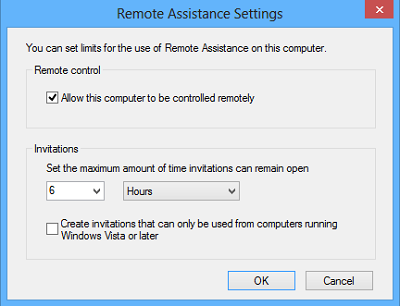
You can even configure certain settings here. For instance, you can set limits for the use of remote assistance, choose to allow the computer to be used remotely, set the maximum amount of invitations.
If you find that your Windows Firewall is blocking Remote Assistance, create a rule to allow it. To do so, open the “Run” dialog box. Type “Firewall.cpl” in the text field and click “OK.’ Windows Firewall control panel will be launched. Go to the left pane and click “Allow an App or Feature through Windows Firewall.”
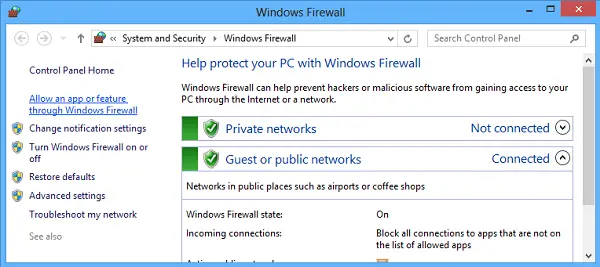
You should find a list of devices that are disabled/enabled through Windows Firewall. Click “Change Settings.”
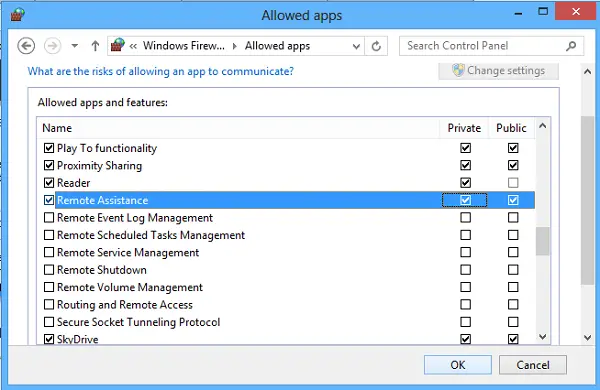
Scroll down until you find “Remote Assistance” option. When you find it, click the option to allow remote assistance.
How do I fix The Computer is not setup to send invitation for Remote Assistance?
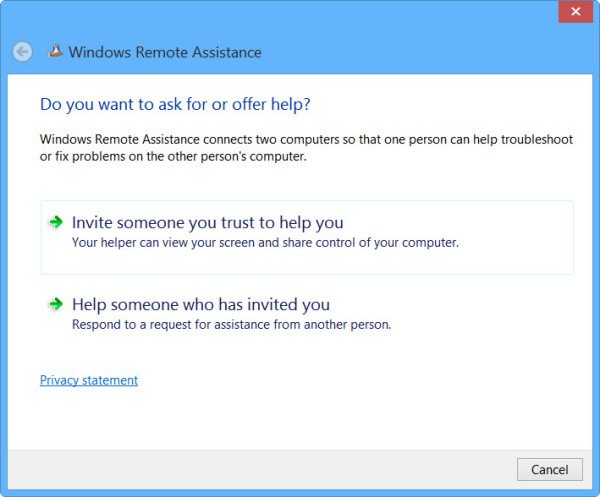
Open an elevated command prompt, type msra.exe and hit Enter to open Windows Remote Assistance. Follow the on-screen wizard. Click on Invite someone you trust to help you or Help someone who has invited you, as the case may be.
Let’s say you want to invite someone to have a look at and operate your computer. Click on Invite someone you trust to help you.
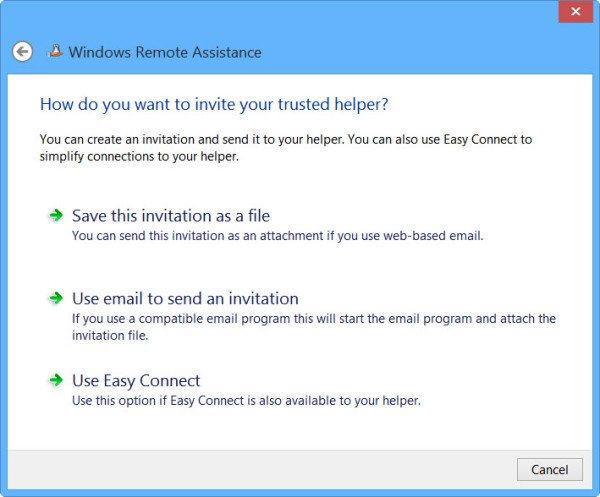
You can generate the invitation as a file or use the email to send an invitation or use Easy Connect. I prefer the Use email to send an invitation.
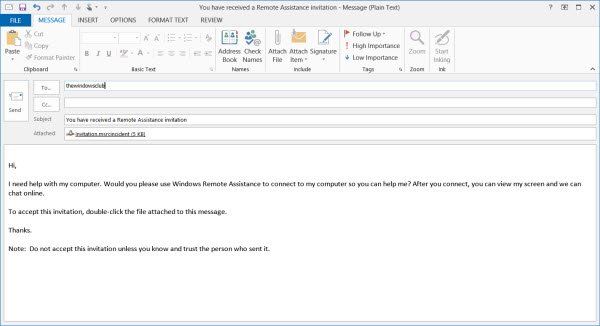
The Invitation file will then be sent to your friend using your email client.
Your friend will then have to enter the code in his Remote Assistance box. After this is done successfully, the two computers will get connected. Once your work is completed, remember to disable this feature.
Read: Cannot start Remote Desktop Services in Windows
Bear in mind, Remote Desktop cannot establish a connection with the Remote Computer until remote access to the server has been enabled, the remote computer turned off, and the remote computer is not available on the network. So, make sure the remote computer is turned on, connected to the network, and the remote access is enabled.
You can now also give or take Tech Support remotely using Quick Assist in Windows 10.
Incidentally, the Microsoft Remote Desktop Assistant tool will help you make your PC ready to use Remote Desktop applications from another device to access your PC.
You might want to have a look at these posts too:
very useful article
It should be mentioned that this is a function best left disabled/deactivated as it can pose a security threat. To that end it’s only advisable to use this sort of thing as and when required and disable or deactivate the ability to allow for remote access in this way when it has been used for that purpose. I’m surprised it wasn’t mentioned in the article.
You don’t list how to “open an elevated Command prompt
Here you go: https://www.thewindowsclub.com/how-to-run-command-prompt-as-an-administrator
fyi, I wondered if this sentence was written as intended:
Bear in mind, Remote Desktop cannot establish a connection with the Remote Computer until remote access to the server has been enabled, the remote computer turned off, and the remote computer is not available on the network
Really good one. But in case of connection over the Internet I prefer http://www.ammyy.com
The control isn’t to “set the maximum amount of invitations.”
Yes, it has been covered here: https://www.thewindowsclub.com/ammyy-admin-remote-desktop-software
This will always prompt the user unless they have modified the helpeeaccept.htm and TakeControlMsgs.htm… even with those things being done the person that would be exploiting this would need to be on the same network or domain. Just opening a port on the firewall does not constitute a vuln. It just means that there can be communication over that port. The only time it becomes an issue of a vuln is when there is a known vuln that would communicate over that port. This is an inherently safe way to get remote assistance.
it should be noted that this is the most convoluded version of remote assistance windows has come up with yet….why can’t it just be simple like in the past? seriously windows way to f up something that really wansn’t originally that hard to do. Thanks. You have basically made this feature uselss when trying to direct non tech savy adults to a place where they can get help….now my child’s nana is going to have to find another way to fix their issue. Thank you for fing up their night Windows….epic fai..
HOW CAN I LOCK THE OPTION FOR REMOTE ACCESS? My hubby keeps changing my windows setting this way with his IPhone and it’s getting extremely frustrating! THANKS TO ANY1 THAT HAS ANY IDEAS&/OR TIPS