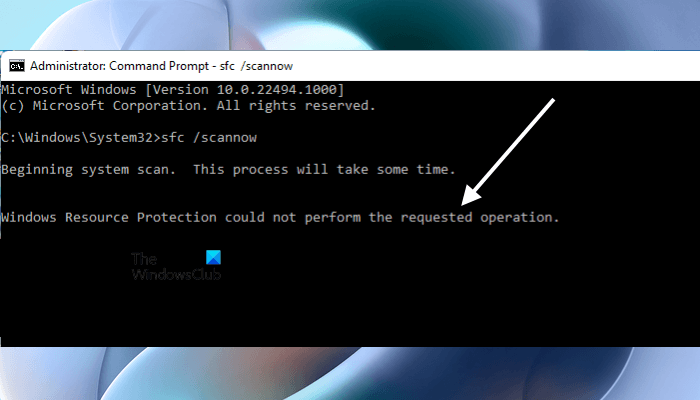
System File Checker is a utility in Windows Operating Systems that helps users repair the corrupted System Image files. If System Image files are corrupted, your computer will not function properly and you will get errors with some programs or apps. System files corruption can be fixed with the help of SFC and DISM tools. You can run an SFC scan anytime to repair the corrupted system files. Sometimes the System File Checker tool does not perform the requested operation and throws the following error:
Windows Resource Protection could not perform the requested operation

Some users have received this error while running the SFC scan. If you receive the same error while using the System File Checker tool, the solutions explained in this article may help you fix it.
Windows Resource Protection could not perform the requested operation
If the error message “Windows Resource Protection could not perform the requested operation” appears while running the SFC scan, the System File Checker will not be able to complete its job. In such a case, you can try the following fixes. Before you proceed, restart your computer. Sometimes the problem occurs due to a minor glitch that can be fixed only by restarting the device. I also experienced the same error while executing the SFC scan. When I launched the SFC tool after restarting my laptop, there was no such error.
If restarting the device does not help, try the following solutions:
- Check if the Windows Modules Installer service is running
- Run Chkdsk scan
- Run System File Checker in Safe Mode, Boot Time or Offline
- Run the System File Checker tool from Windows Recovery Environment
- Use DISM tool
Let’s see all these solutions in detail.
1] Check if the Windows Modules Installer service is running
The issue that you are currently facing might occur if the Windows Modules Installer service is disabled. You can check this in the Windows Services Manager in Windows 11/10. The steps to do this are as follows:

- Launch the Run command box by pressing the Win + R keys.
- Type
services.mscand click OK. This will open the Services app. - Scroll down and locate Windows Modules Installer.
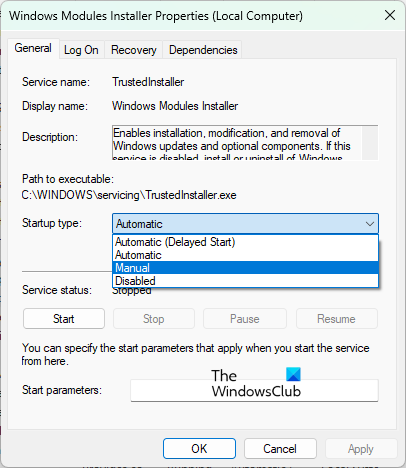
- Once you find it, check its status. If it is stopped, right-click on it and select Properties.
- Select Manual in Start type.
- Now, click Start, then click Apply.
- Click OK.
Now click on Start to start the Service and check if you are able to run the SFC tool.
2] Run Chkdsk scan
It might be possible that your computer’s HDD has bad sectors or logical errors. It is necessary to repair the bad sectors on a hard drive. Ignoring this may create a problem for you, as it may result in data loss or may cause more damage to the hard drive. If the SFC tool is unable to complete the requested task, it is better to take the help of another diagnostic and repair tool.
You can run a Chkdsk scan on your computer and see if it helps. Run the Chkdsk scan on all your drive partitions one by one. If the tool finds any bad sector or logical errors on your drive partitions, it will repair them. After the completion of the Chkdsk scan, restart your computer and check if you can run the SFC scan.
3] Run System File Checker in Safe Mode, Boot Time or Offline
If you are unable to run the SFC scan after repairing your hard drive, some of your system’s components might be conflicting with the SFC tool. You may try to run Run System File Checker in Safe Mode, Boot Time or Offline.
If you do not get the error while running the SFC scan in Safe Mode, let the System File Checker complete its task. It will repair all the corrupted System Image files in the Safe Mode.
4] Run the System File Checker tool from Windows Recovery Environment
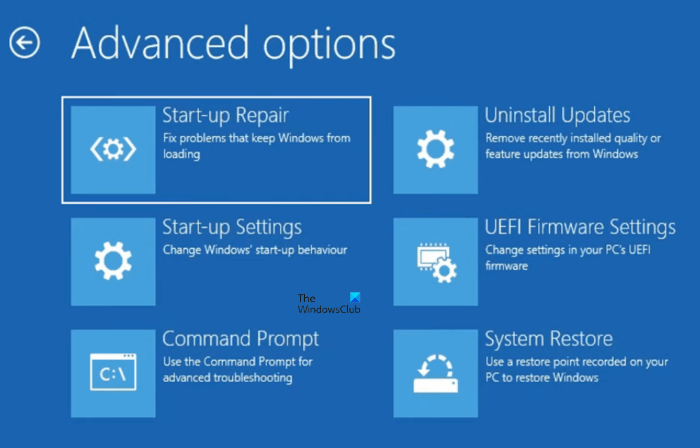
If for some reason, Windows could not enter Safe Mode, try running the SFC tool from Windows Recovery Environment. To do so, first, you have to enter into the Windows Recovery Environment.

Once you are in the Windows Recovery Environment, go to “Troubleshoot > Advanced options > Command Prompt.” After launching the Command Prompt from WinRE, type the following command to run the SFC scan.
sfc /scannow
If the System File Checker tool does not display the error message the time, let it complete the scan.
5] Use DISM tool
The DISM tool is helpful when the SFC is not able to repair the corrupted system files or if the SFC tool fails to complete the requested task. DISM tool also helps repair the corrupted System Image files. Because the SFC tool is failing on your computer, you can use the DISM scan in its place.
Why is SFC scan not working?
If the SFC scan is not working, there might be some logical errors or bad sectors in your disk. To fix this problem, you can run a Chkdsk scan. Microsoft has developed the Chkdsk utility to fix the logical errors and bad sectors on a computer disk. You can run the Chkdsk san on all hard drive partitions.
Read: SFC not working, will not run or could not repair corrupt file.
How do I fix SFC Scannow Windows Resource Protection could not start the repair service?
While running the SFC scan, you may receive the following error message:
Windows Resource Protection could not start the repair service
The above error terminates the SFC scan process. To fix this problem, you should check if the Windows Modules Installer is disabled or not. If you find it disabled, start it. This will fix the problem.
Apart from that, you can also try some other fixes, like running the SFC scan in Safe Mode, running the Chkdsk and DISM utilities, etc.
Hope this helps.
Read next: Fix Windows Resource Protection found corrupt files but was unable to fix some of them.
Leave a Reply