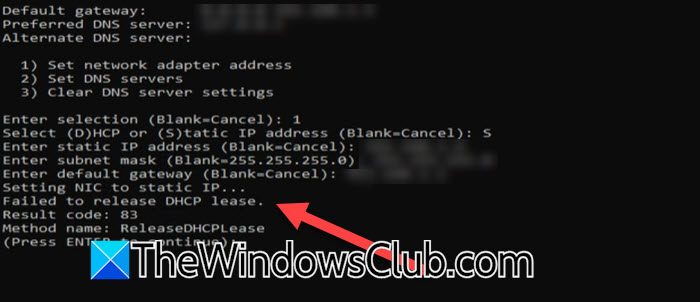
When trying to set a static IP address in Windows Server Core Edition using the Command Prompt, we encountered an error that says Failed to release DHCP Lease. This error message can appear when making any changes to the network adapter’s settings. In this post, we will see workarounds and solutions that you can implement if Windows Server failed to release DHCP Lease.

Fix Windows Server failed to release DHCP Lease
If the Windows Server failed to release DHCP Lease, follow the solutions mentioned below.
- Check for Server Updates
- Force change the IP address
- Restart DHCP Client Service
Let us talk about them in detail.
1] Check for Server Updates

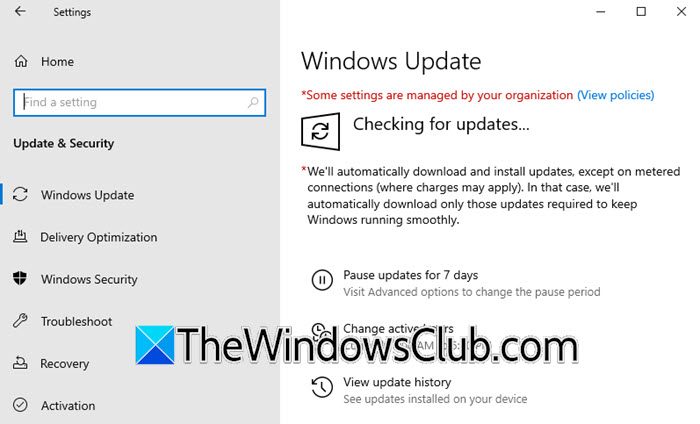
You may encounter issues when configuring the network settings of your server if there is a bug in your OS’s version. Even though there is no official confirmation from Microsoft, we will still check for the updates, hoping that they have released a patch that will fix this bug. To do so, open Settings, go to Update & Security, and click on Check for updates. If updates are available, install them, reboot your computer, and check if the issue persists.
2] Force change the IP address

If there are no updates available, for the time being, we will manually change the IP address of the server from the CLI. We have to force change the IP address and bypass the error message in question. If you are already on the screen where you got the error, hit Enter to continue, and then select the option to open PowerShell, usually, the respective number would be 15, Exit to the command line (PowerShell); however, if you are not there, just open PowerShell (as administrator).
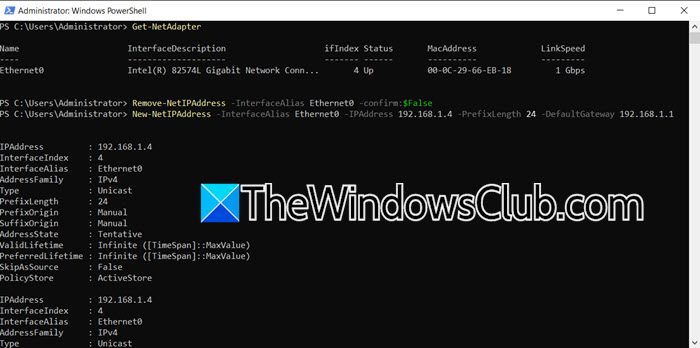
After opening PowerShell, run Get-NetAdapter to list down your network interface cards and their aliases.
If your network interface card has more than one alias and you are not sure which one to configure, run ipconfig /all and check the list of aliases. We are going to change the IP of the currently selected alias.
Once you know which alias to configure, you need to run the following command to remove the IP address assigned to the Ethernet interface.
Remove-NetIPAddress -InterfaceAlias Ethernet -confirm:$False
Let’s break down the command.
- Remove-NetIPAddress: This cmdlet removes an IP address and its configuration from a network interface.
- InterfaceAlias Ethernet: Specifies the network interface to which the IP address is assigned. In this case, it’s the Ethernet interface.
- confirm:$False: Suppresses the confirmation prompt that usually appears when you run the cmdlet, allowing the command to execute without user intervention.
In my case, the command was Remove-NetIPAddress -InterfaceAlias Ethernet0 -confirm:$False.
After removing the assigned IP, our job is to assign a new one. To do so, you need to run the following command.
New-NetIPAddress -InterfaceAlias {NAME} -IPAddress {IP} -PrefixLength {L} -DefaultGateway {GATEWAY_IP}
Let’s look at the description of the command.
- New-NetIPAddress: This cmdlet adds a new IP address configuration to a network interface.
- InterfaceAlias {NAME}: Specifies the network interface by its name or alias where the IP address will be assigned. Replace {NAME} with the actual name of the network interface, such as Ethernet.
- IPAddress {IP}: Specifies the new IP address to assign. Replace {IP} with the actual IP address, like 192.168.1.10
- PrefixLength {L}: Specifies the subnet prefix length (also known as subnet mask) for the IP address. Replace {L} with the prefix length number, like 24 (for a subnet mask of 255.255.255.0).
- DefaultGateway {GATEWAY_IP}: Specifies the IP address of the default gateway. Replace {GATEWAY_IP} with the actual gateway IP address, like 192.168.1.1.
After substituting all the variables, the command for my server turns out to be New-NetIPAddress -InterfaceAlias Ethernet0 -IPAddress 192.168.1.4 -PrefixLength 24 -DefaultGateway 192.168.1.1. You might be using a different IP, and DefaultGateway, so, construct the query accordingly.
This is a workaround that will remove the current IP and will set a new static IP.
3] Restart DHCP Client Service
The DHCP or Dynamic Host Configuration Protocol Client Service is an essential element within a network, automating the allocation and management of IP addresses and various network configuration parameters. Since we are facing the issue when trying to assign the IP automatically, let’s restart the DHCP Client Service running on your computer. For that, open PowerShell and run the following command.
Restart-Service DhcpClient
Once done, check if the issue persists. In case, the issue is not resolved, run netsh winsock reset to reset the Winsock protocol.
Hopefully, you can resolve the issue using the solutions mentioned in this post.
Read: DHCP Client Service gives Access Denied error in Windows
How do I fix DHCP lease failure?
If you encounter an error that implies that the DHCP lease failed and you are not able to configure the server’s network settings, there are a few solutions and workarounds that you can try. First, check if there is an update available and install it. If the update is not able to fix the issue, set the IP manually or restart the DHCP service to allow automatic IP allocation.
Read: Failed to obtain IP address from DHCP Server
What causes DHCP failure?
There are various reasons that can cause DHCP failure such as IP address conflict, i.e.; two devices with the same IP address, misconfigured DHCP server, insufficient IP addresses, and more. However, we recommend you search for the issue using the given error message for the solutions.
Also Read: Fix DHCP Lookup Failed error on Windows & Chromebooks.