Windows 11/10 Start Menu lets you access all your apps, Windows settings, and files. You can launch the Start Menu by clicking on the Windows icon on the Taskbar. Clicking on the icon again or clicking in the empty space closes the Start menu. Some users are complaining that the Start Menu does not close by itself when they click on its icon or in the empty space in Windows 11 or Windows 10. This article lists some troubleshooting suggestions that you can follow to fix this issue.
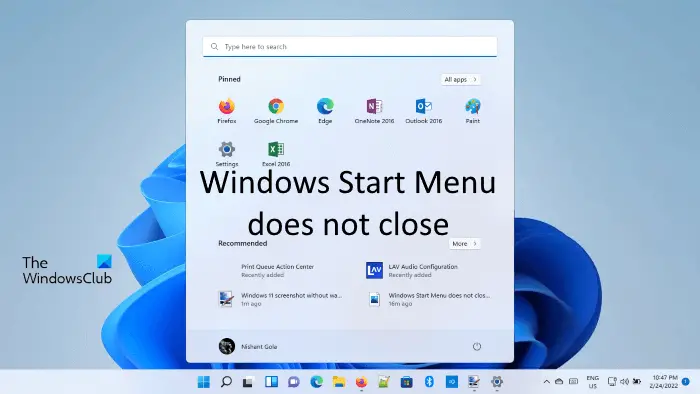
Fix Start Menu does not close in Windows 11/10
If the Start Menu is not closing & remains frozen in Windows 11/10, then we have mentioned some troubleshooting methods that you can try to fix this problem. But before you begin we suggest you restart your device and see if it helps. If restarting the computer does not fix the issue, move ahead towards the following fixes.
- Check for Windows Updates
- Restart Start Menu process
- Run SFC scan
- Reset/Restore Start Menu layout to default
- Turn off Tablet Mode
- Disable the Use Start Full Screen mode
- Uninstall the recently installed apps or software
- Re-register the Start Menu
Let’s see all these solutions in detail.
1] Check for Windows update
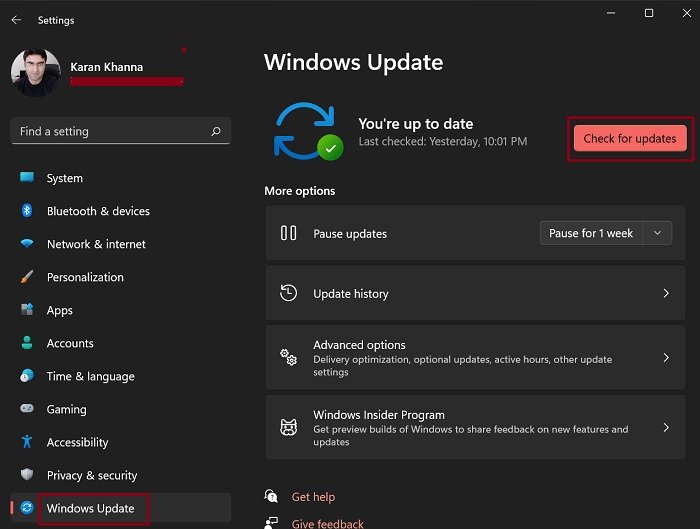
You might be experiencing this issue due to a minor bug. Therefore, check if an update is available for your Windows device. If yes, install the latest updates and then see if this fixes the problem. To check updates, open the Windows update page in Windows 11/10 settings.
2] Restart Start Menu process
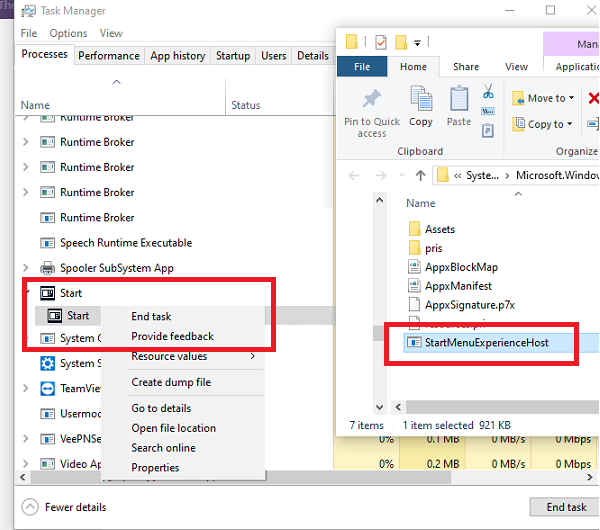
First, restart Start Menu process and see if that helps:
- Open Task Manager.
- Sort the processes by name, and scroll to find a program with name START.
- Right-click on this Start process, and select End task.
- The start menu process will shut down and restart after a second or two.
If this does not help then restarting the Windows Explorer process can sometimes fix it.
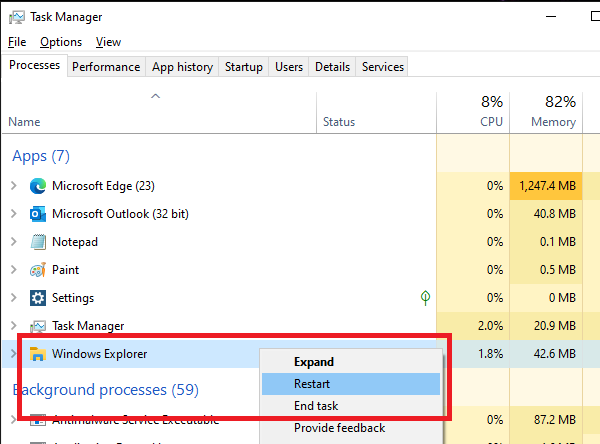
Launch the Taskbar and locate Windows Explorer. Once you find it, right-click on it and select Restart.
3] Run SFC scan
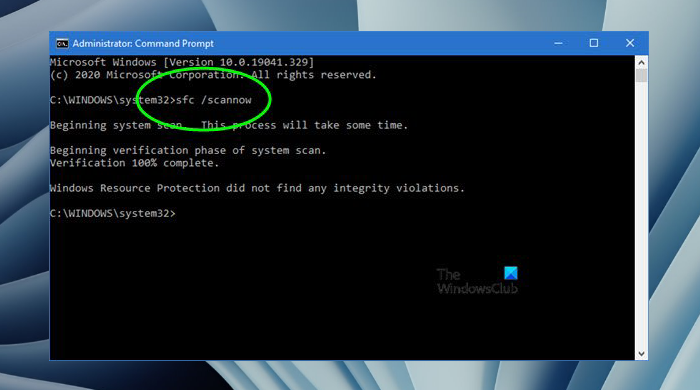
One possible cause of the issue is the corrupted system image files. The System File Checker (SFC) is an automated tool from Microsoft that scans a computer for Windows image files corruption and repairs the corrupted files (if possible).
You can run the SFC scan by executing the following command in an elevated Command Prompt.
sfc /scannow
4] Reset/Restore Start Menu layout to default
Now, if ever you need to restore your Start Menu layout, enable the built-in Administrator account, make File Explorer show hidden files and folders. and then delete the following folder:
C:\Users\<username>\AppData\Local\TileDataLayer\Database
Now copy paste the folder that you had earlier, in this TileDataLayout folder location, and restart your computer.
If you wish to reset Start Menu settings to default, simply rename the Database folder to say – Database-Bak.
On restart you will see the default Start Menu layout.
5] Turn off the Tablet Mode
In Windows 11, Microsoft has deprecated the Tablet Mode for Windows 11 devices and made it available only for the 2-in-1 devices that you can use without a keyboard and the touch-screen devices. Hence, this solution is for users who have touchscreen or 2-in-1 devices.
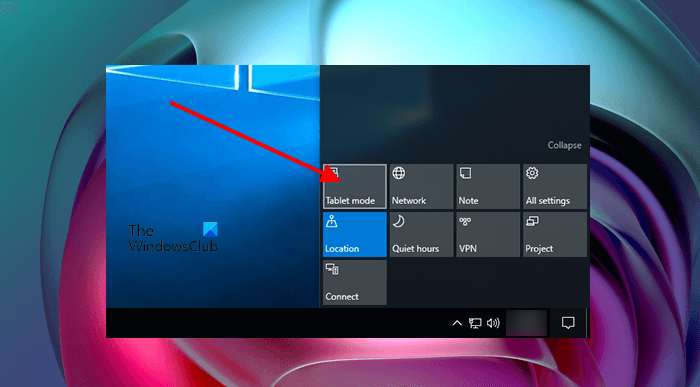
In Windows 10, you can easily disable the Tablet Mode by clicking on the Notifications icon on the right side of the Taskbar (refer to the above screenshot).
In Windows 11, there is no dedicated method to enable or disable the Tablet Mode. But, by detaching your keyboard, you can toggle between the Tablet Mode on and off.
Related: Start Menu does not open in Windows 11/10.
6] Disable the Use Start Full Screen mode (applies to Windows 10)
This solution is for Windows 10 users. Open Windows 10 Settings and check whether the Use Start Full Screen mode is enabled or not. If you find it enabled, consider disabling it.
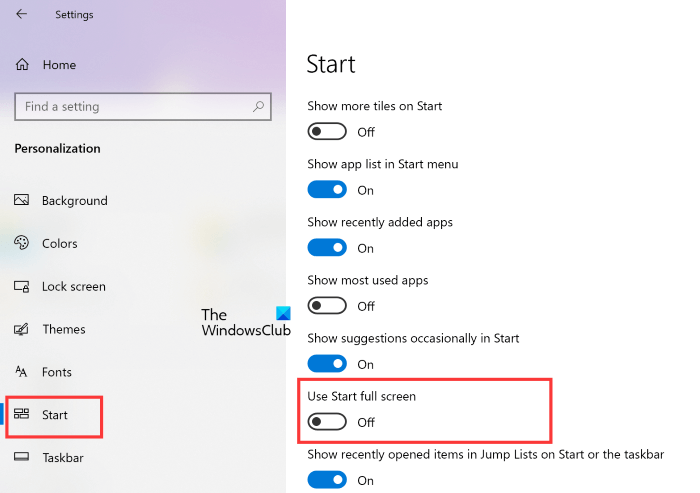
The steps for the same are written below:
- Press Win + I to open Windows 10 Settings.
- Click Personalization.
- Select Start from the left pane.
- If the Use Start Full Screen button is turned on, turn it off.
7] Uninstall the recently installed apps or software
Some users have confirmed that some apps or software were conflicting with the Start Menu. This might be the case with you. To check this, uninstall some of the recently installed programs and see if this fixes the problem. Troubleshooting in Clean Boot can help identify such apps.
8] Re-register the Start menu
Re-registering the Start Menu can fix the problems associated with it. You can try this and see if it fixes the problem. To do this, launch Windows PowerShell as an administrator. After that, copy the following command, paste it into the PowerShell, and hit Enter.
Get-appxpackage -all *shellexperience* -packagetype bundle |% {add-appxpackage -register -disabledevelopmentmode ($_.installlocation + “\appxmetadata\appxbundlemanifest.xml”)}
After the command is executed successfully, close Windows PowerShell and restart your computer. After reboot, the issue should get fixed.
How do I close Windows Start Menu?
Closing the Start Menu is as simple as launching it. When you click on the Windows icon on the Taskbar, it launches the Start Menu. When you click on the same icon the second time, it closes the Start Menu. Apart from that, if you click in the empty space on your desktop, it will also close the Start Menu.
Read: Fix Windows Apps greyed out in Start Menu
Why is the Start Menu always open?
There are many reasons why the Start Menu always remains open on your system. There might be problematic software interfering with the Start menu. Some users have reported that the Windows Terminal was causing this problem. Apart from that, the issue might be occurring due to the corrupted system image files. In such a case, running an SFC scan may help.
Other causes include some of the Windows features, like the Tablet mode and the Use Start Full Screen mode. According to the affected users, turning off these two modes fixed the issue for them.
We hope our post helped you fix the problem.
Read next: Start Menu keeps popping up or opens randomly in Windows 11/10.